If you're into homelab porn, I'm going to tell you about the one I'm building. 24 cores, 256 GB of RAM, 96 TB of storage, dual NVMe drives, redundant power supplies... There are many like it, it's not the fastest nor the biggest, but quoting Full Metal Jacket, this one's mine.
First, I'll provide a little context for this server, and then I'll discuss the components in detail: their prices, the reasoning behind my choices, and the build process. I’ll save the software installation and configuration for the next article.
Context
It’s been months since the first part of this series of articles. I certainly haven’t forgotten about this project; rather, since it’s contingent on the renovation of our new house, those delays have also affected the homelab.
Since the room where the equipment will be installed isn’t ready yet (it won’t be long now!), I can’t carry out the plan in the order that would make the most sense:
- Assemble the rack.
- Install the patch panels and connect the cables.
- Install the switches and connect the cables.
- Install the router, connect it, and configure the routing tables and firewall.
- Install, connect, and configure the application server.
If I waited until the room was completely ready, I wouldn’t have time to set up the server and all the services before moving into the house. And since some of those services are going to be critical (especially Home Assistant for home automation and Frigate for camera monitoring), I didn’t want to stress myself out by leaving them for last.
But honestly, aside from that, I was dying to start tinkering, so I skipped the usual order, started by buying the server, and set it up in my current apartment.
Final Decision
In Part 1, I had a plan laid out after a lot of research. The idea was to buy a Dell PowerEdge R7515 or R7525, which are good rack-mounted servers, reliable and with good compatibility.
Well, as time went on and since I’m restless, I didn’t stop looking into other options.
First, I explored the possibility of a server that would combine NAS storage capabilities (at least 8 hard drives, ideally up to 12) with AI. I’m very interested in having a local AI for privacy reasons; I don’t feel comfortable giving any external AI access to my personal data, but I would with a self-hosted AI.
I don’t want to go into too much detail about this research in this article, but it wasn’t successful because all the options had some kind of problem:
-
Due to the size of the graphics cards, a 3U or 4U chassis would be required. NAS chassis of these dimensions are designed for 24 hard drives, which is too many for my needs. Plus, it would take up extra space in the rack, which isn’t ideal.
-
The PSUs for NAS-oriented servers don’t have the necessary connectors for graphics cards (EPS), even if they had sufficient power.
-
Rack-mounted servers designed for AI/GPUs don’t have enough drive bays; they’re specialized and usually have only 1 or 2.
I imagine someone more knowledgeable about servers and electronics might be able to adapt the connectors on a PSU to create an EPS connector, but that’s not my thing, I’m more into software. That’s why I decided I wasn’t going to get into that mess; I’d focus on the application server and NAS, and then I’d consider a separate system for AI later.
Having ruled out that option, I started looking at prices for 2U NAS servers with the intention of buying one, and I realized a sad truth: the used market in Europe is much worse than in the U.S. There’s far less variety of used or refurbished servers, and the ones available are much more expensive. I had a hard time finding the configuration I wanted at a price that wasn’t a total rip-off. Once I accepted this reality, I began to seriously explore the idea of building the server from parts.
Component List
This was the final configuration:
| Component | Product | Price |
|---|---|---|
| Case | Inter-Tech IPC 2U-2412 | 403.50€ |
| Power Supply | ASPOWER R2A-DV0800-N | €467.87 |
| Motherboard | ASRock ROMED8-2T | €740.46 |
| Processor | AMD EPYC 7443 | €319.13 |
| Fan | Dynatron A26 | €59.24 |
| RAM | 8x Samsung 32GB DDR4-2933 ECC RDIMM | $1,444.00 (~€1,309) |
| NVMe M.2 | 2× Micron 7450 PRO 960 GB M.2 2280 | $796.00 (~€722.10) |
| Hard Drives | 8x Seagate IronWolf Pro 16 TB | €3,975 |
| Total | €7,996.30 |
This is expensive, not gonna lie, and definitely overkill. But hey, as far as hobbies go there are worse ones.
Chassis
The Inter-Tech IPC 2U-2412 is a 2U chassis compatible with motherboards up to SSI form factor, featuring 12x 3.5" (LFF) bays with a backplane.
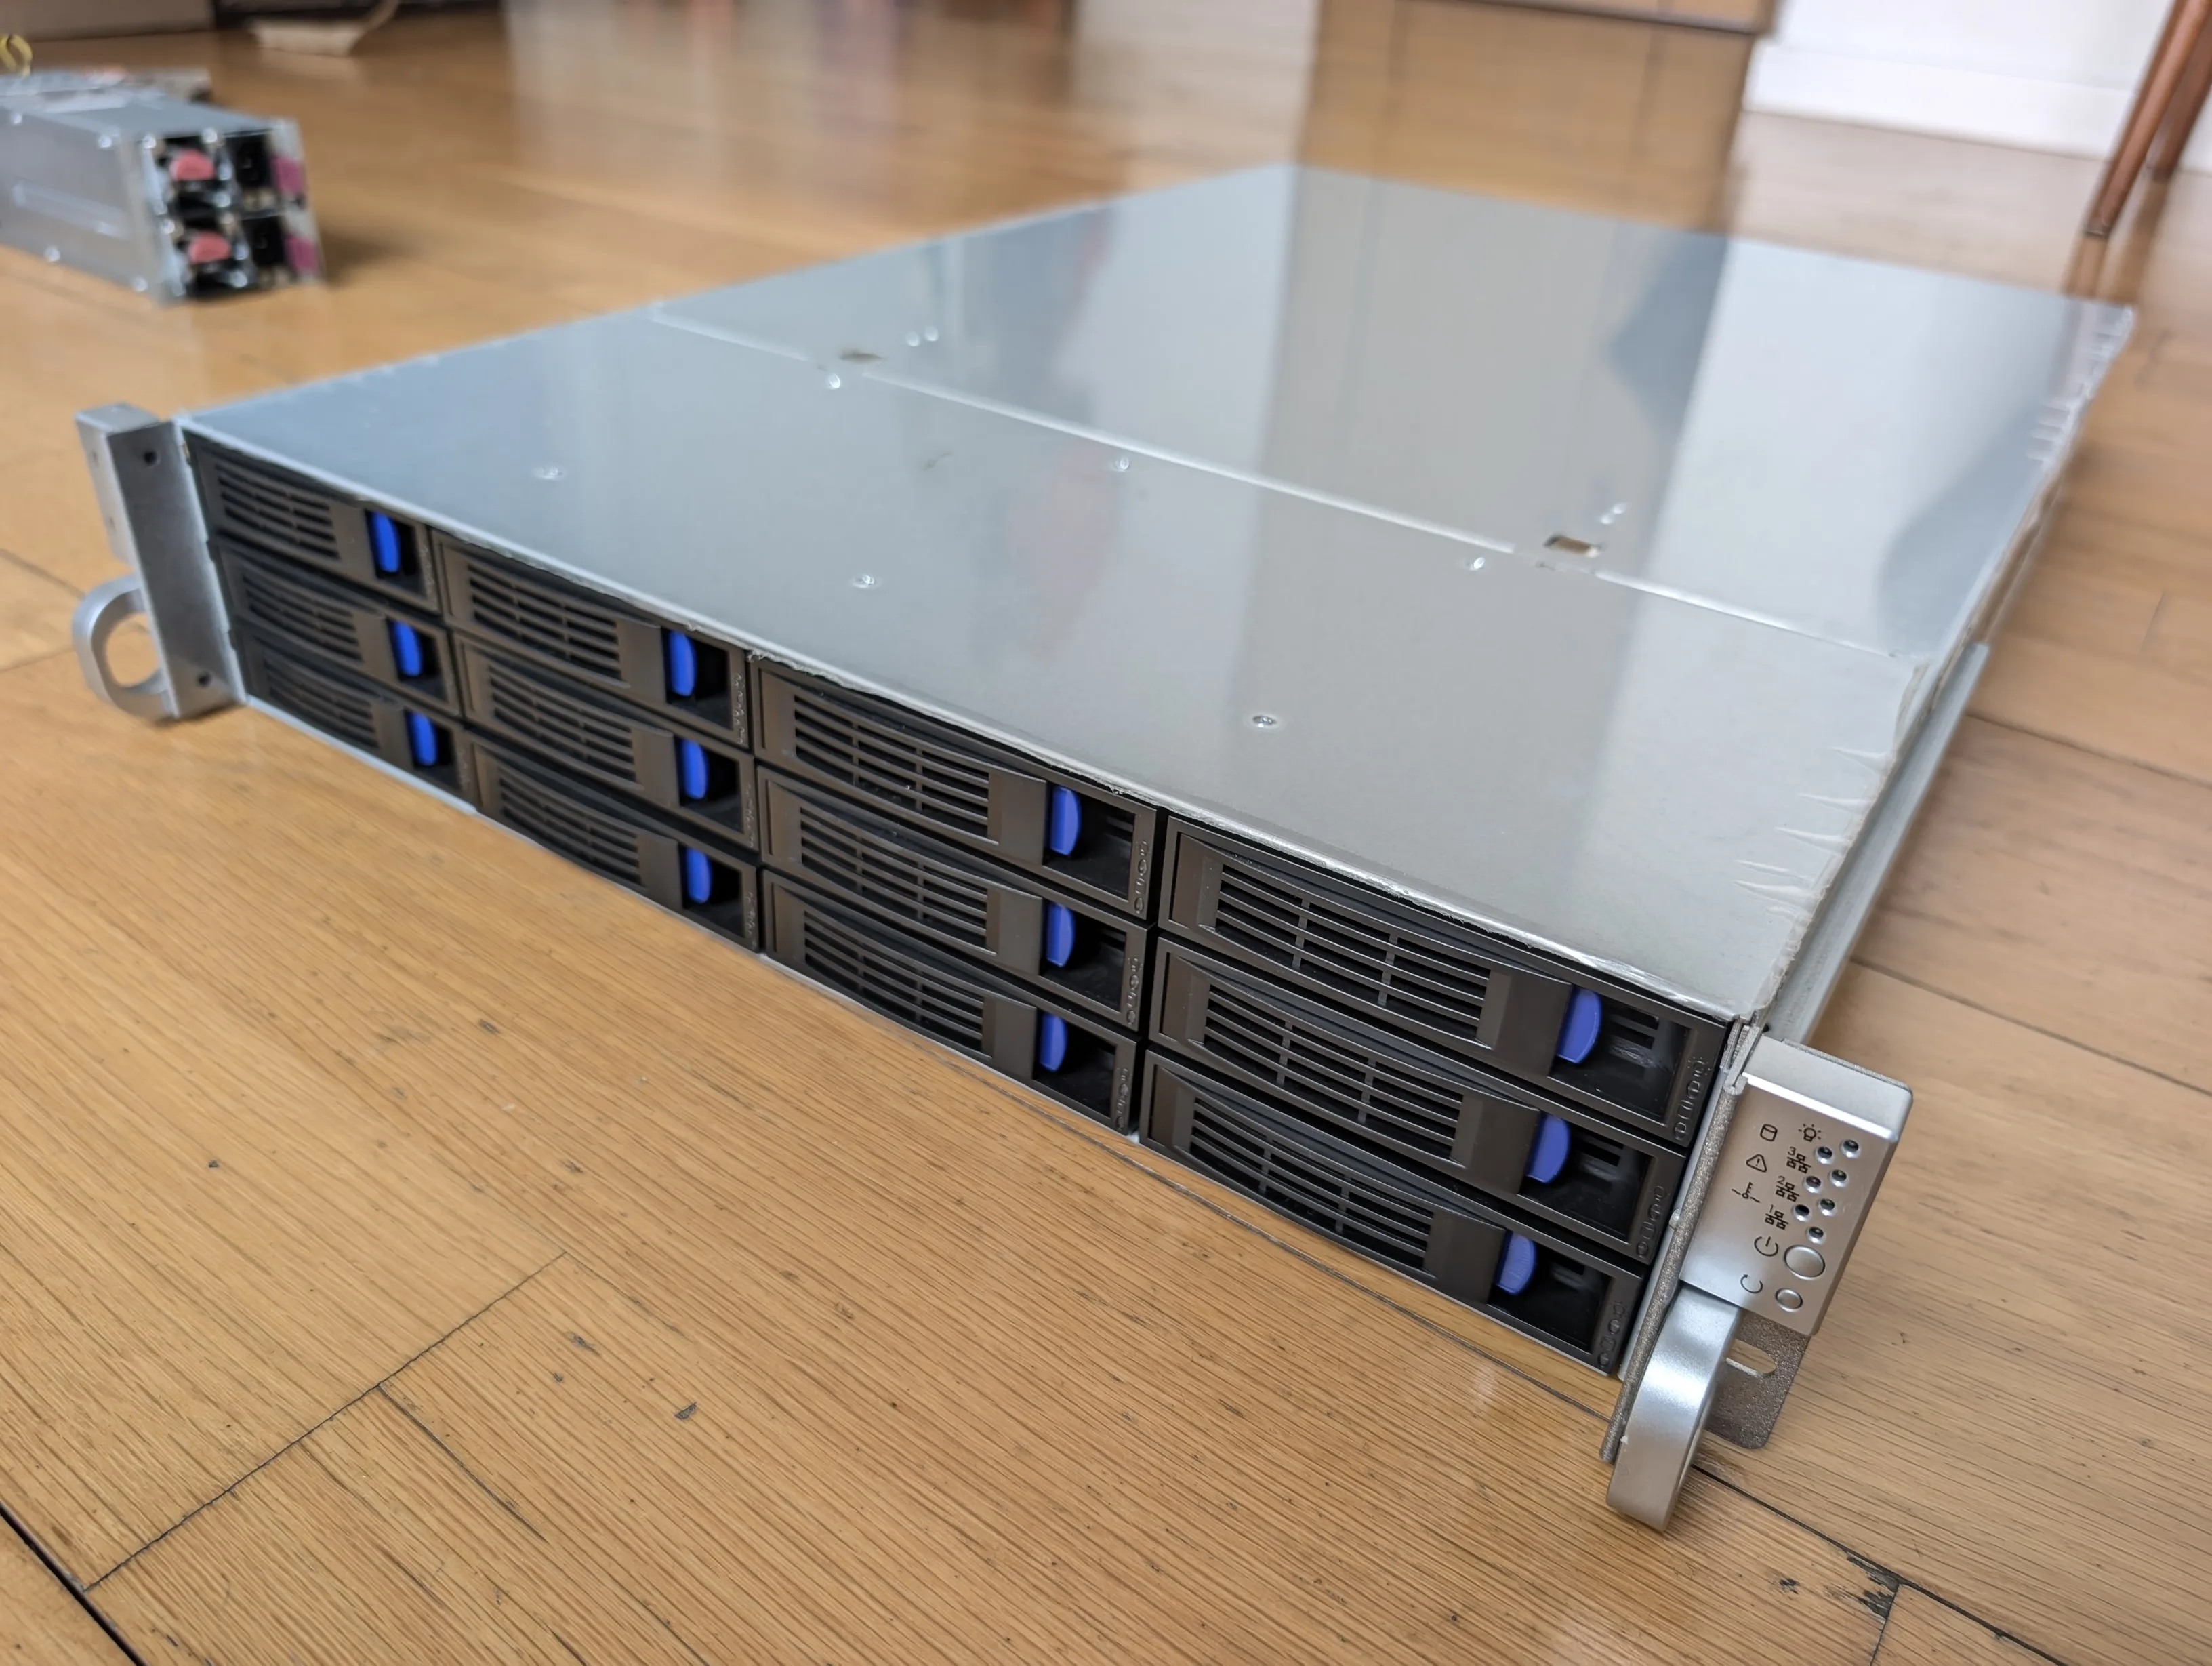
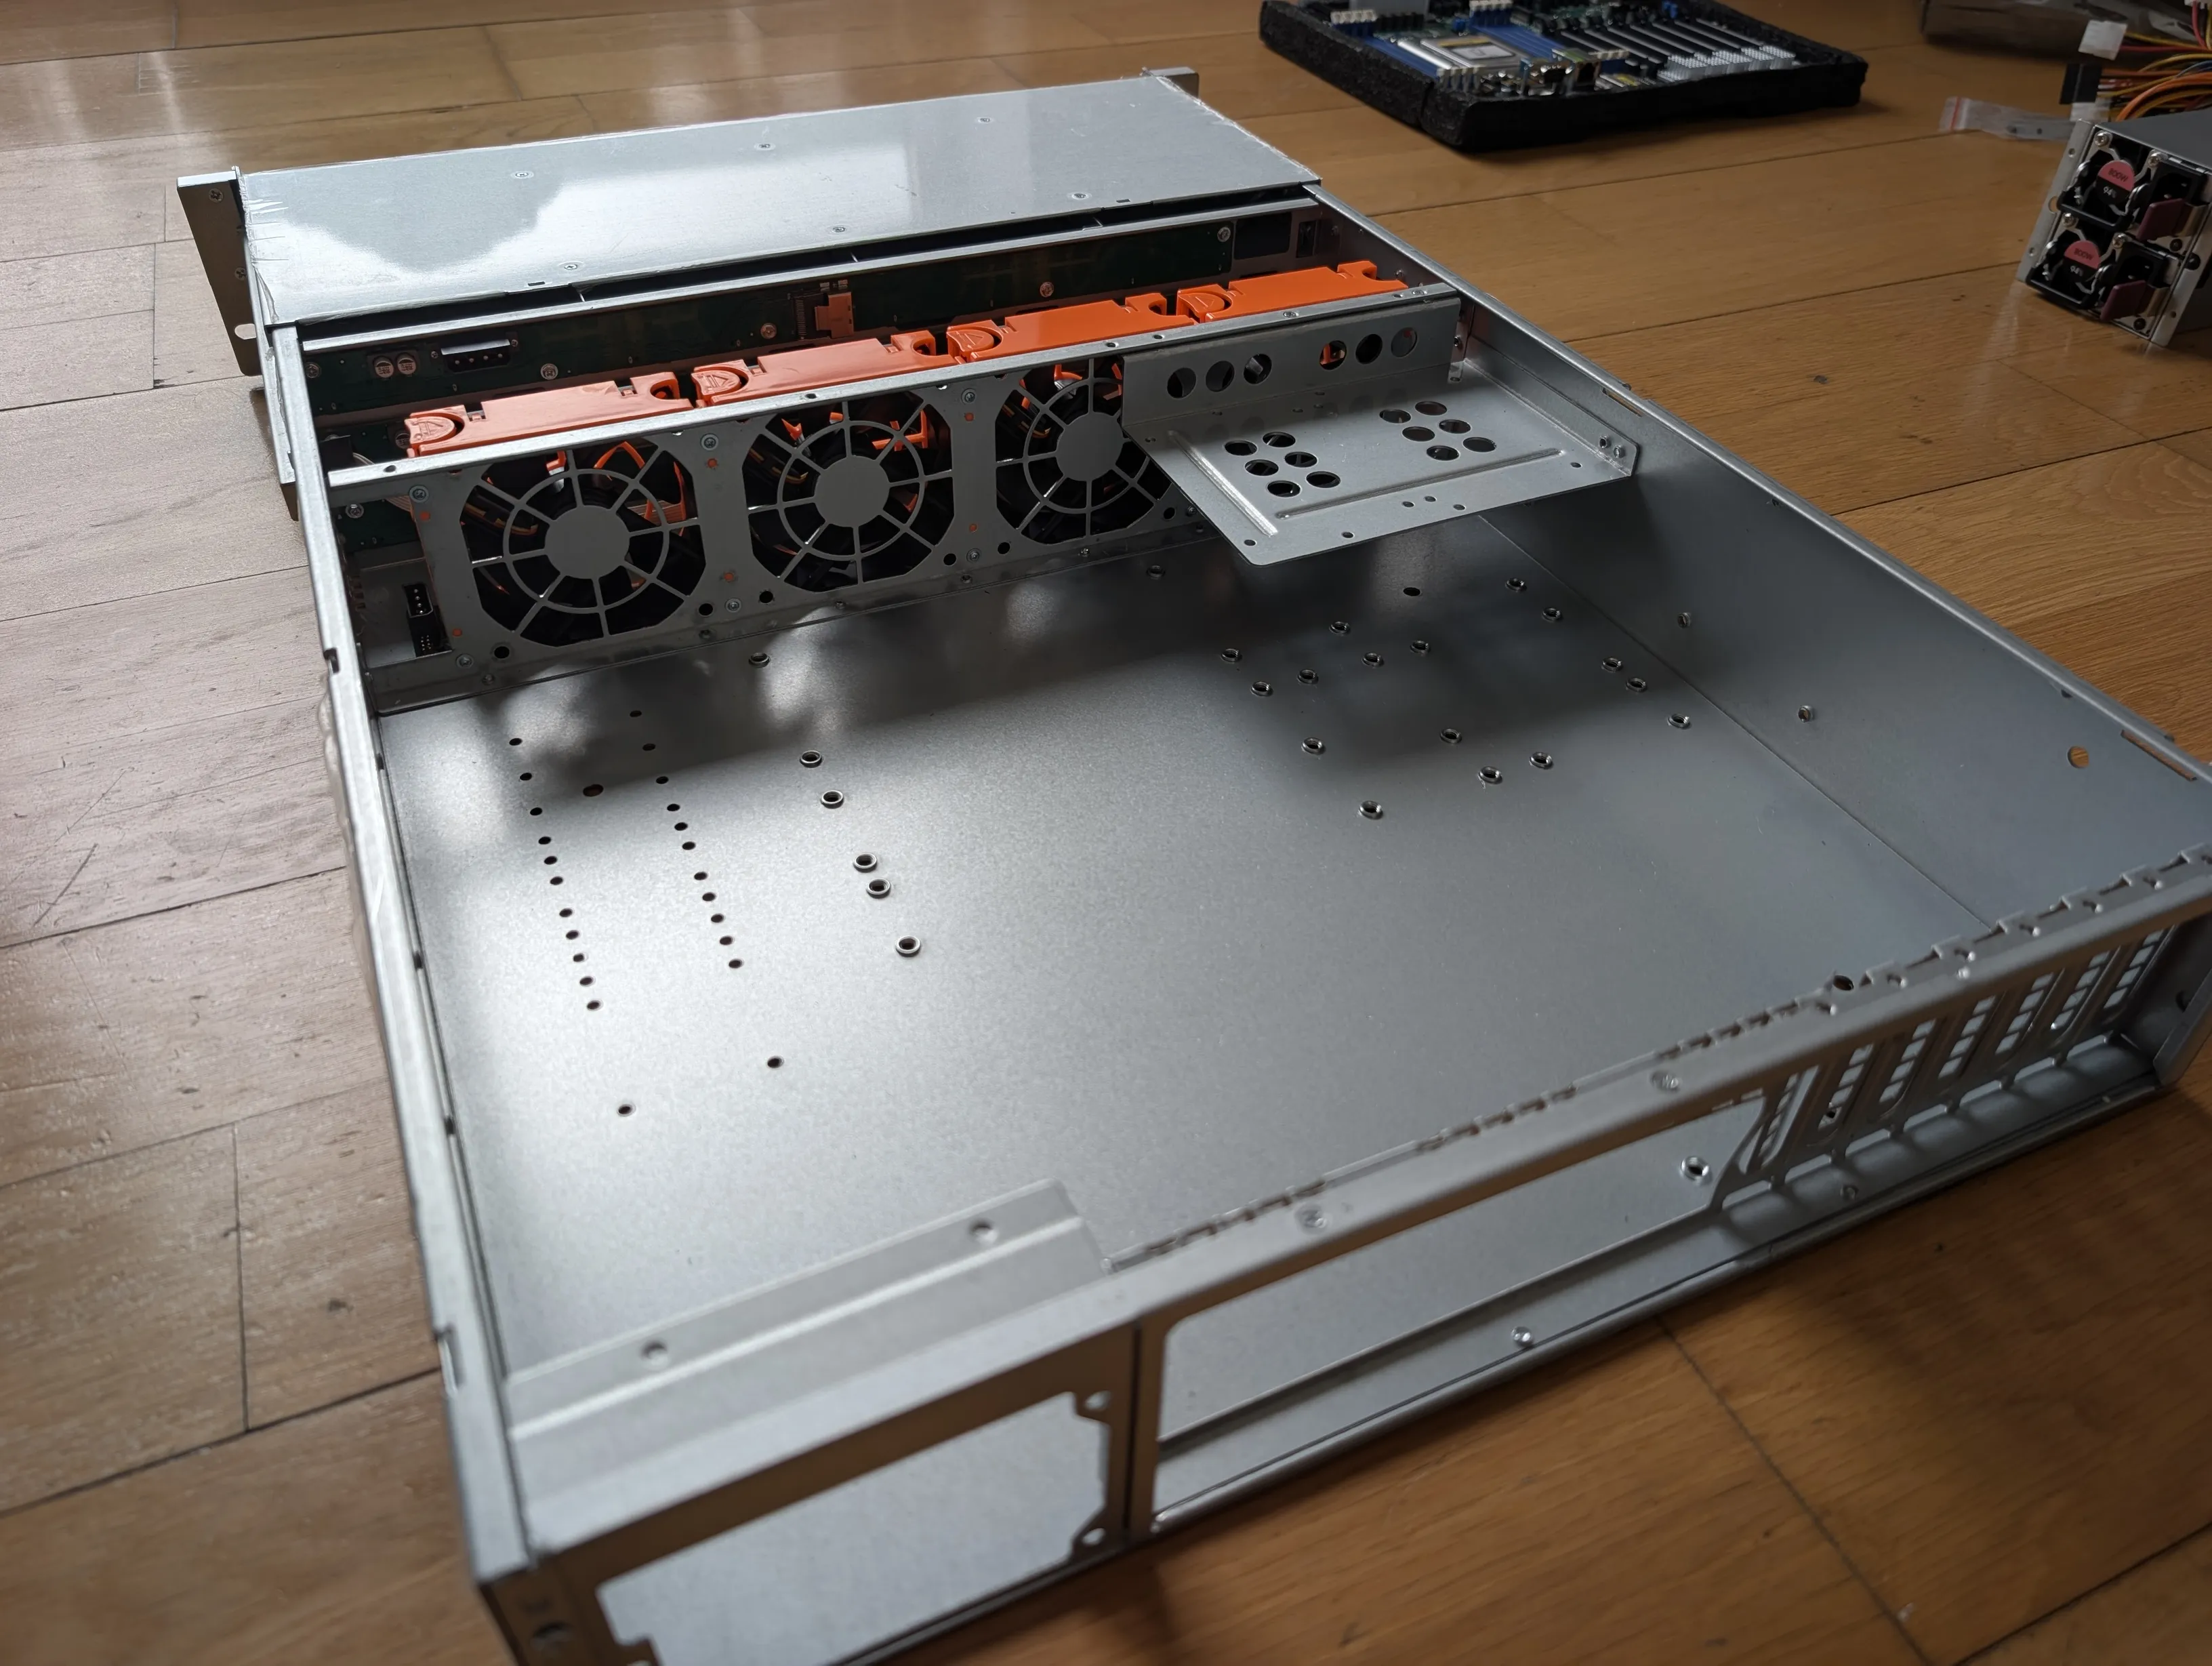
My first choice until I found the InterTech was the AIC RSC-2ET. I liked the design better, and it seems to be better built, but it’s quite a bit more expensive (about €1,400 in the configuration I was looking for), although it includes a redundant power supply.
Other options were the Chenbro RM23812 and RM24512, but they weren’t easy to find in Europe, and also more expensive than the InterTech.
I bought it from Ibertrónica.
Power Supply
I had two requirements for the power supply:
- Enough power for all components, including some extras I'll install later (a small GPU for video conversion, a TPU for Frigate...)
- High efficiency, since the server will be on 24 hours a day and powered by solar batteries at night. It had to be Platinum (efficiency greater than 90%) or better.
- Redundant, or CRPS, which is the standard for servers. If one power supply fails, the system would continue to operate using the other.
One of the power supplies will be connected to an UPS, and the other to a separate outlet, so that a potential UPS failure won’t take down the server.
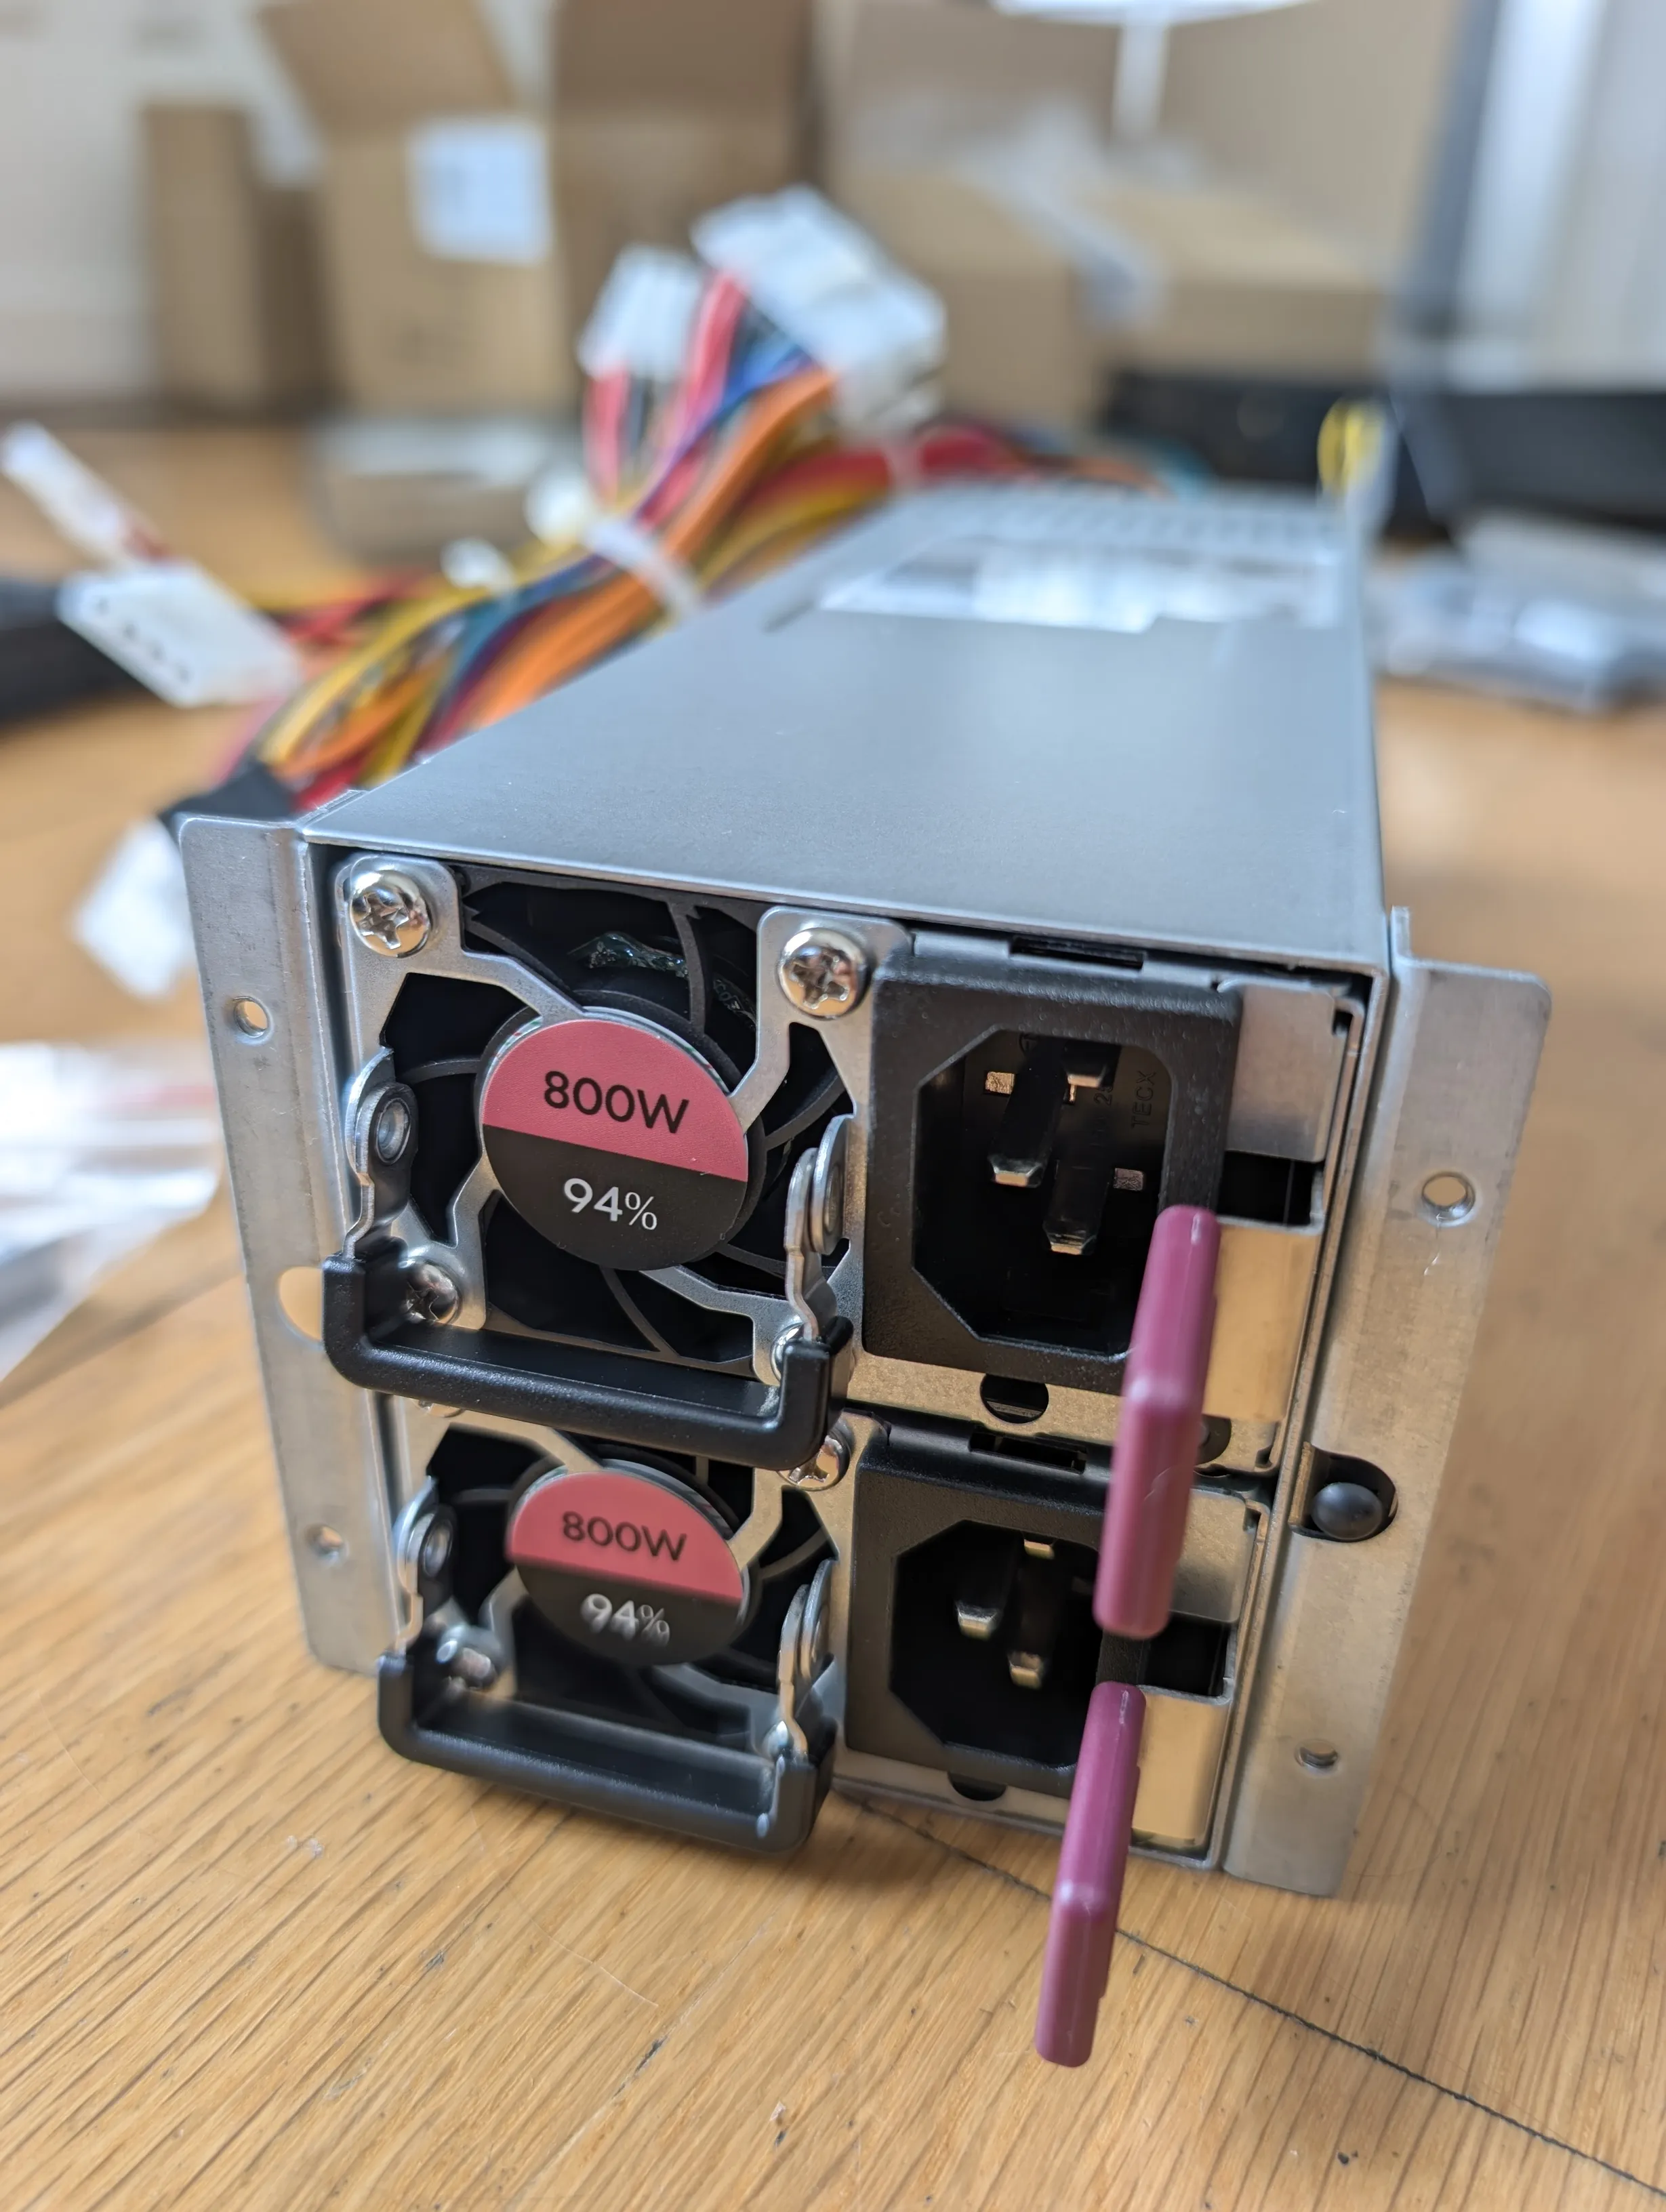
I bought the ASPOWER R2A-DV0800-N because it was available at the same store where I bought the case, and they guaranteed its compatibility, so I didn’t want to overthink it.
Motherboard
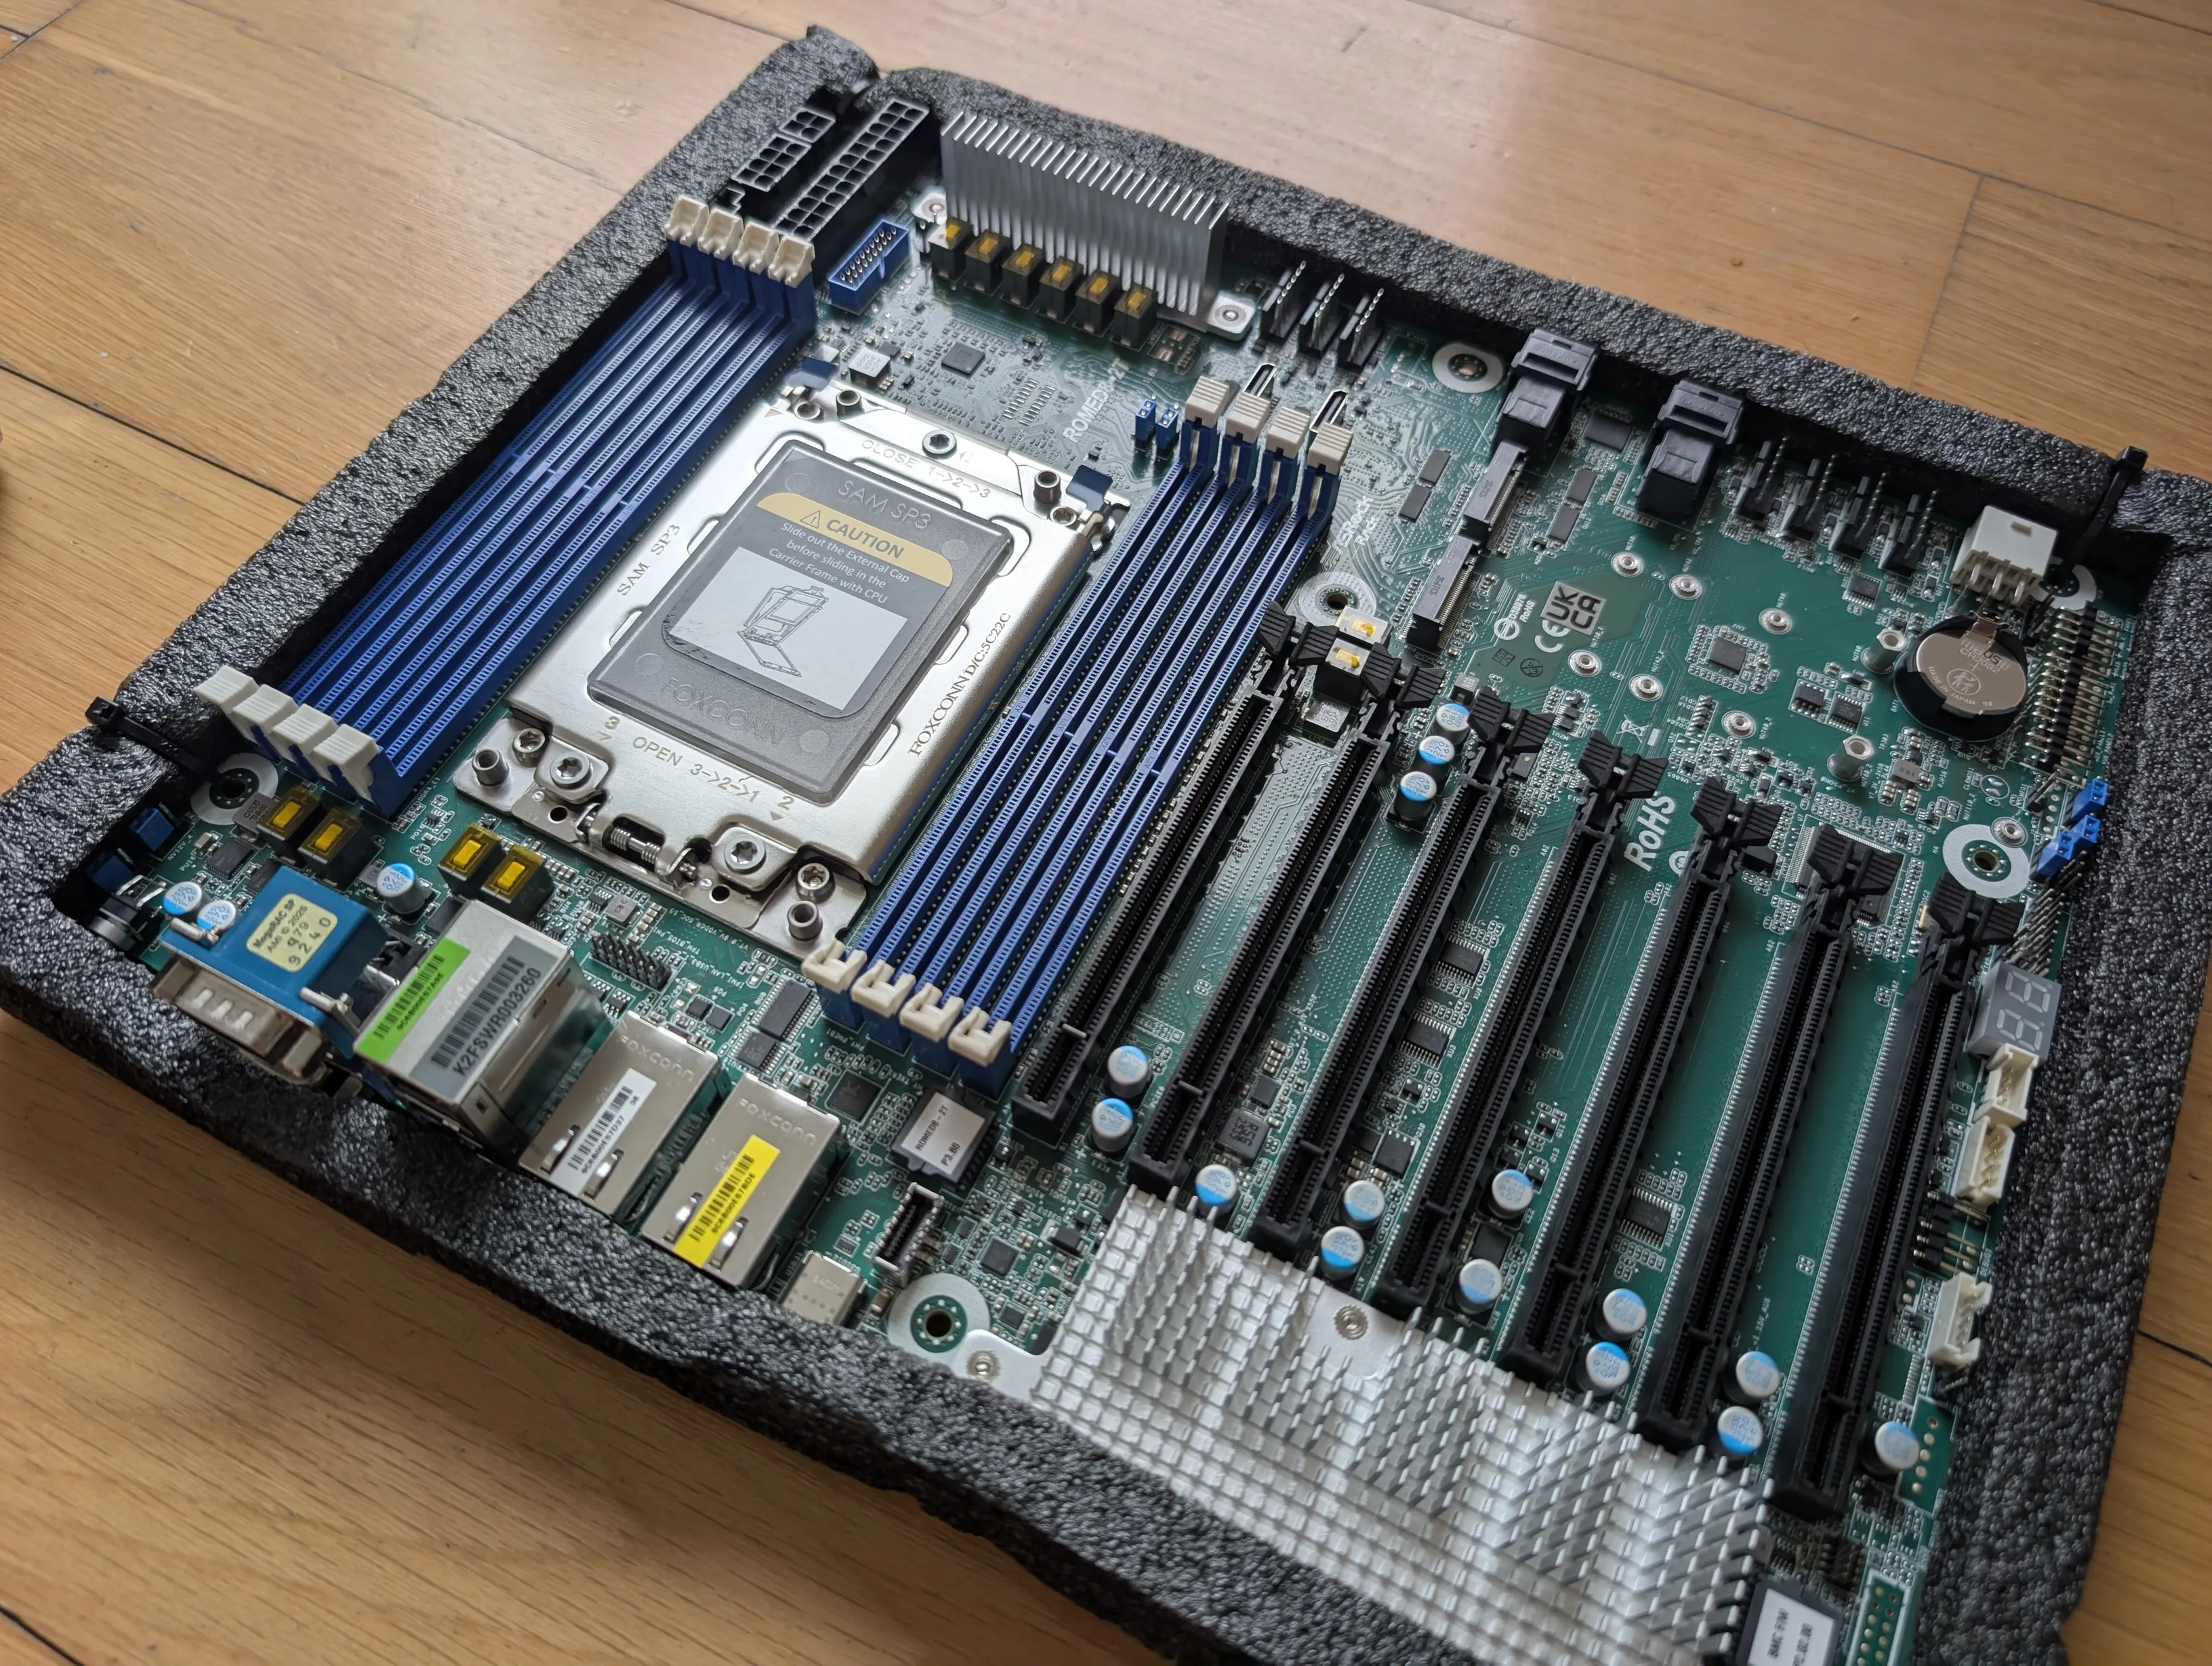
My choice of motherboard was determined by my decision to use DDR4 memory instead of DDR5. The ASRock ROMED8-2T is a very popular option in this segment and met all my requirements:
- Support for 2nd or 3rd generation AMD EPYC CPUs (more details in the next section).
- 8 channels of DDR4 RDIMM (ECC) memory.
- 8x PCIe slots, more than enough for future expansions.
- 10x SATA 6 ports, enough for the 8 hard drives I’ll be installing initially. If I need more in the future, I’ll install an HBA card.
- 2x M.2 (one up to 22110, the other up to 2280). Ideally, both would have been 22110, but oh well, that’s what I have. The important thing was to have two drives to set up in a redundant RAID 1 array.
- 2x 10GBASE-T Ethernet ports, essential because I want the core of my home network to run at 10 Gbps.
- IPMI for remote management, accessible without licenses. I’ve already had this happen with my current HPE Microserver, I can’t access the management interface without a license, and I didn’t want to fall into that trap again.
I bought it new from smicro.eu.
CPU
Since the server will be used for virtualized and containerized applications, I was looking for a CPU with plenty of cores to increase execution parallelism, rather than raw power per core.
AMD EPYC processors outperform Intel Xeon processors in terms of PCIe lanes and memory bandwidth, in addition to having a higher core count.
Since I wanted to stick with DDR4 memory, that limited me to 2nd- or 3rd-generation EPYC processors. Used prices were reasonable, so I looked for a 3rd-generation model with a good balance between the number of cores, clock speed, and power consumption that fell within the limits of the motherboard (225W max) and the fan (280W).
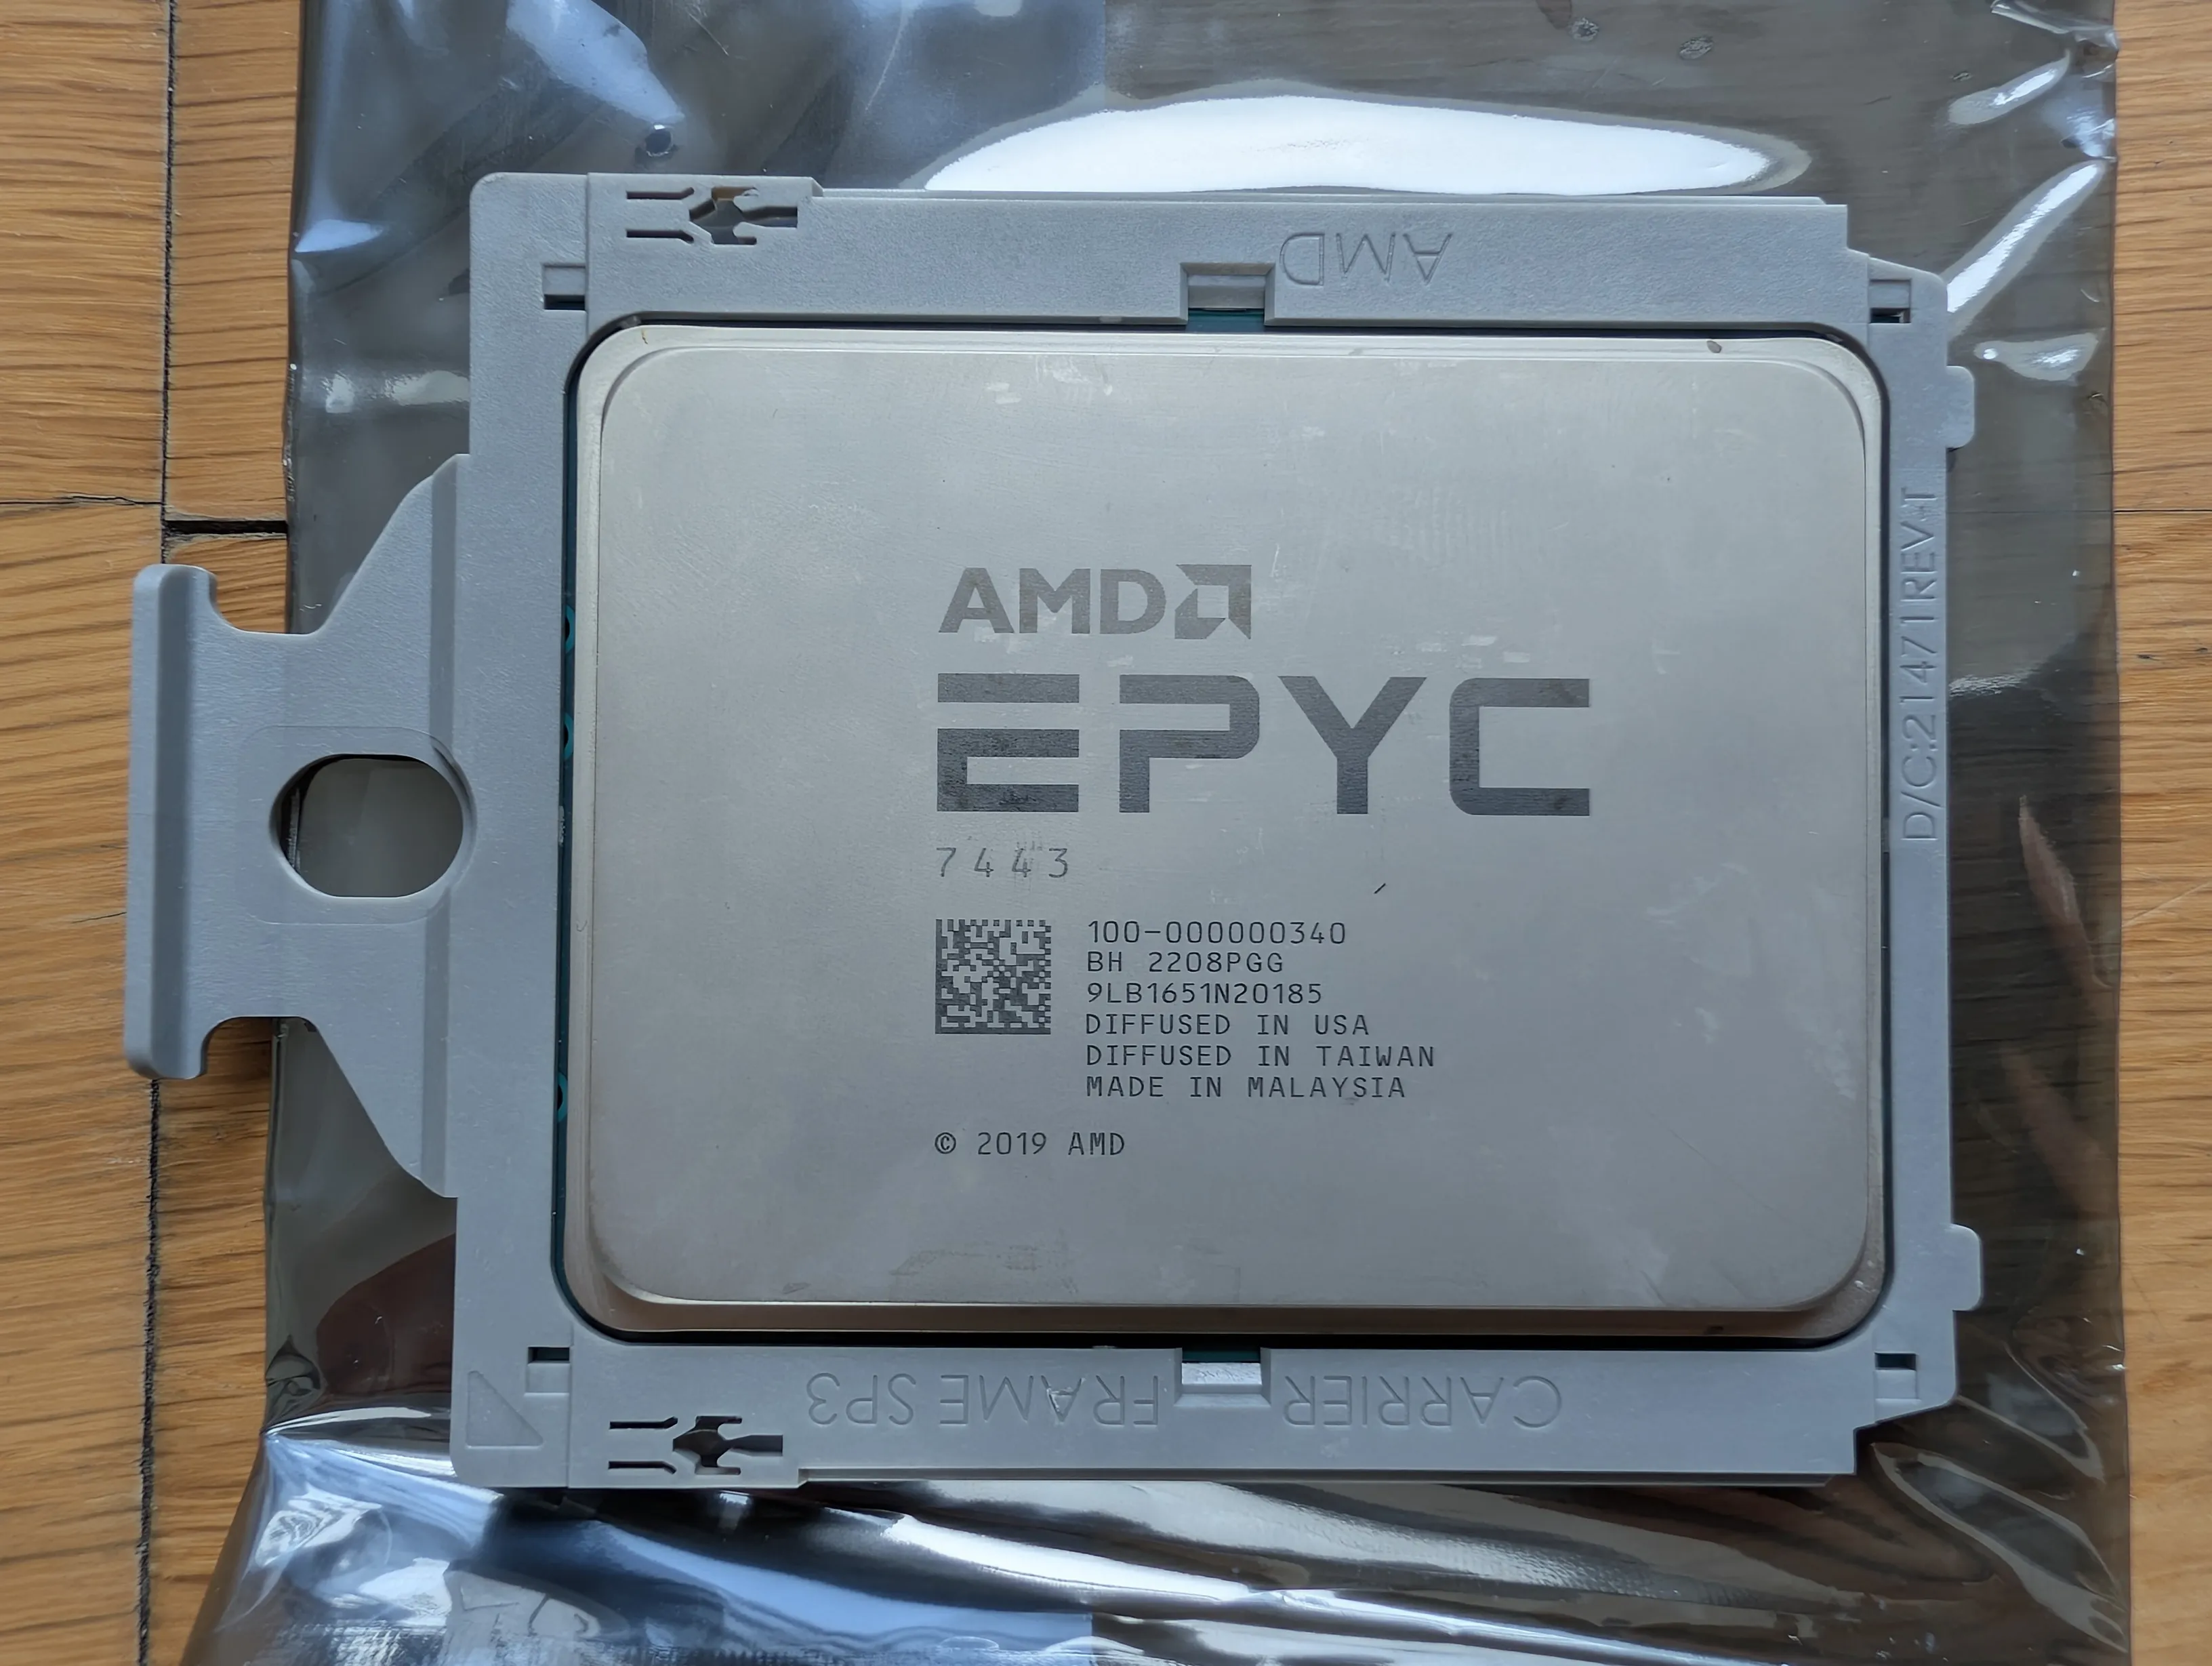
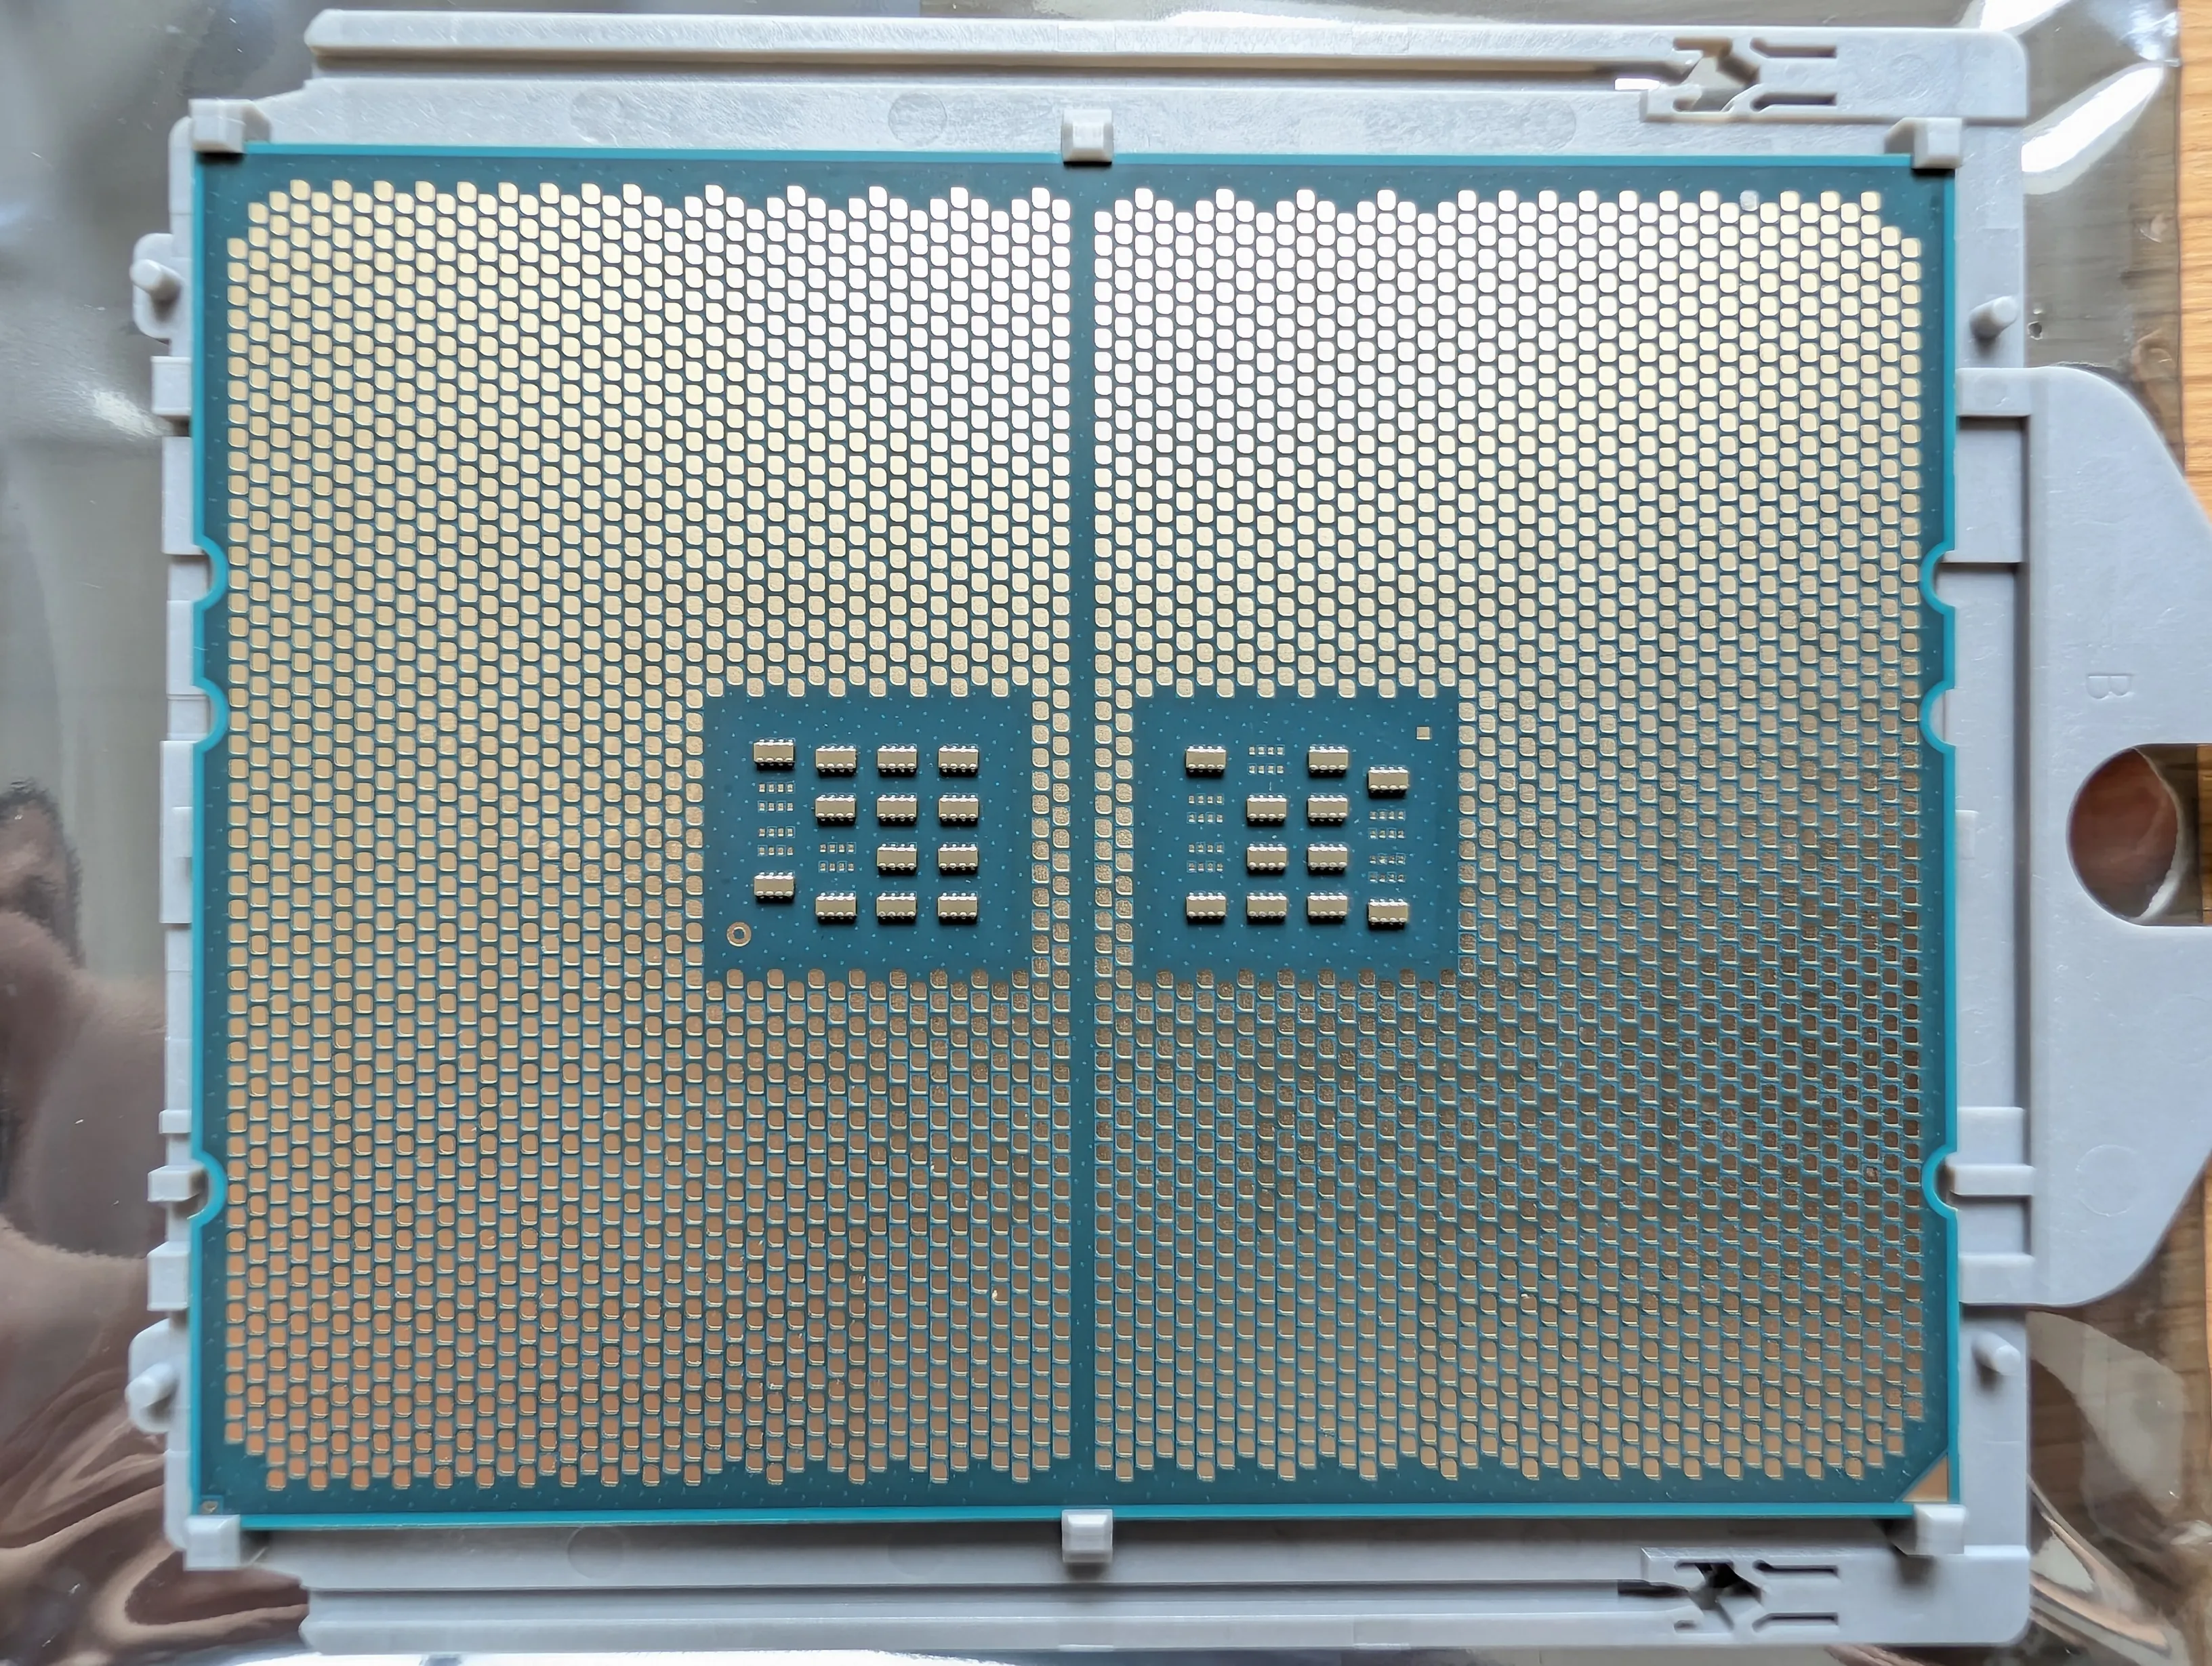
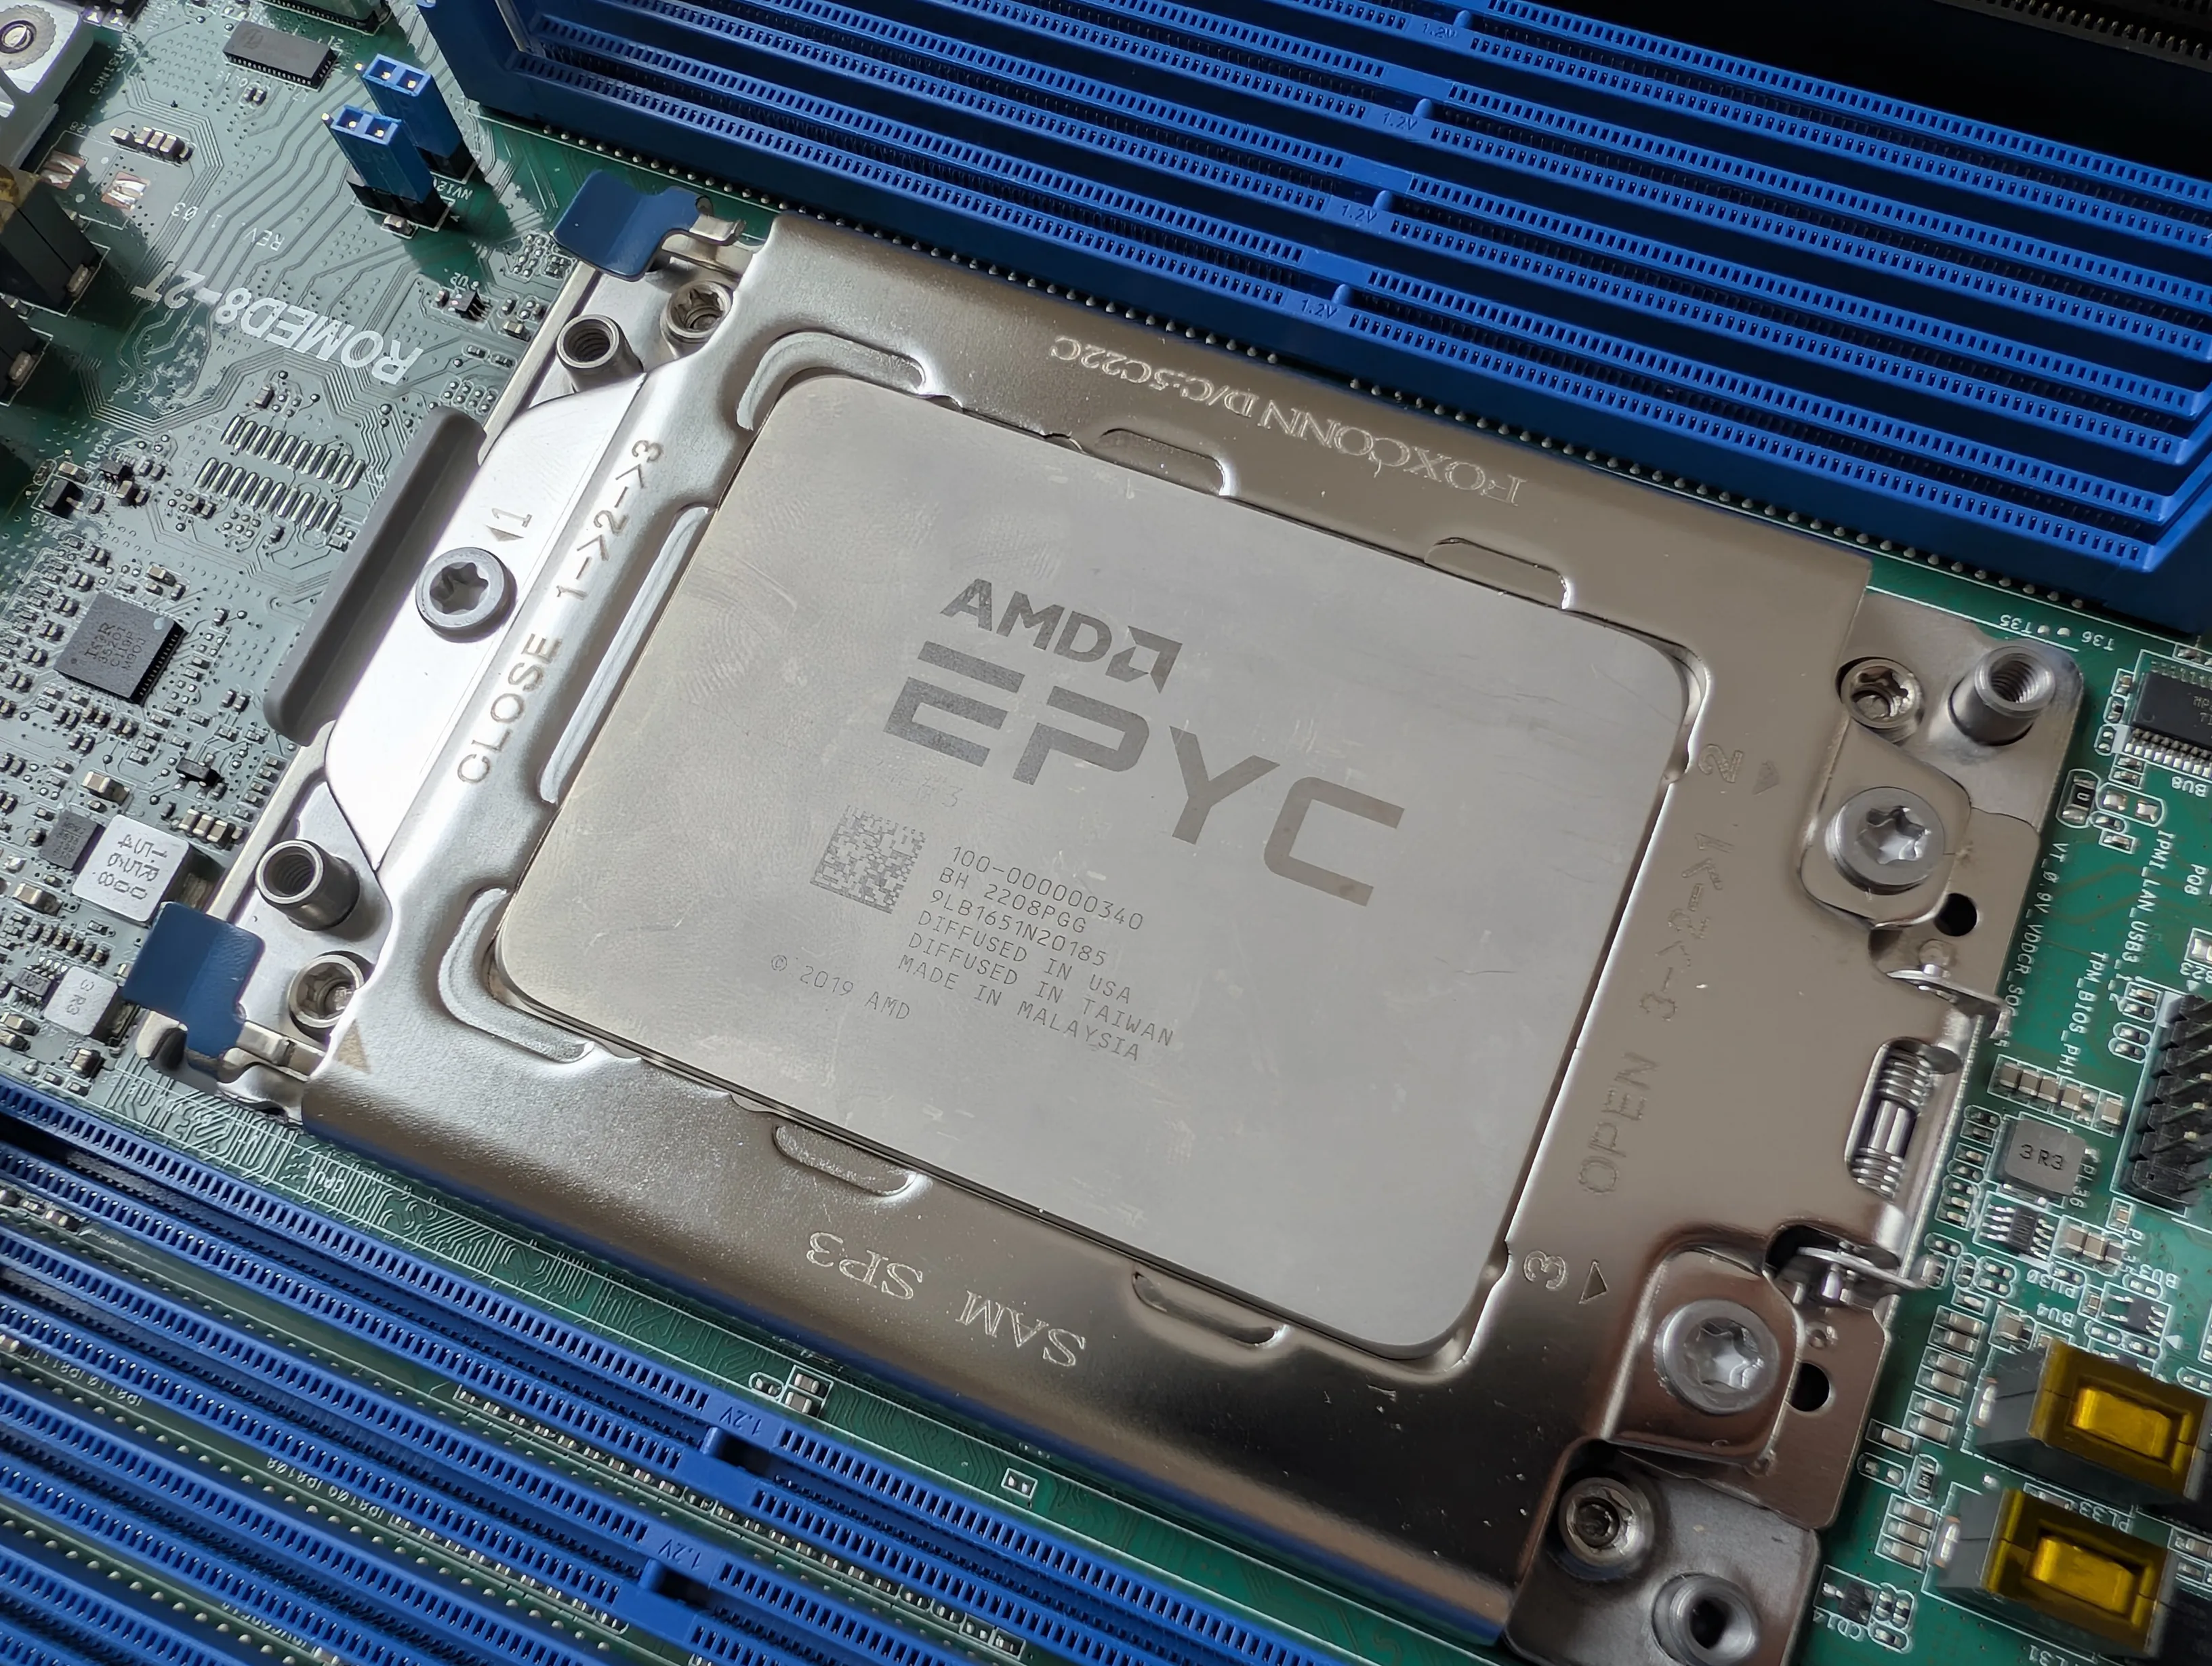
The one I ultimately chose was a used AMD EPYC 7443, purchased on ebay.de. With 24 cores and 48 threads, I expect it will have more than enough power for all the applications I plan to install on the server.
Fan
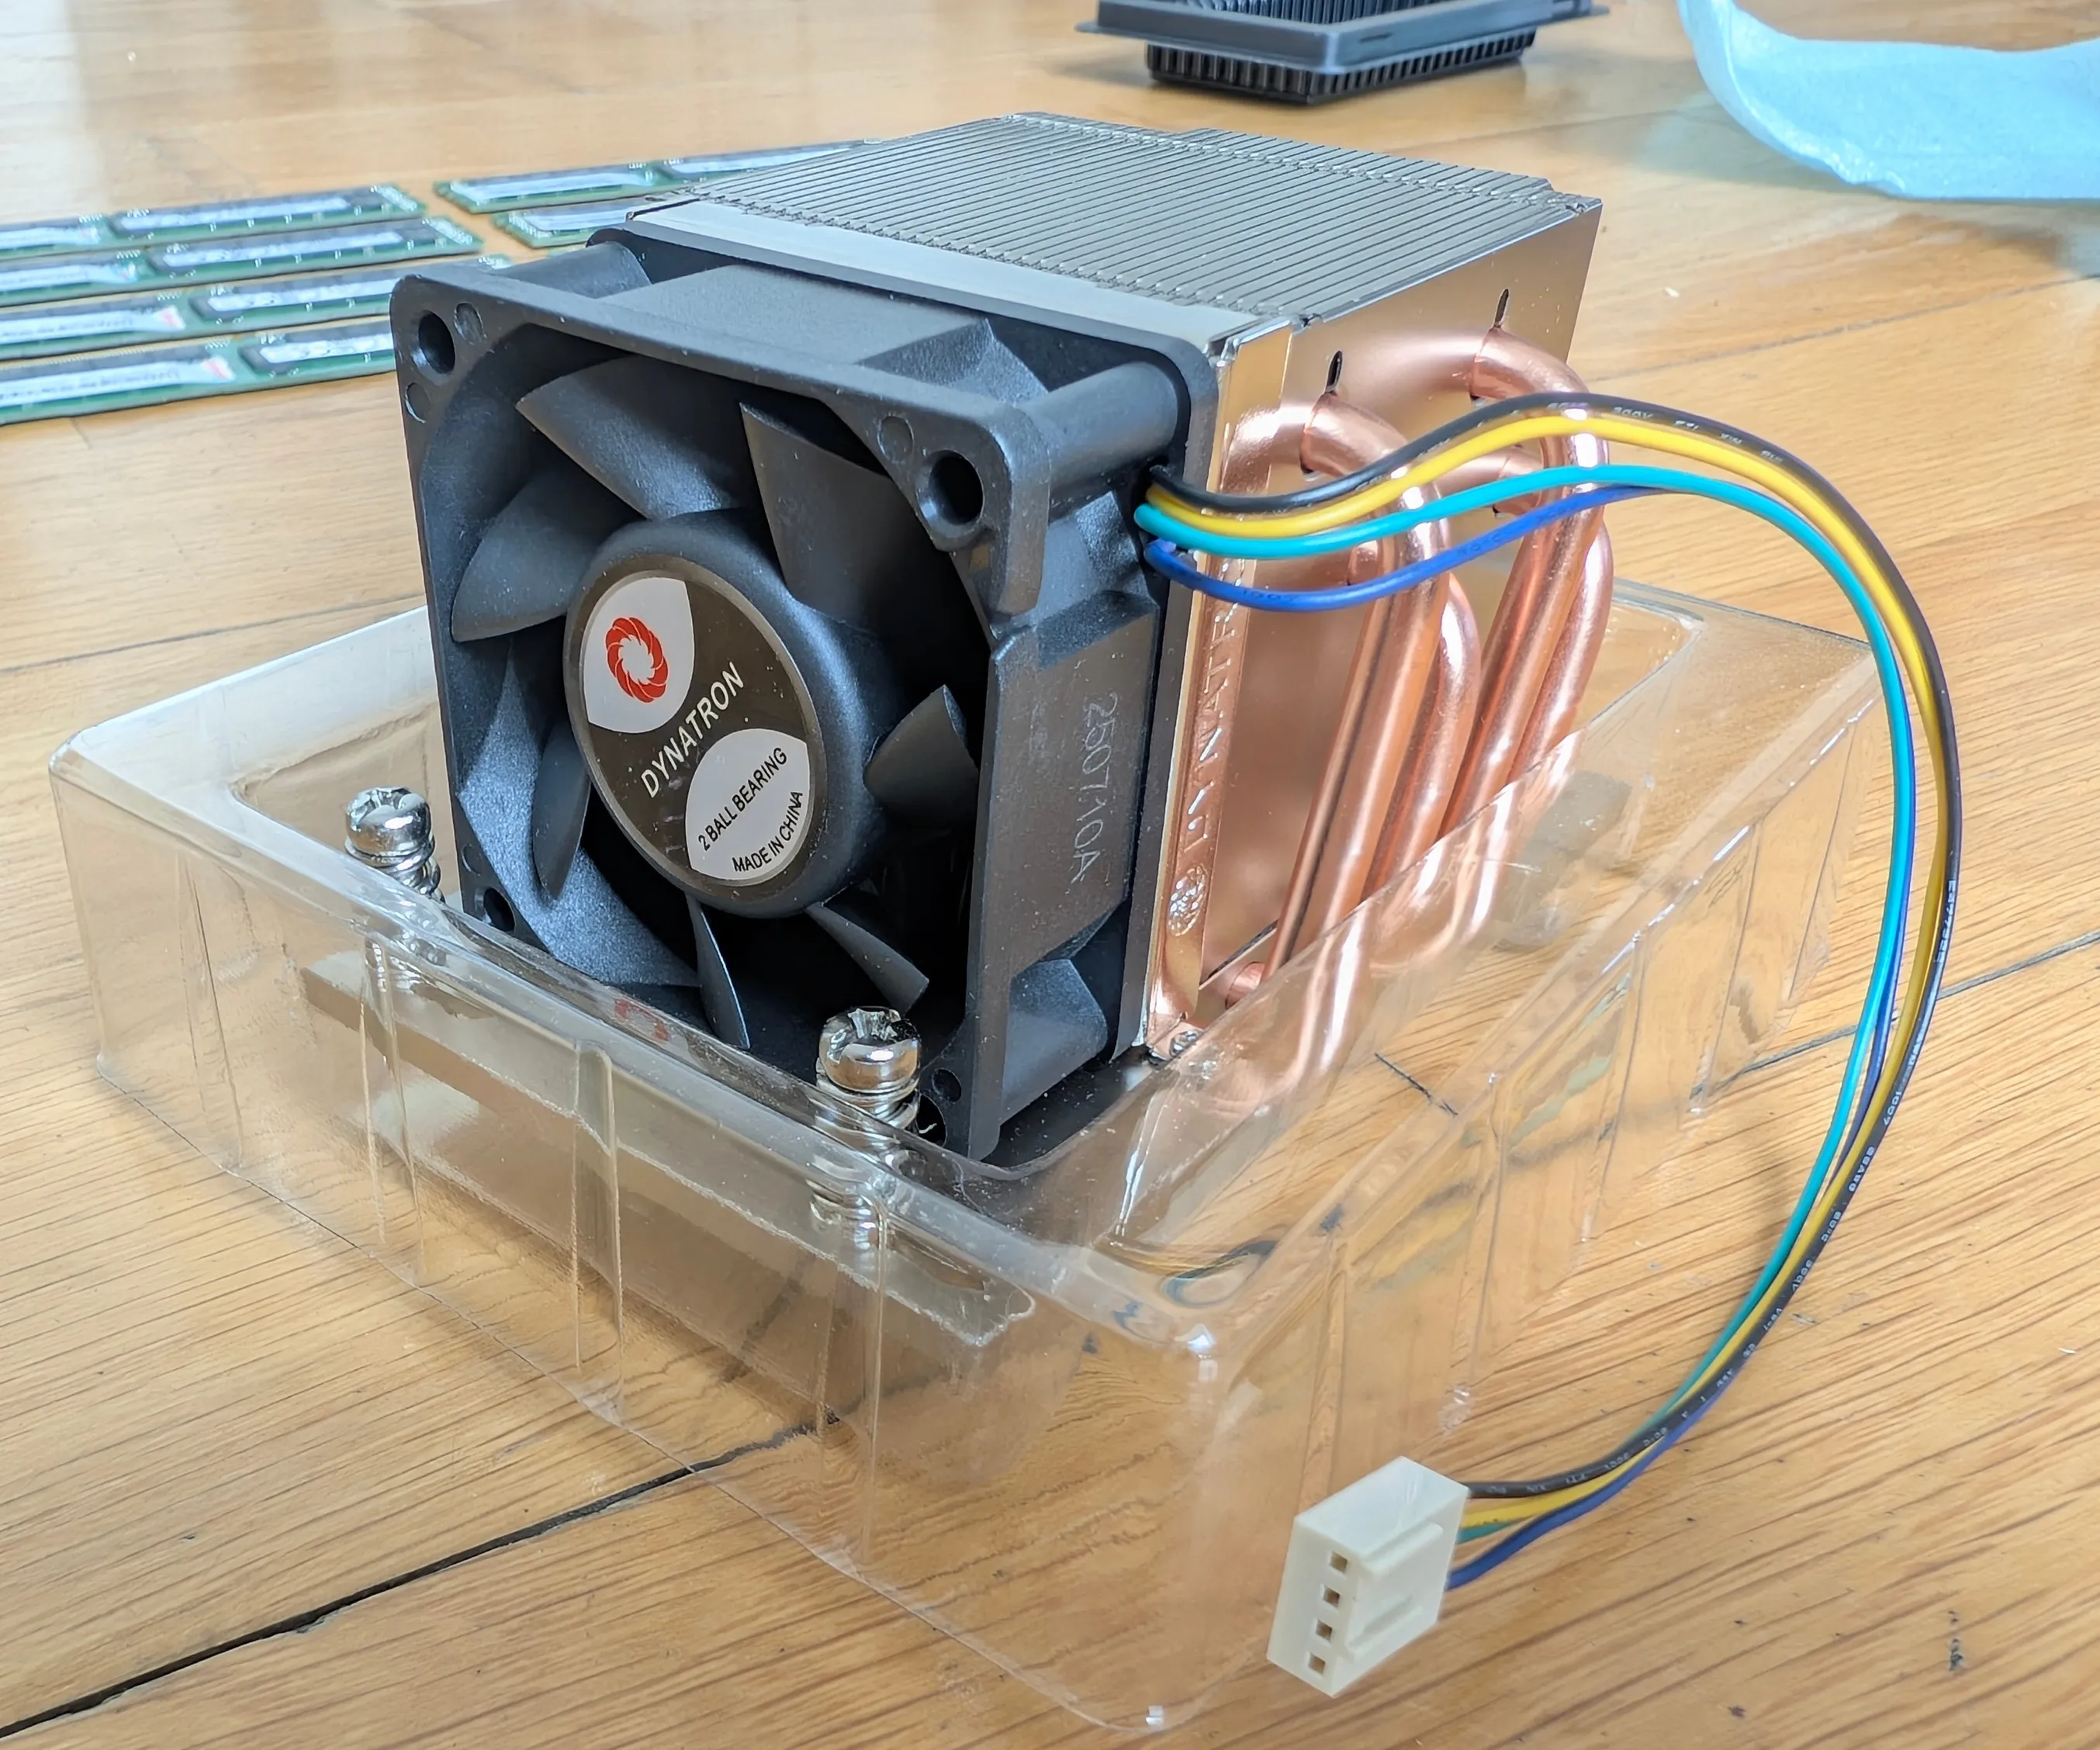
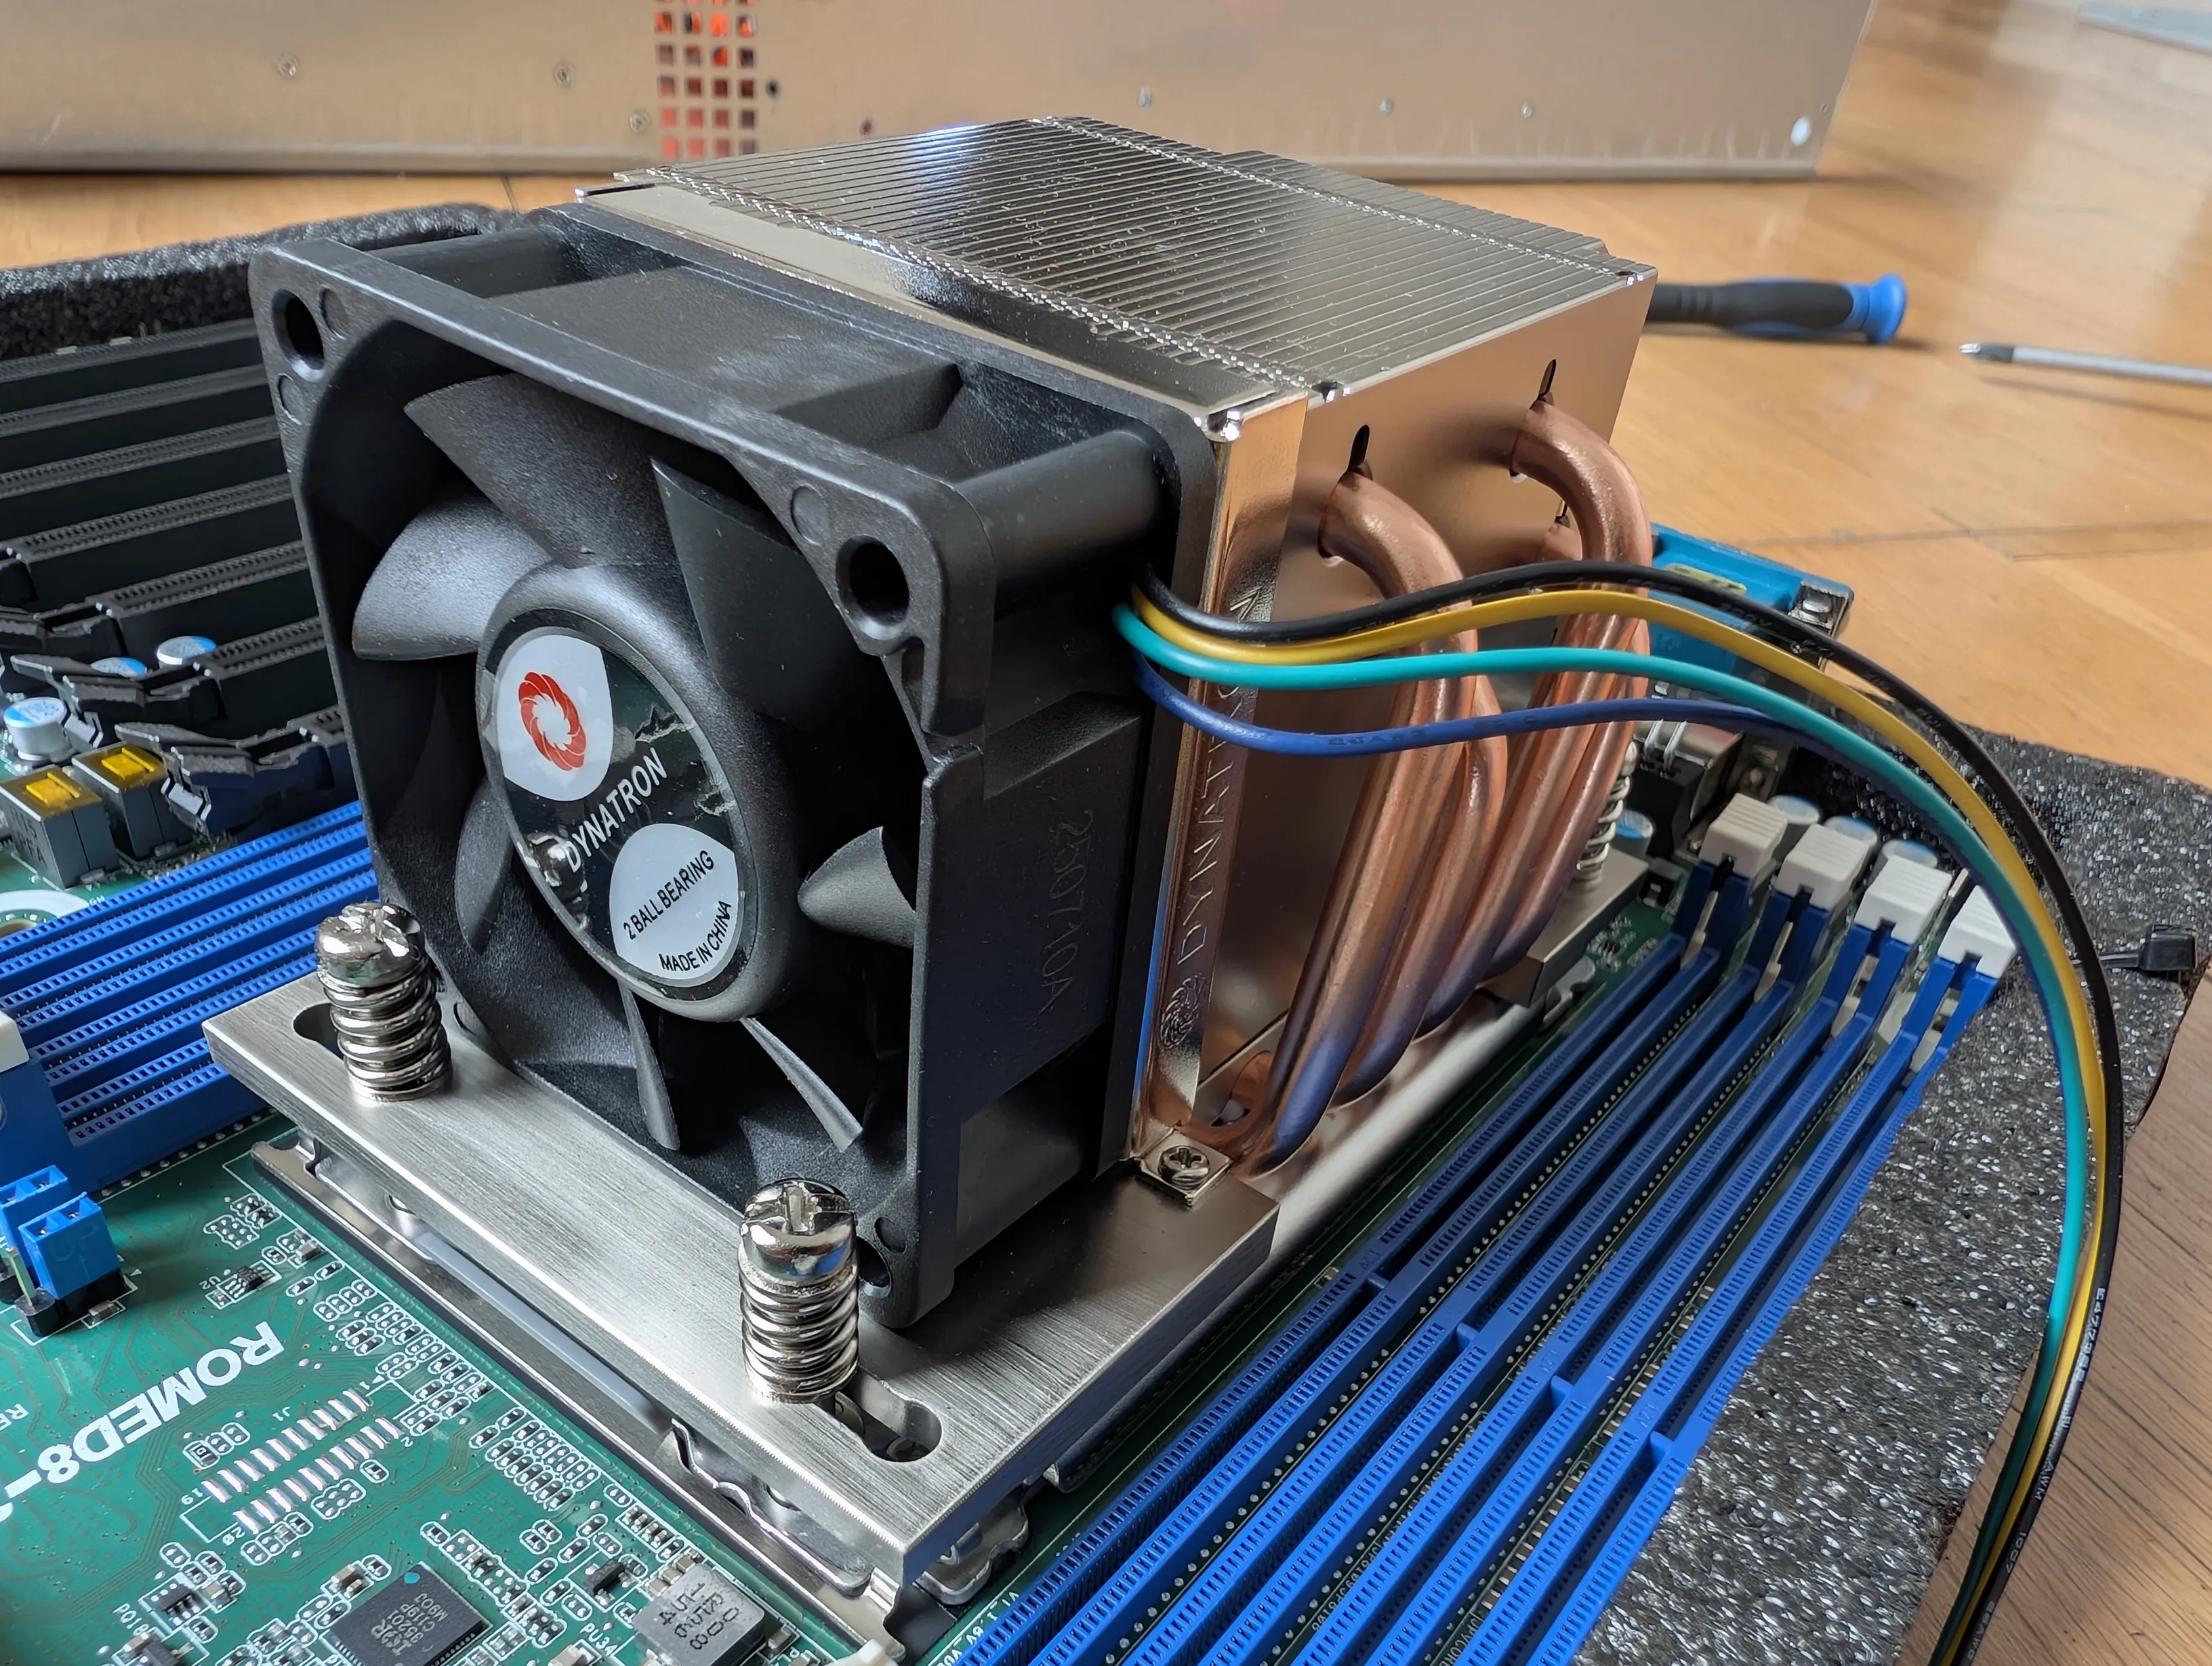
2U chassis severely limit the height of the components that can be installed. The Inter-Tech IPC 2U-2412 limits the fan to less than 65 mm in height.
The other important requirement is that it provide sufficient cooling for the installed CPU’s power draw. The AMD EPYC 7443 has a peak power draw of 200 W.
After searching for options that met both requirements, I settled on the Dynatron A26, and it has been performing very well in terms of both noise and cooling.
RAM
I knew the server would need at least 128 GB of RAM, since I plan to install about 100 TB of NAS storage, and ZFS performs better when it has plenty of memory available.
Another important requirement was to have ECC. Since the server will be the primary storage for my family’s data, I believe it’s a worthwhile investment to prevent silent data corruption.
Anyone in the tech world knows that memory prices have skyrocketed due to high demand for AI. 128 GB of DDR5 memory was priced between €3,000 and €4,000, which was a painful pill to swallow, especially since I didn’t really need that level of performance.
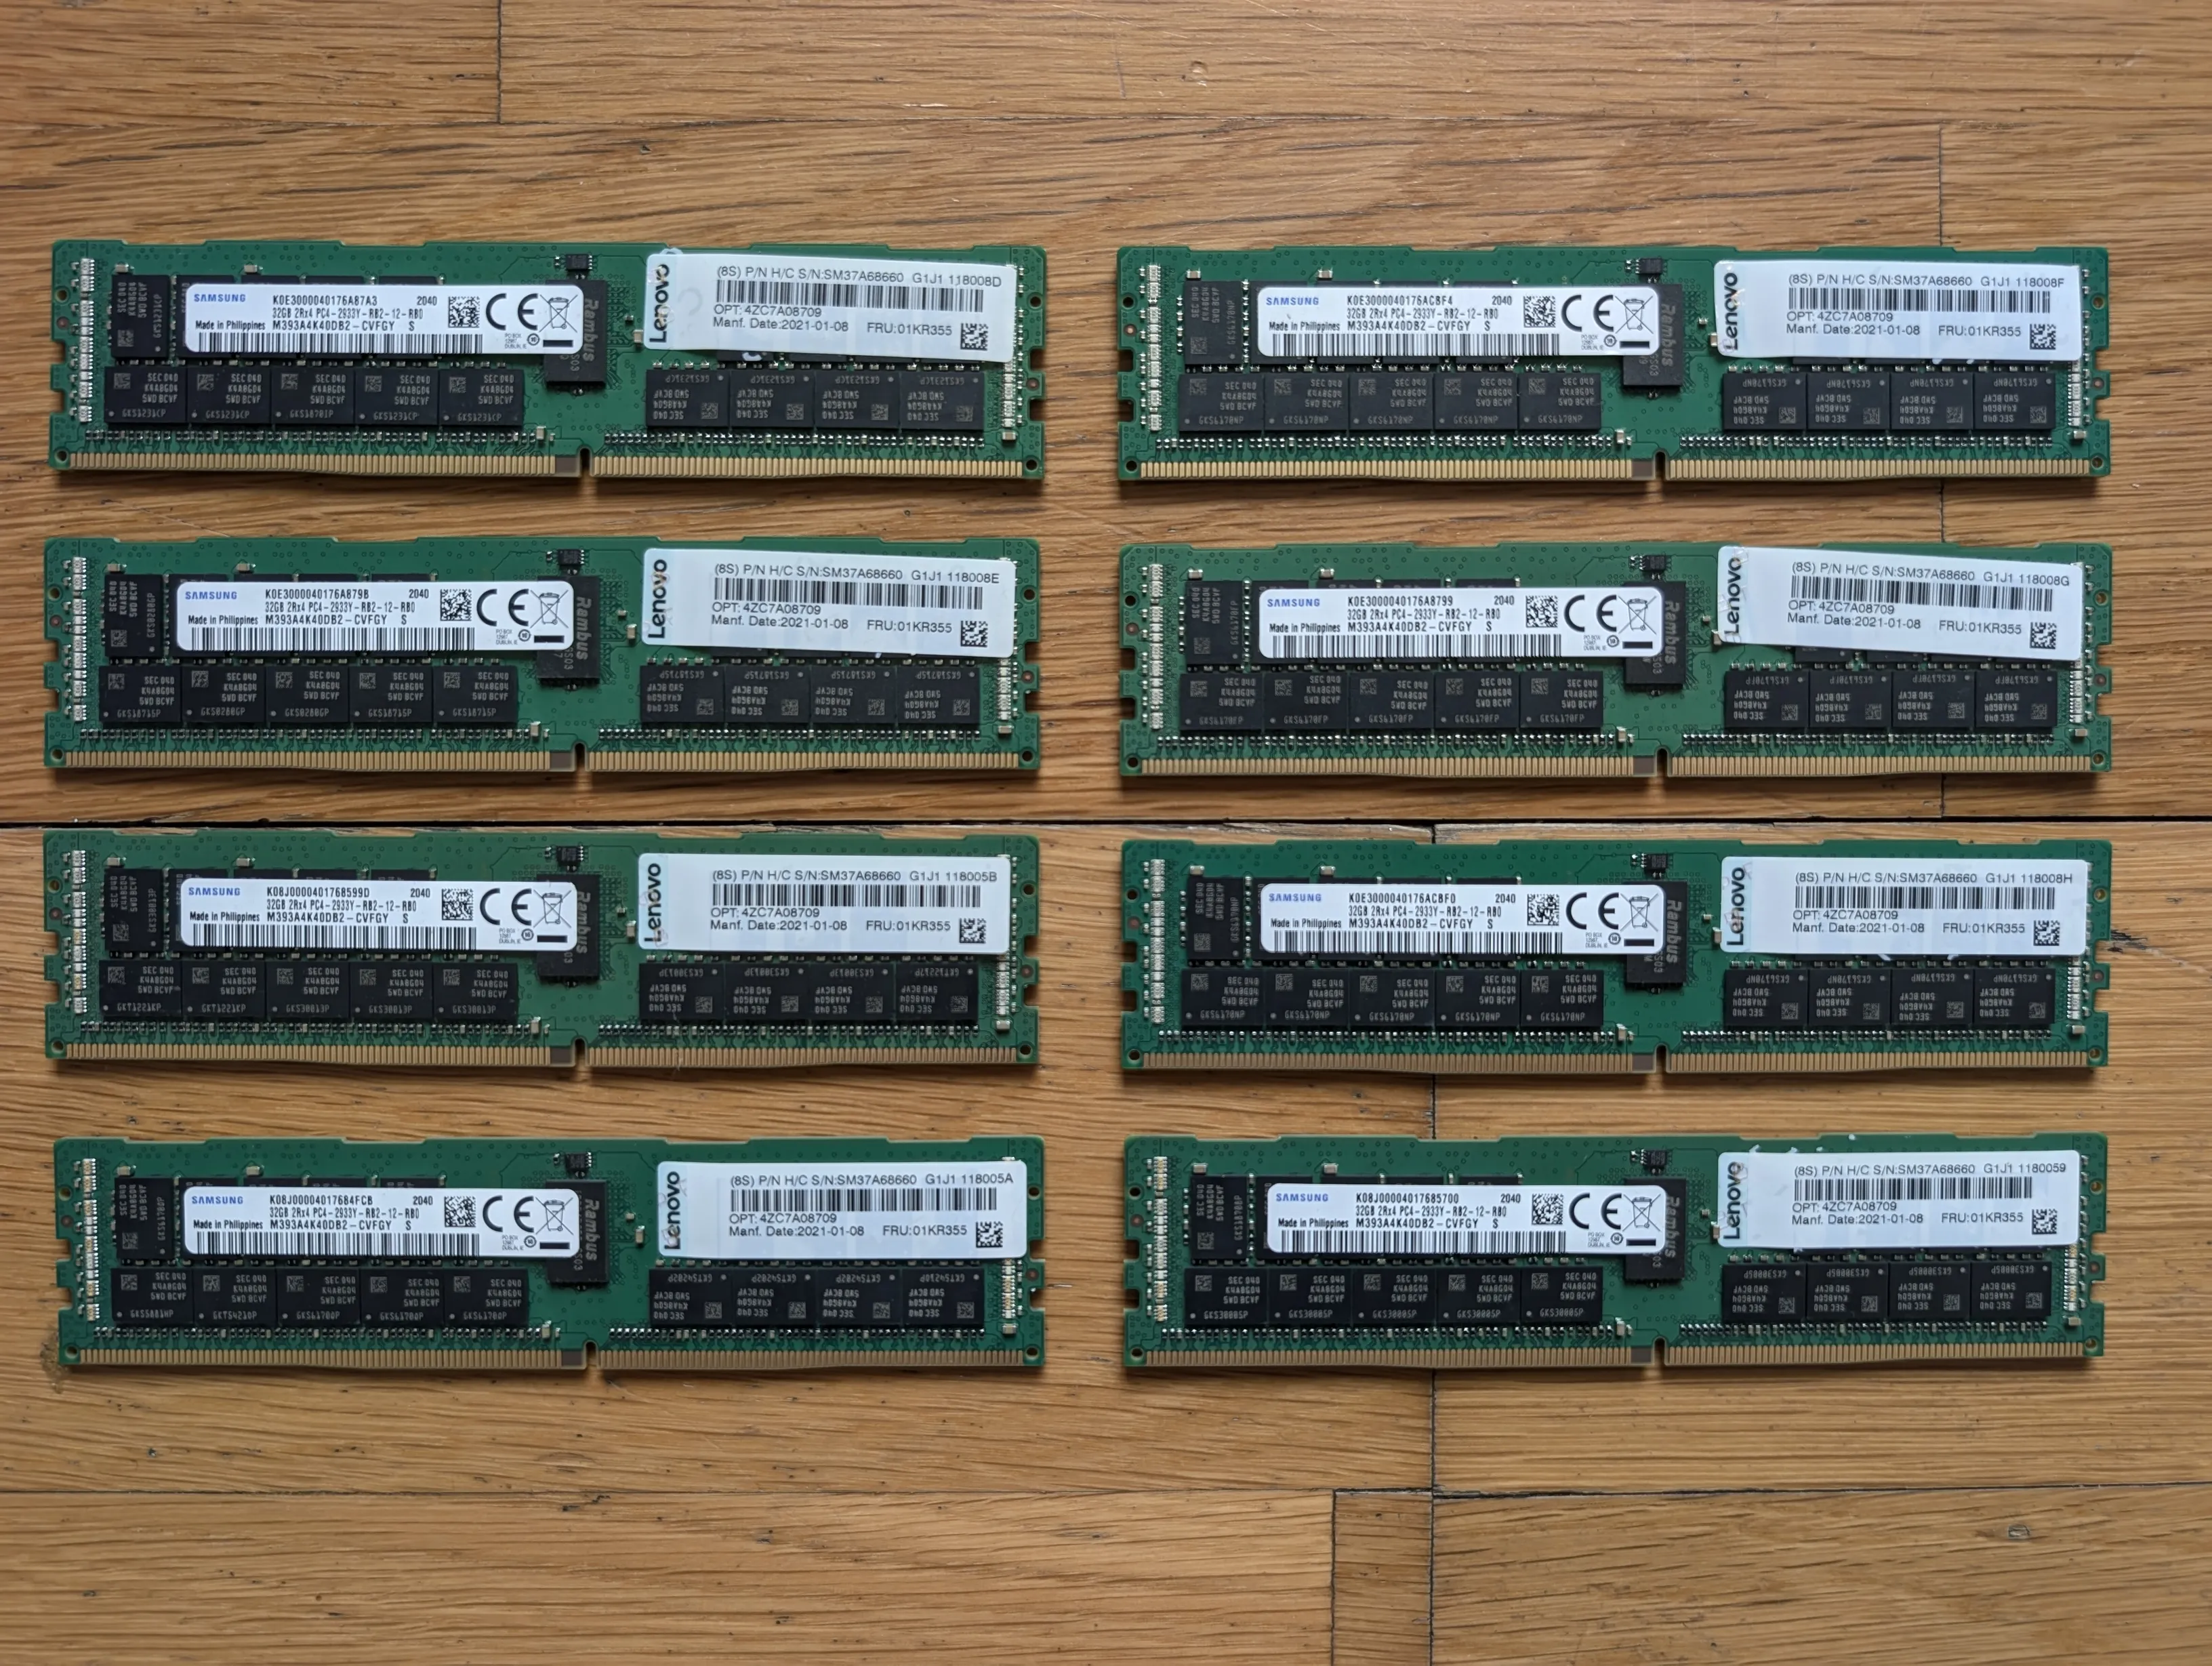
This made me reconsider the server and opt for DDR4 instead. I managed to get 256 GB of used DDR4 for almost a third of what the 128 GB of DDR5 would have cost me.
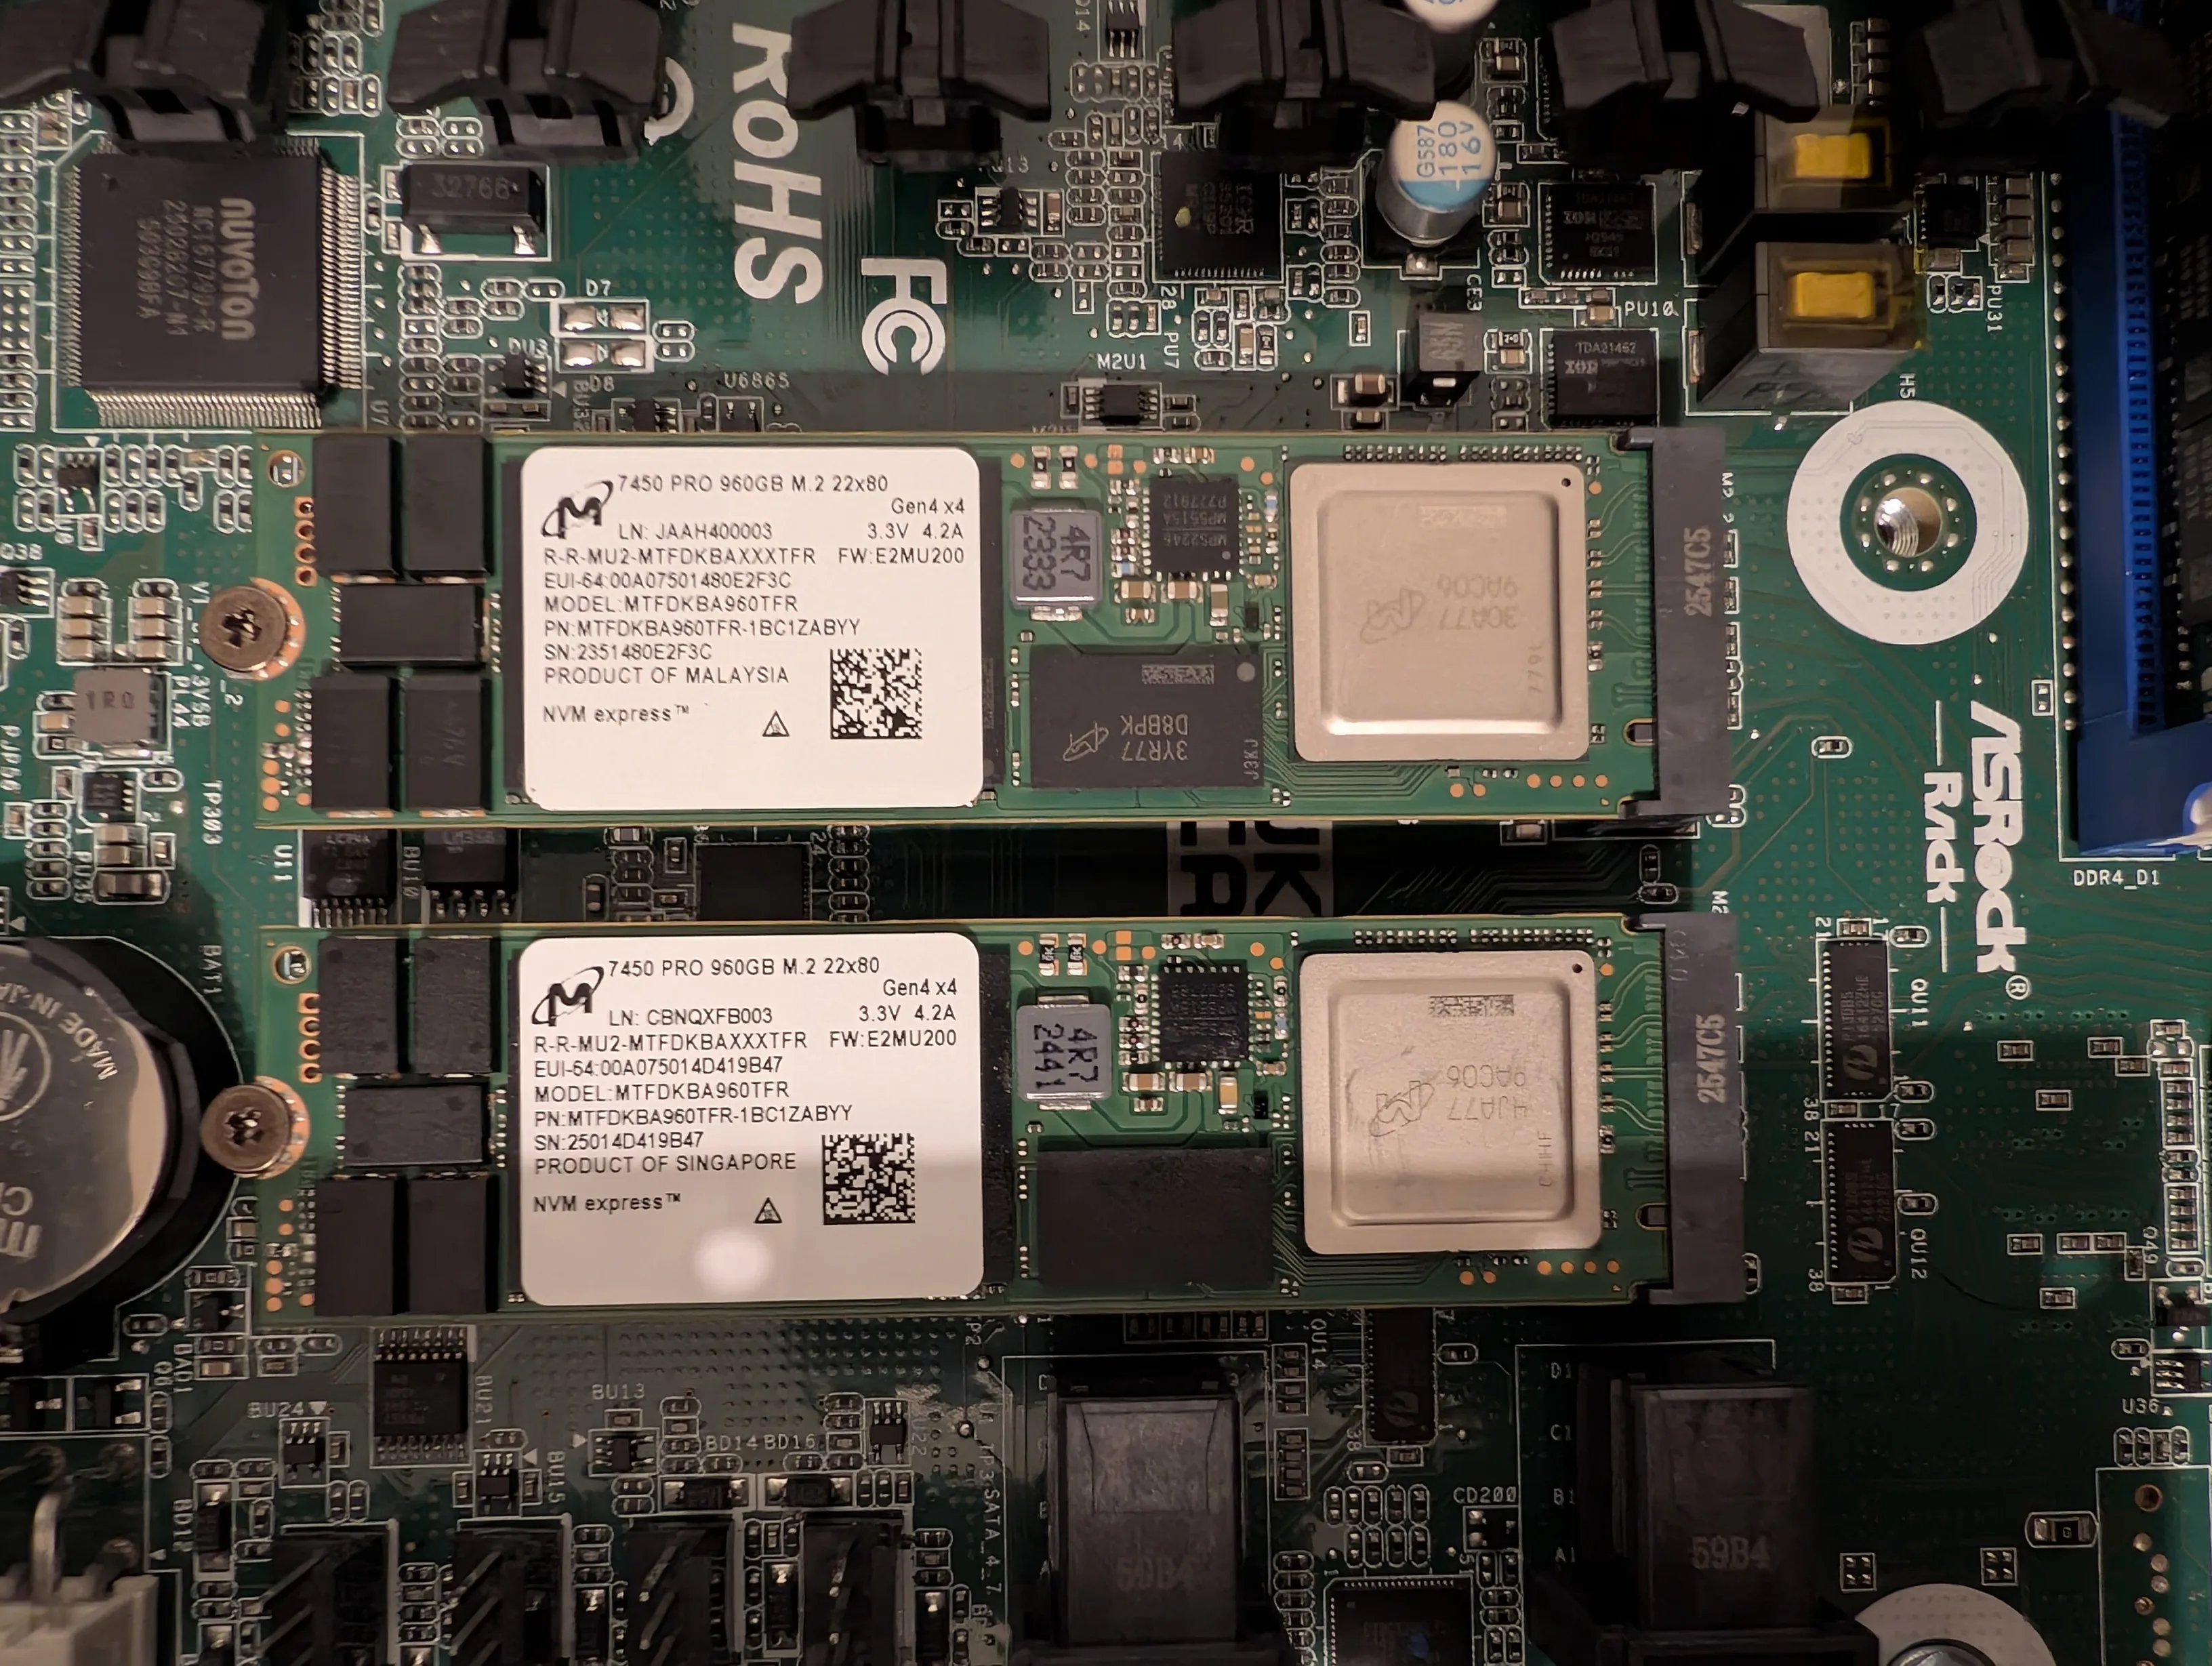
NVMe M.2
The primary drives need to be fast, since this is where applications will run and databases, metrics, logs, etc., will be stored. This means using SSD technology, in my case, in the NVMe M.2 format.
Given the server’s high-availability requirements, I wanted to install two drives in a RAID 1 configuration, so that if one fails, the system will continue to function with the other.
There are also two attributes of enterprise-grade solid-state drives that I found particularly interesting:
- DWPD ≥ 1. This means the drive can be completely rewritten every day for years. Drives designed for desktop use aren’t intended for a server that will be constantly running and writing databases, metrics, logs, etc. They’re used to store personal data and some programs, but they don’t experience as much data turnover, and if they’re written to frequently, they tend to fail sooner rather than later.
- PLP to ensure that data in memory is written to the drive in the event of a power failure. This should minimize potential data corruption in the event of a server failure.
It wasn’t easy to find suitable options because the motherboard limited me to M.2 2280 drives, and most were available in the 22110 format, which was too long. Additionally, prices were very high due to AI. I finally managed to get two used Micron 7450 PRO 960 GB M.2 2280 drives on ebay.com for a comparatively reasonable price.
Hard Drives
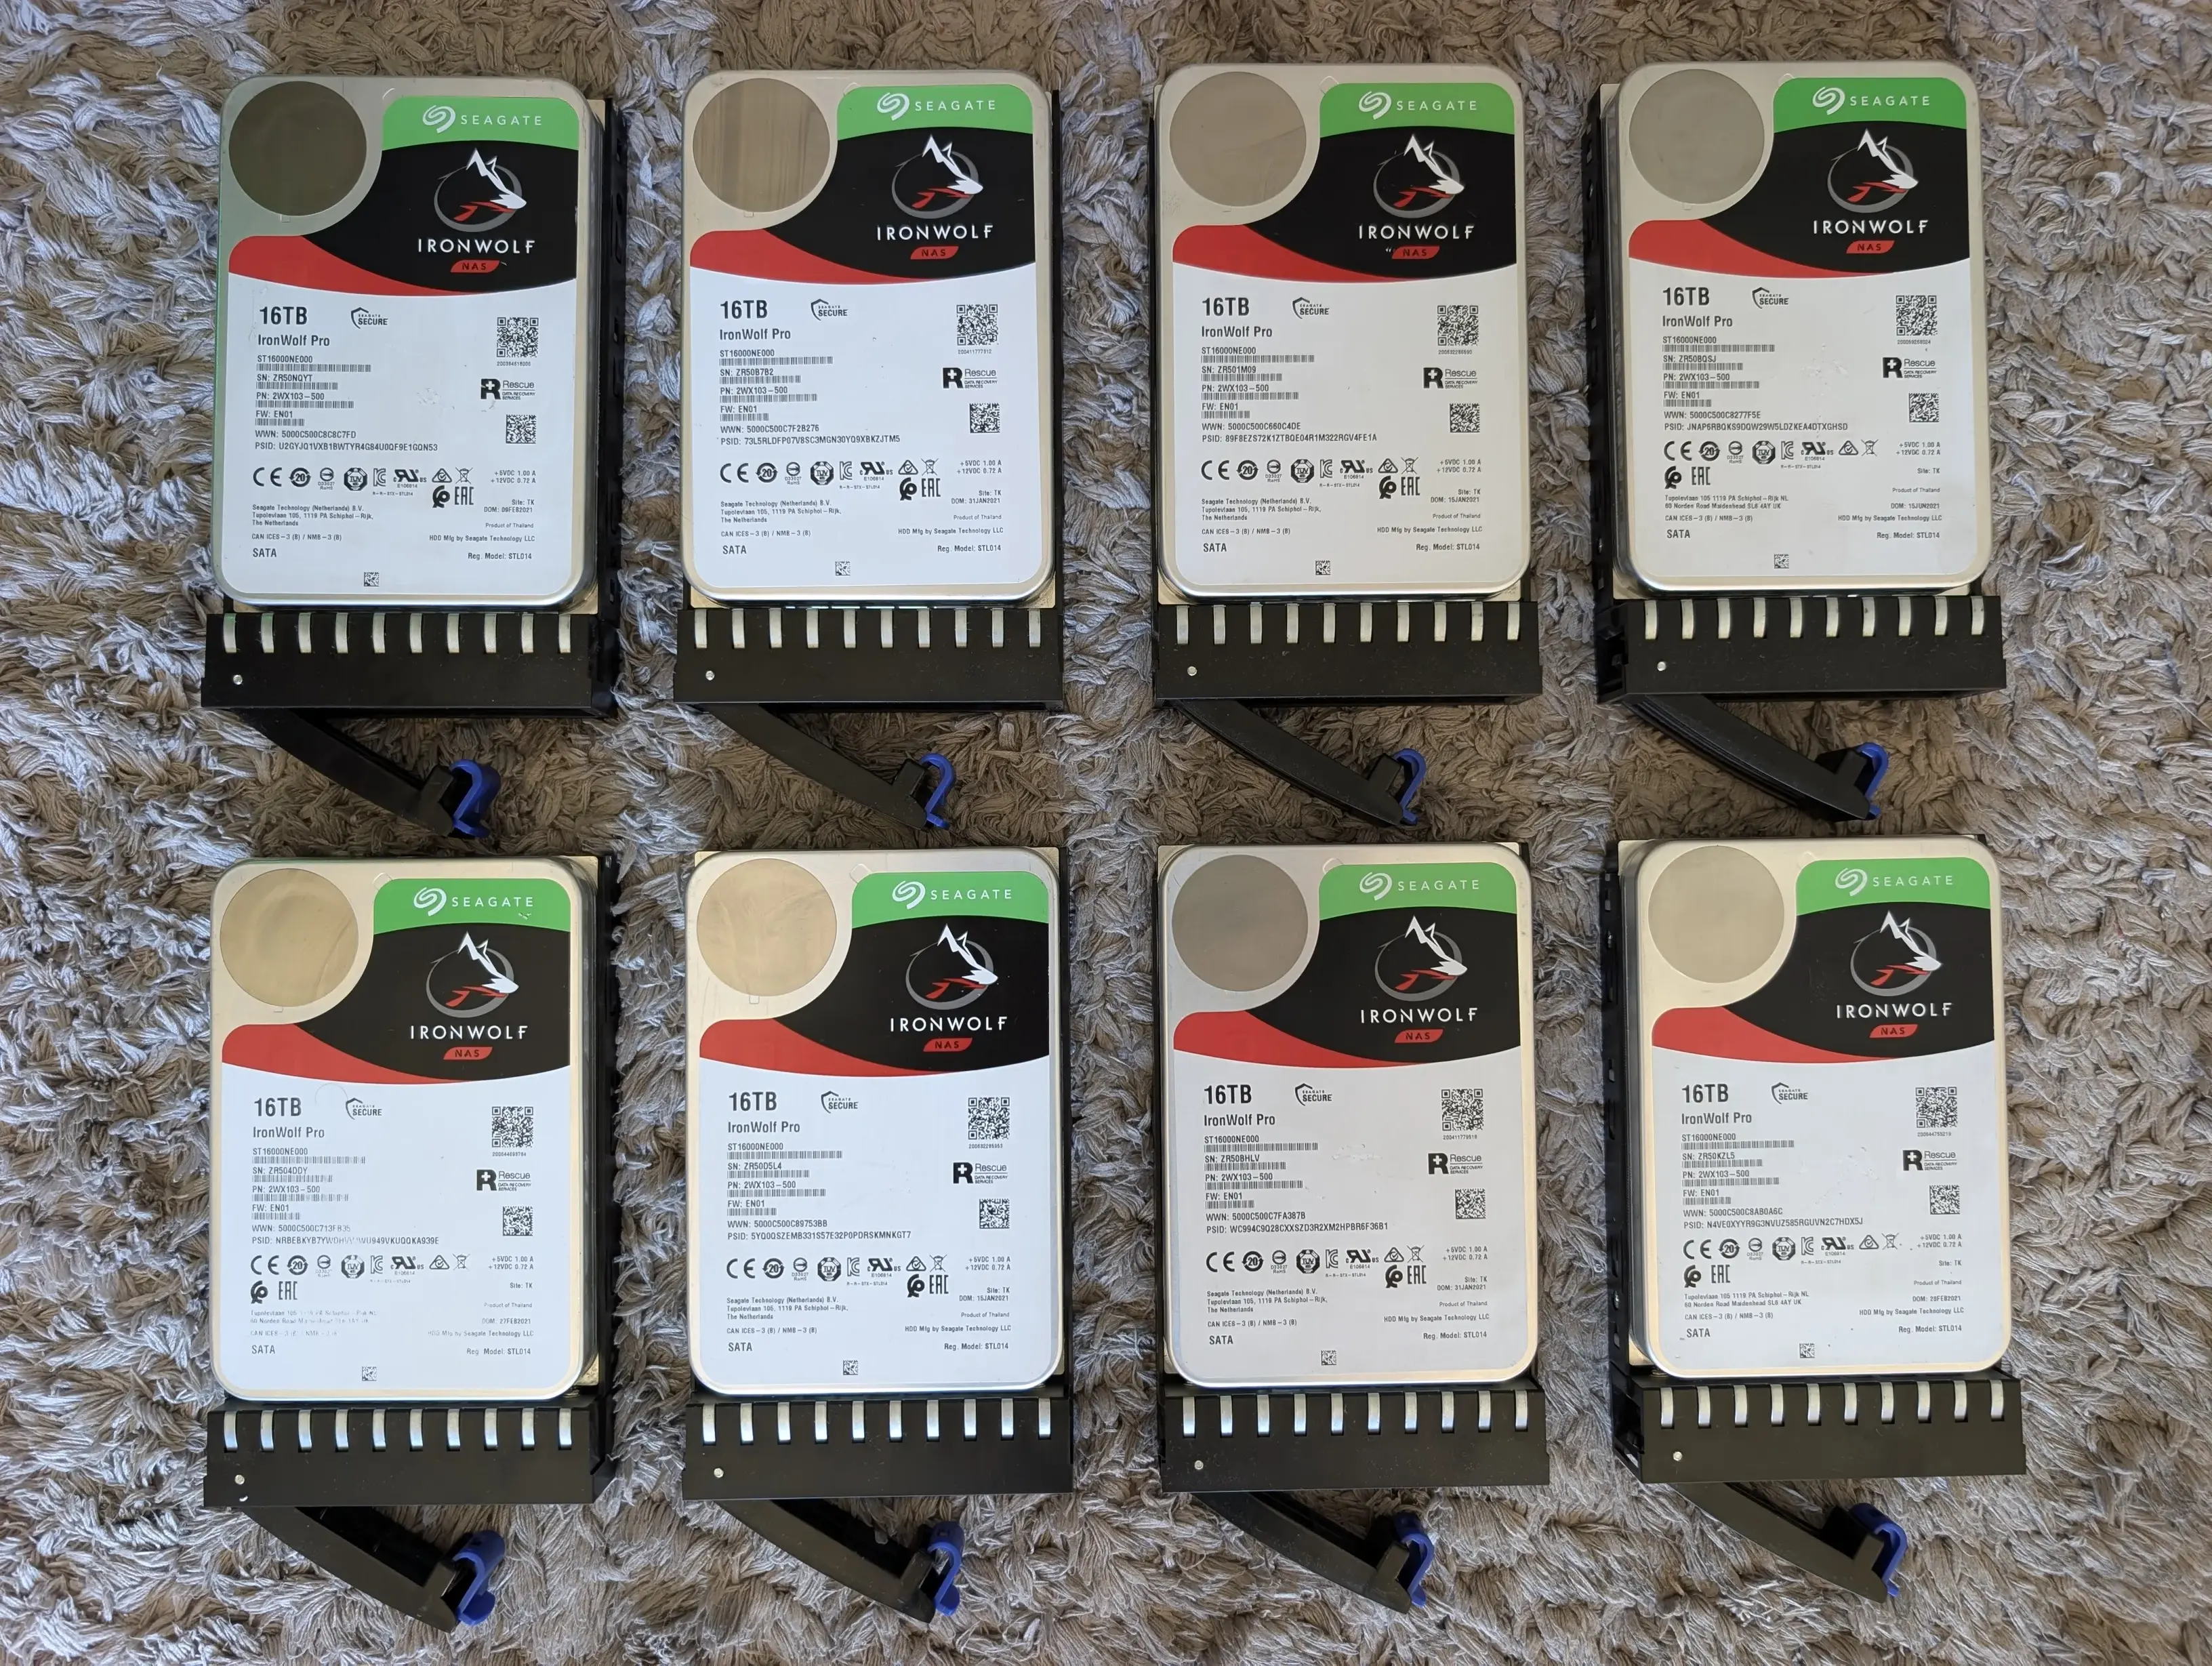
"Traditional" 3.5-inch hard drives remain the most efficient option for storing large amounts of data, but their prices have also skyrocketed. I was tempted to buy them at the beginning of the year and hold onto them, but I ultimately decided to wait and see if prices would drop. But no, they just kept going up, so I ended up buying them at a higher price than I could have.
I chose eight refurbished Seagate IronWolf Pro drives, each with 16 TB of storage. They’ll be set up in RAIDZ2 mode, which will give me about 96 TB of usable space, more than enough for all my data and backups (wink).
Assembly
Some photos of the assembly:
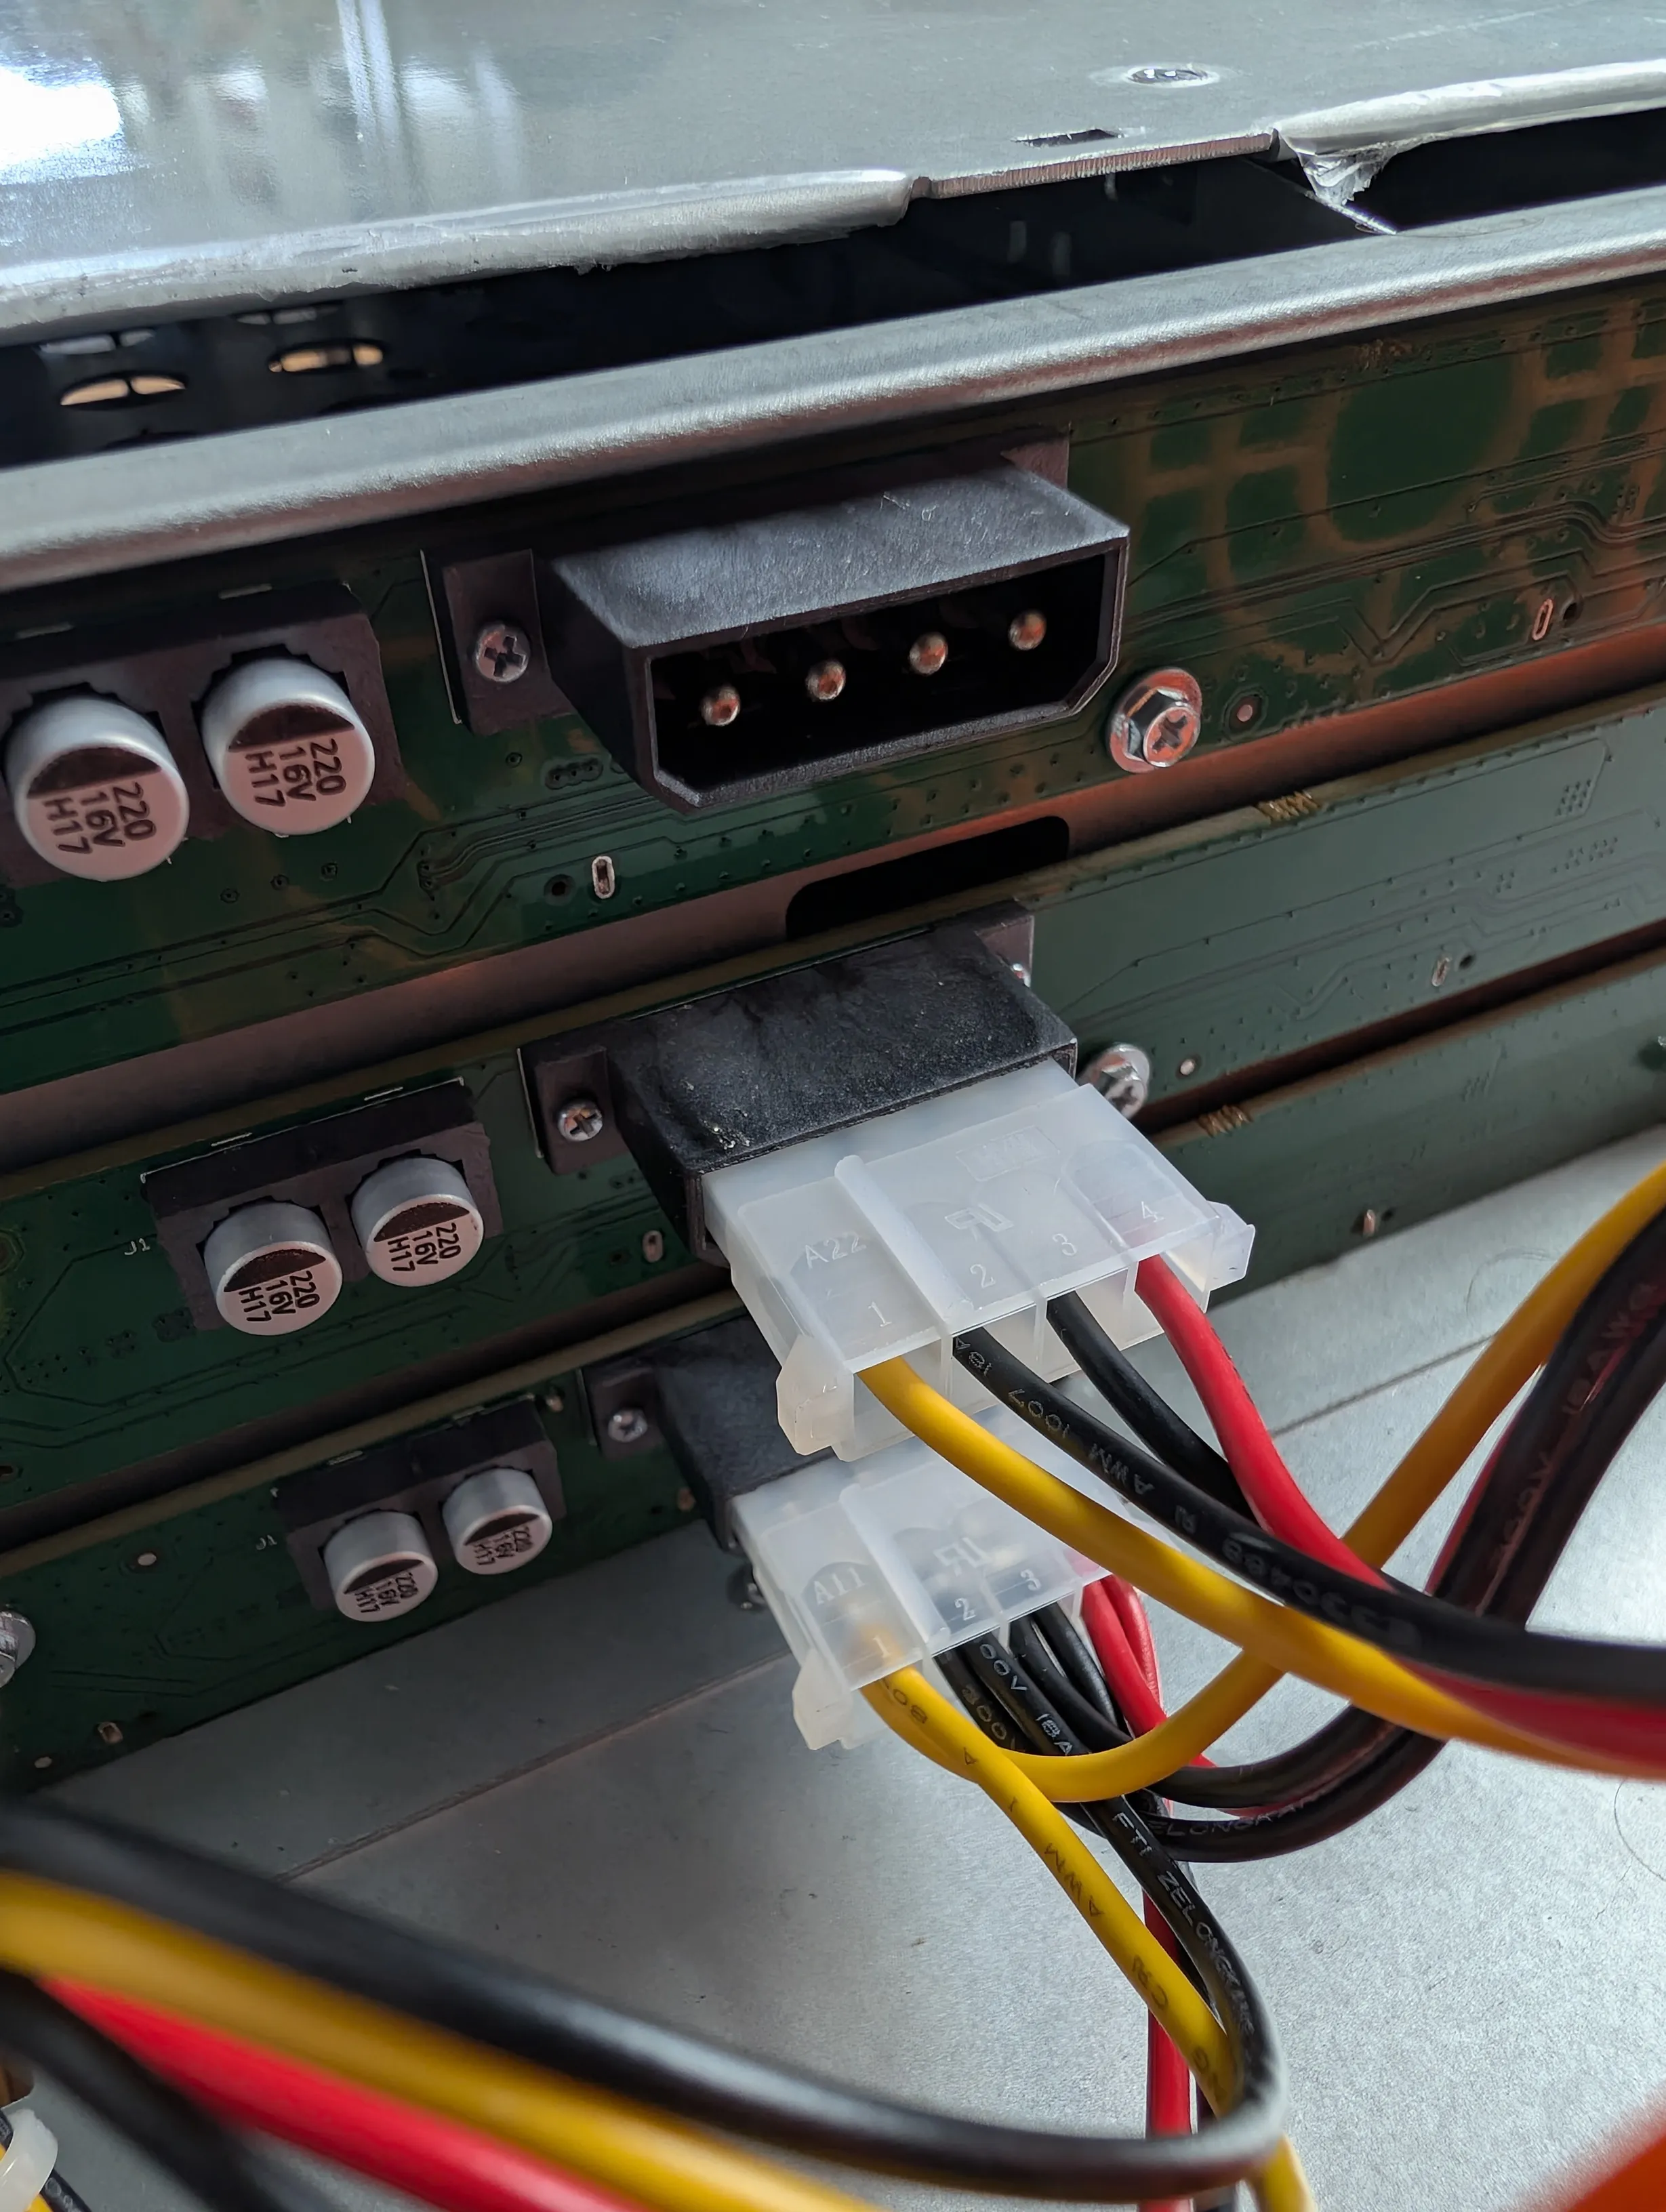
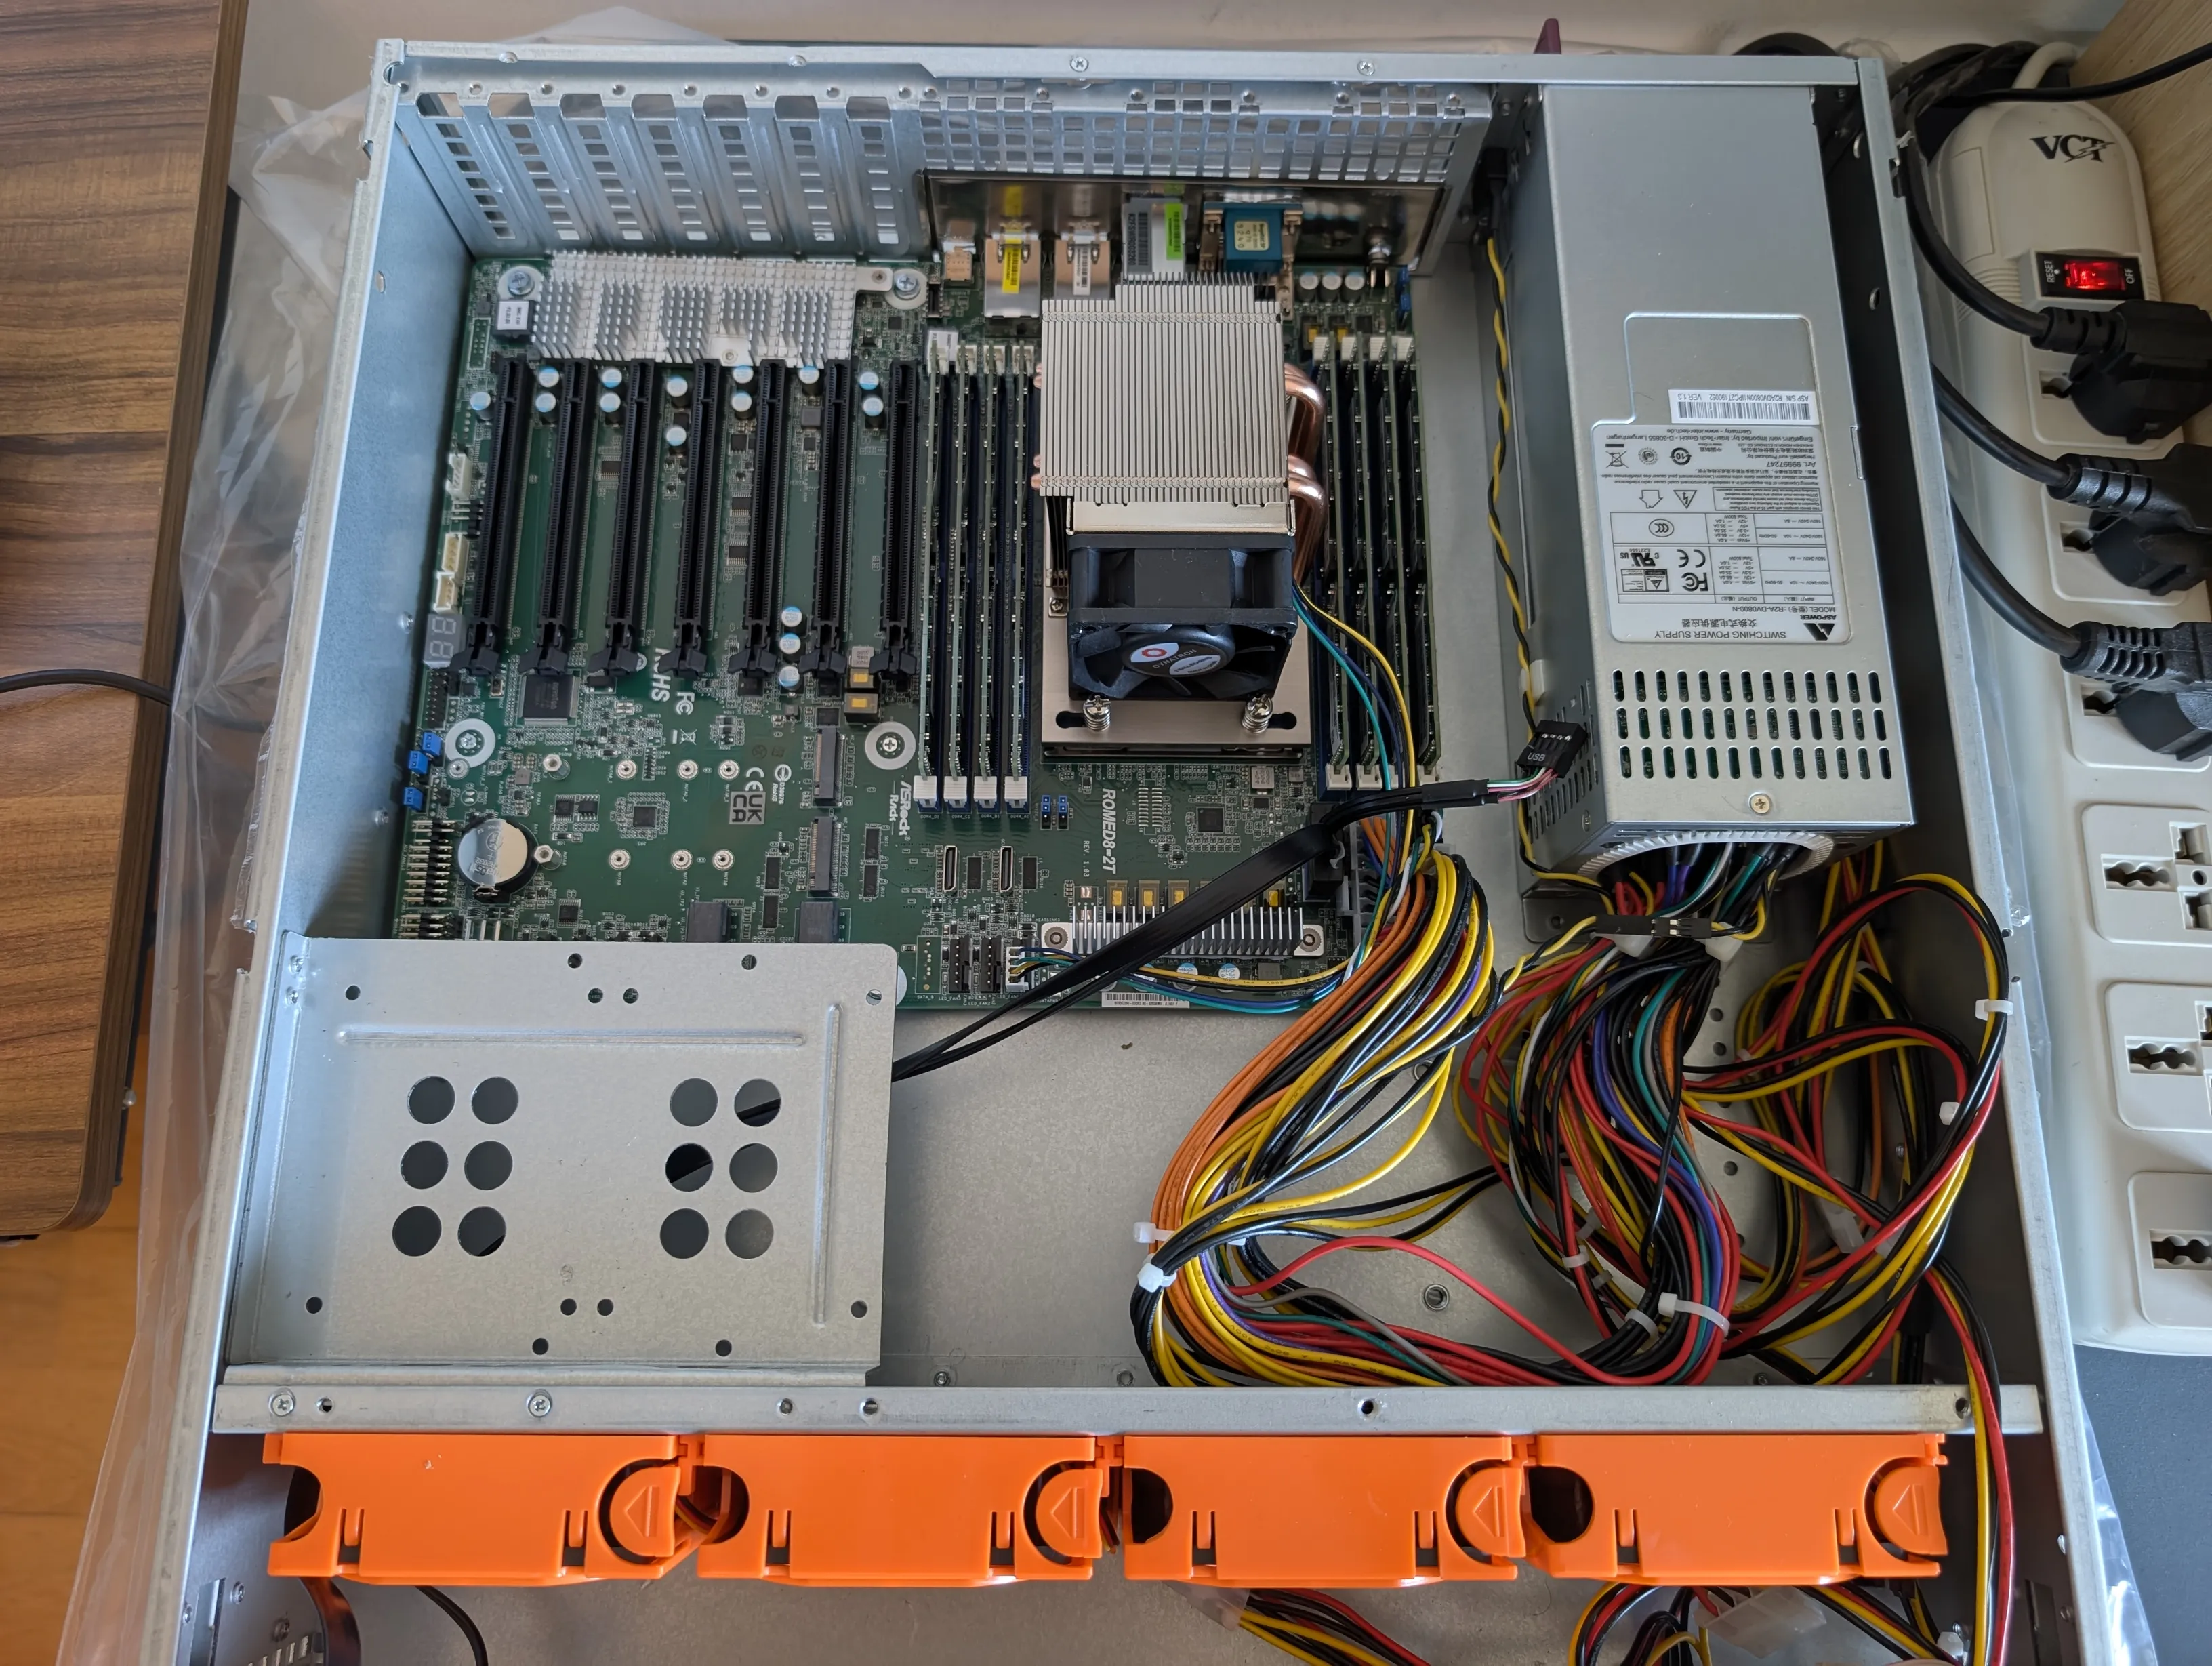
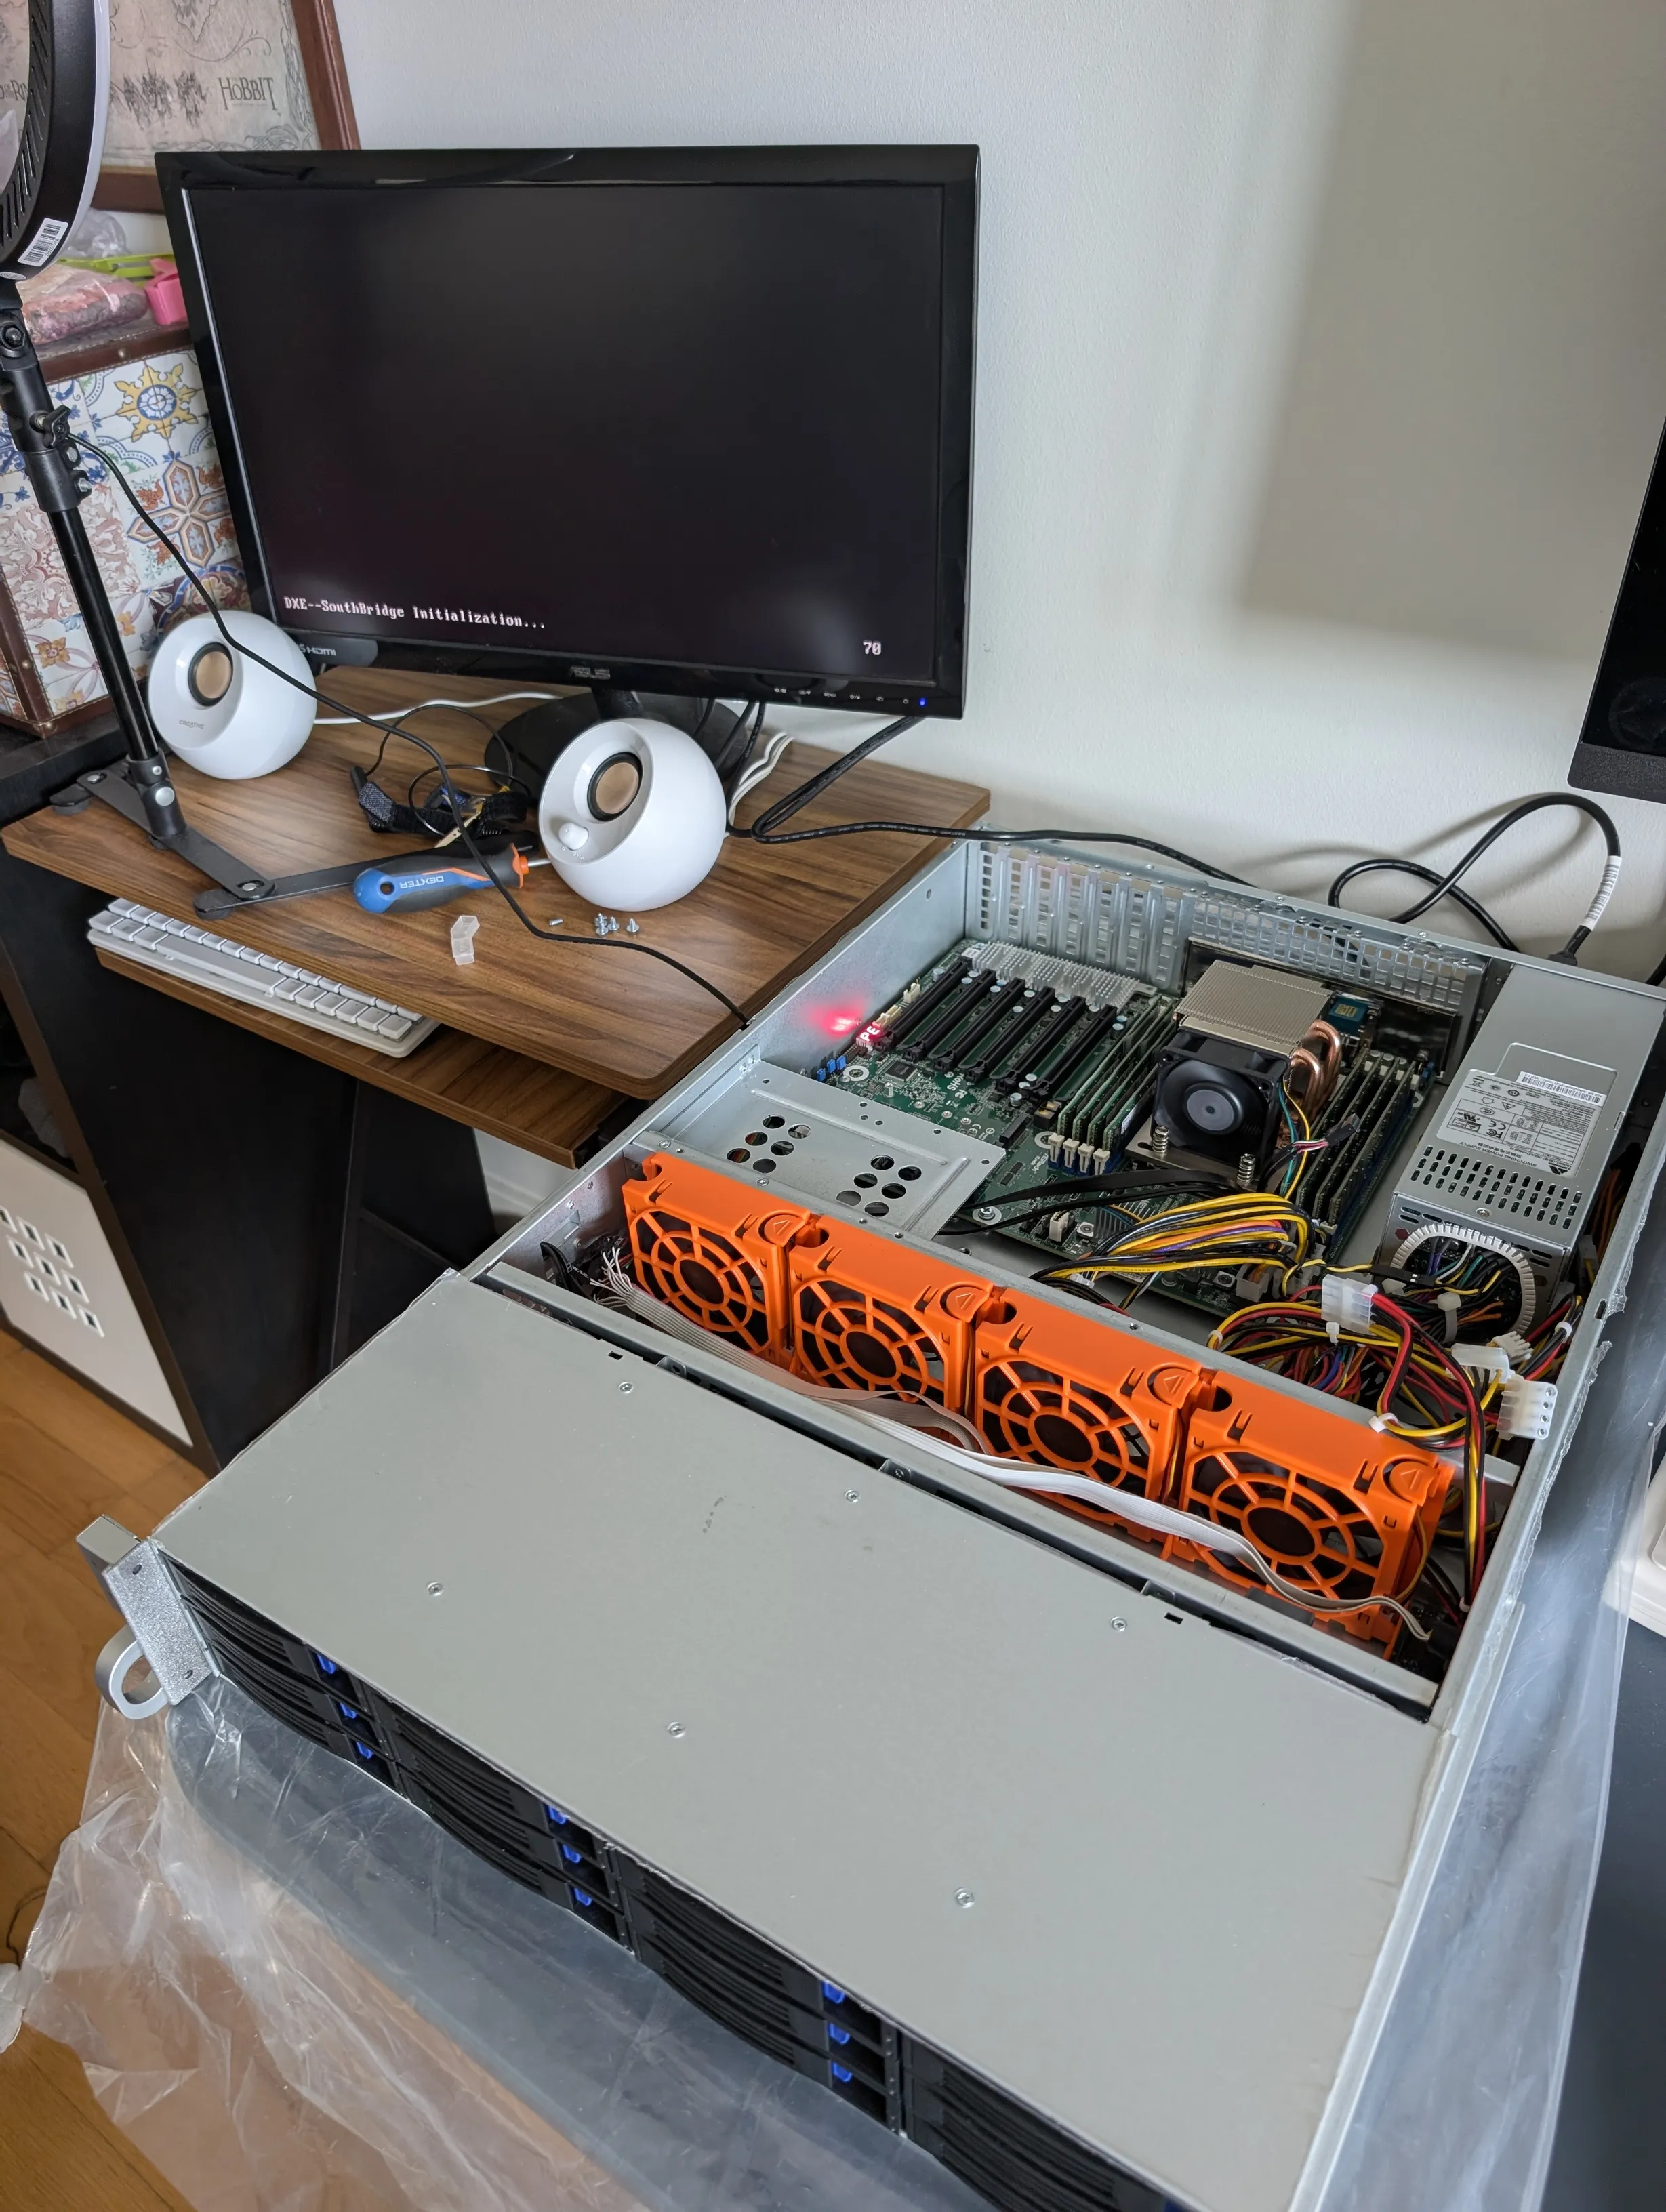
Although this wasn’t my first computer, I still made several mistakes, some of them quite embarrassing. I’m listing them below in case they serve as a lesson to somebody else:
Mistake #1: EPYC CPU plastic cover
When inserting the AMD EPYC CPU I didn't remove the plastic cover that came in the motherboard slot. No matter that there is a big fat warning on the plastic, I was a bit rushed and missed it.
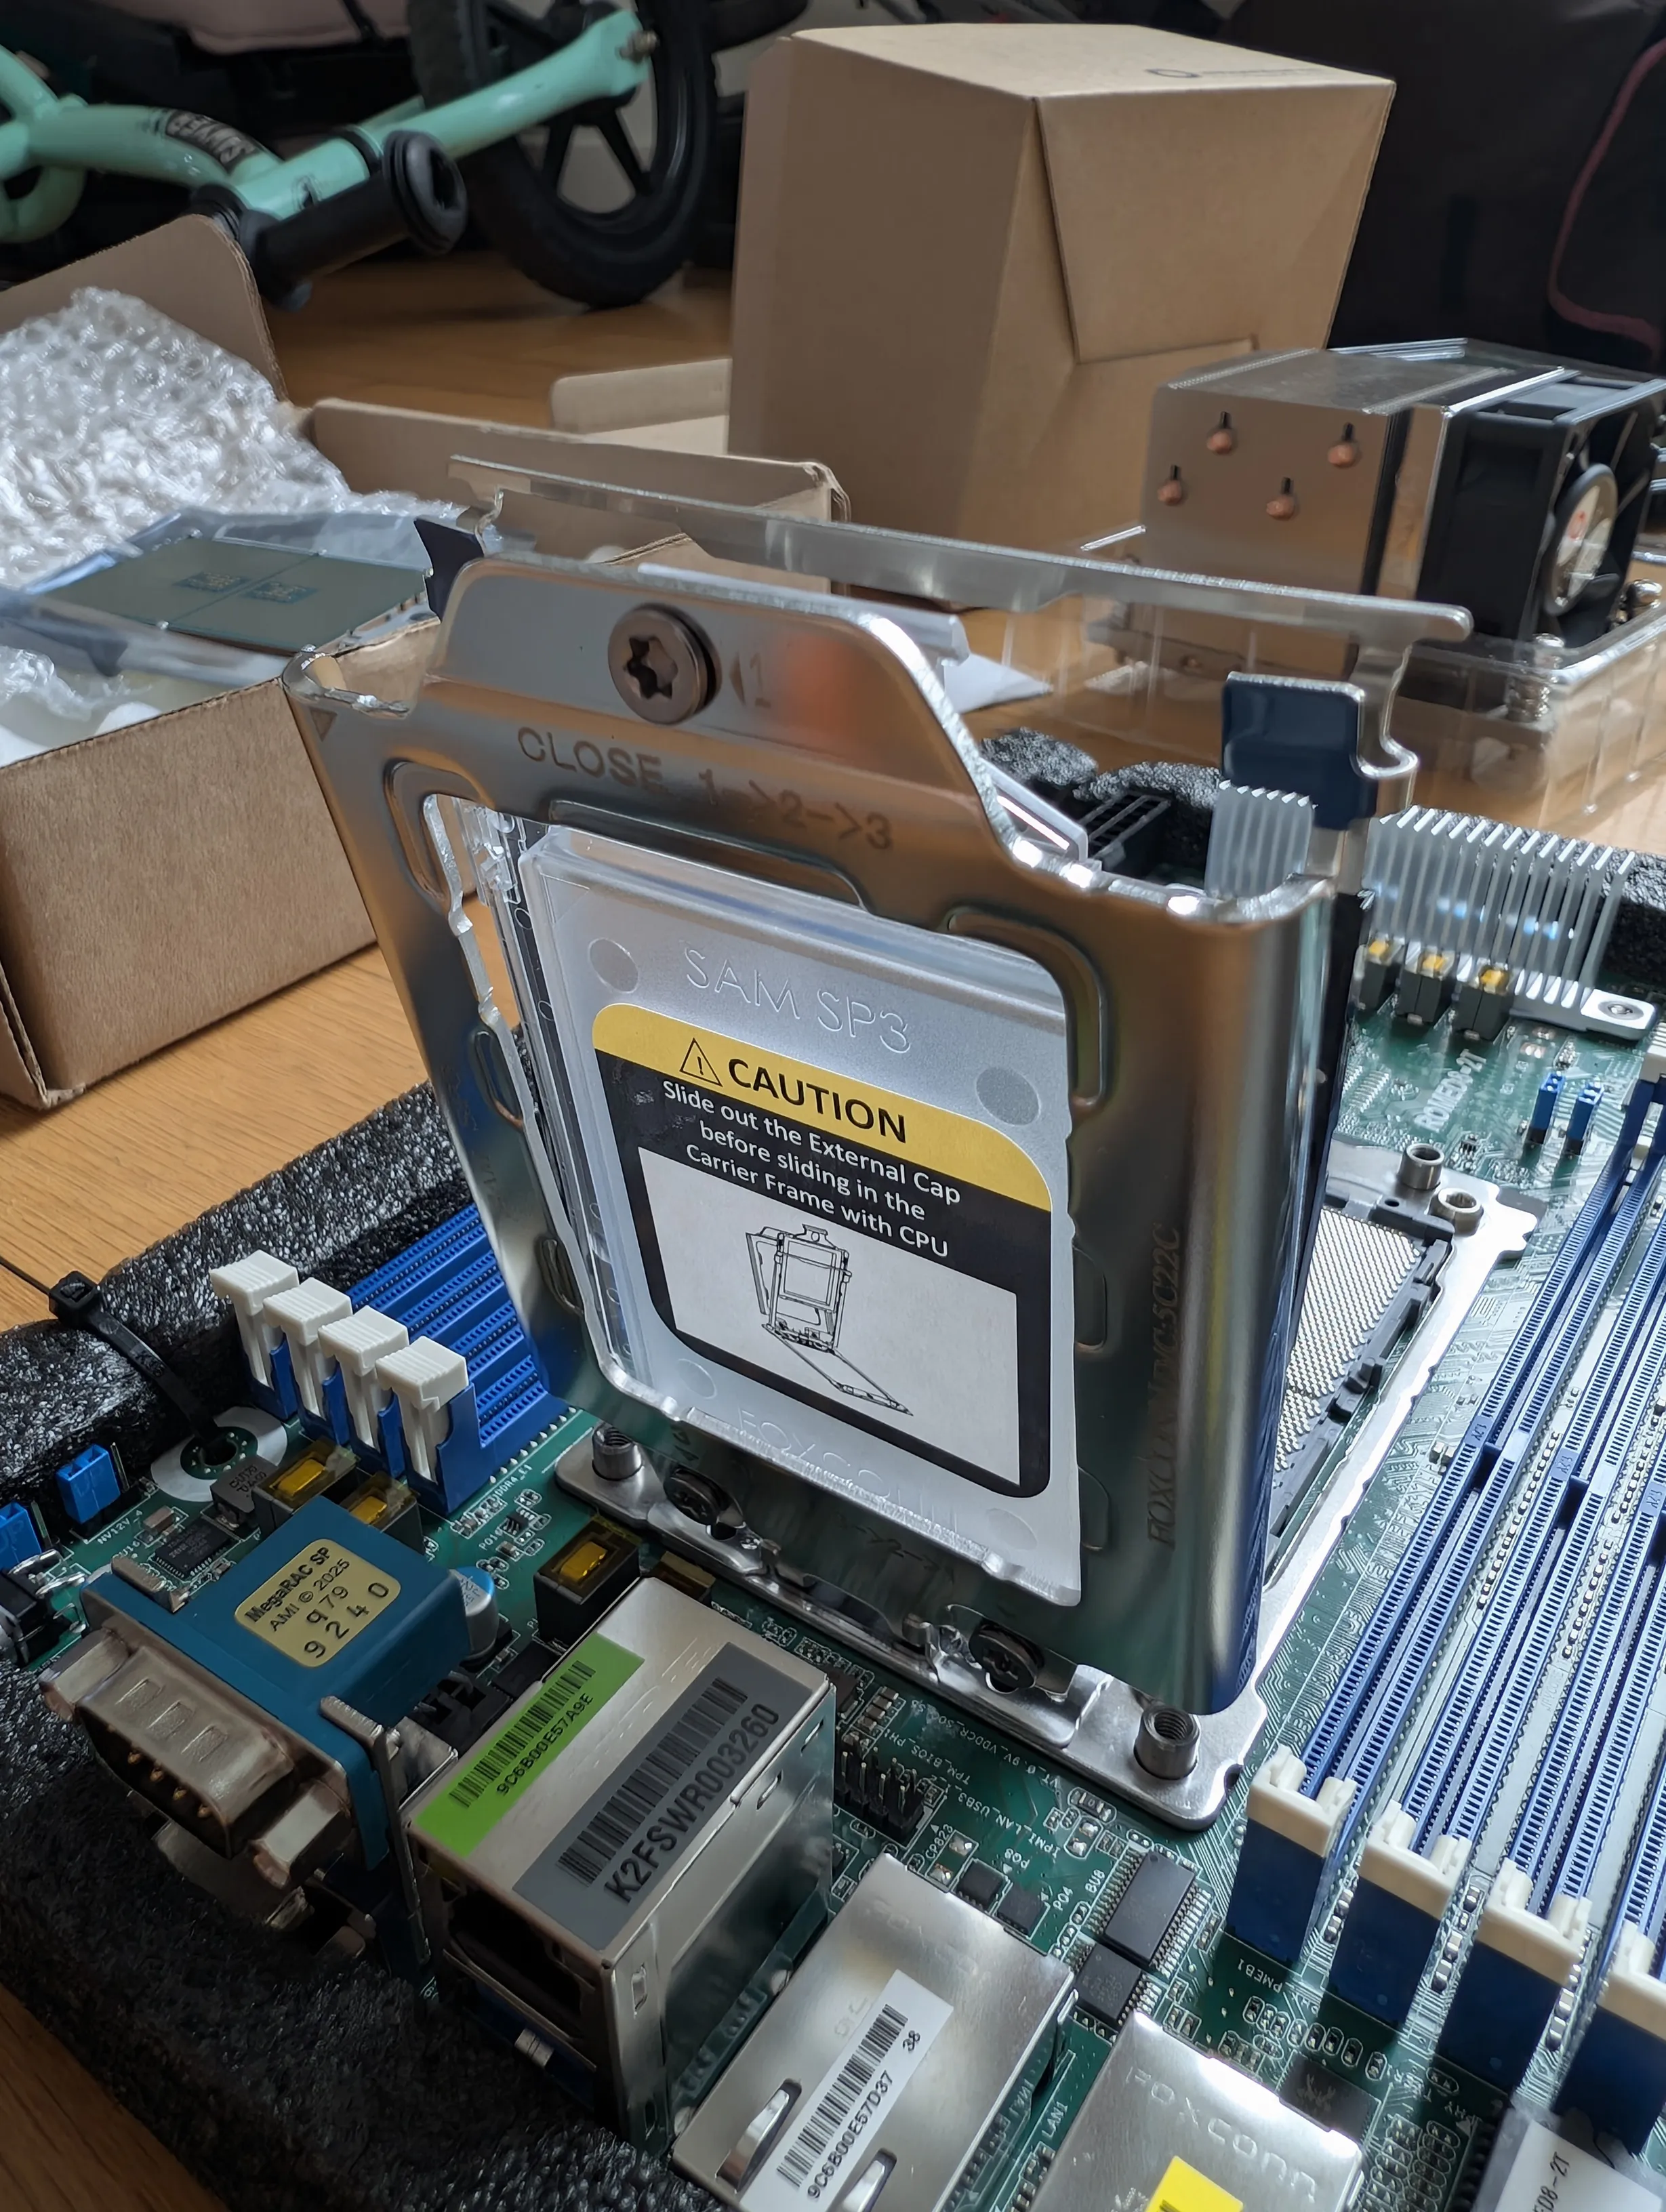
I corrected it and installed the CPU. However when I booted it for the first time it wasn't recognizing one of the RAM sticks. 😱
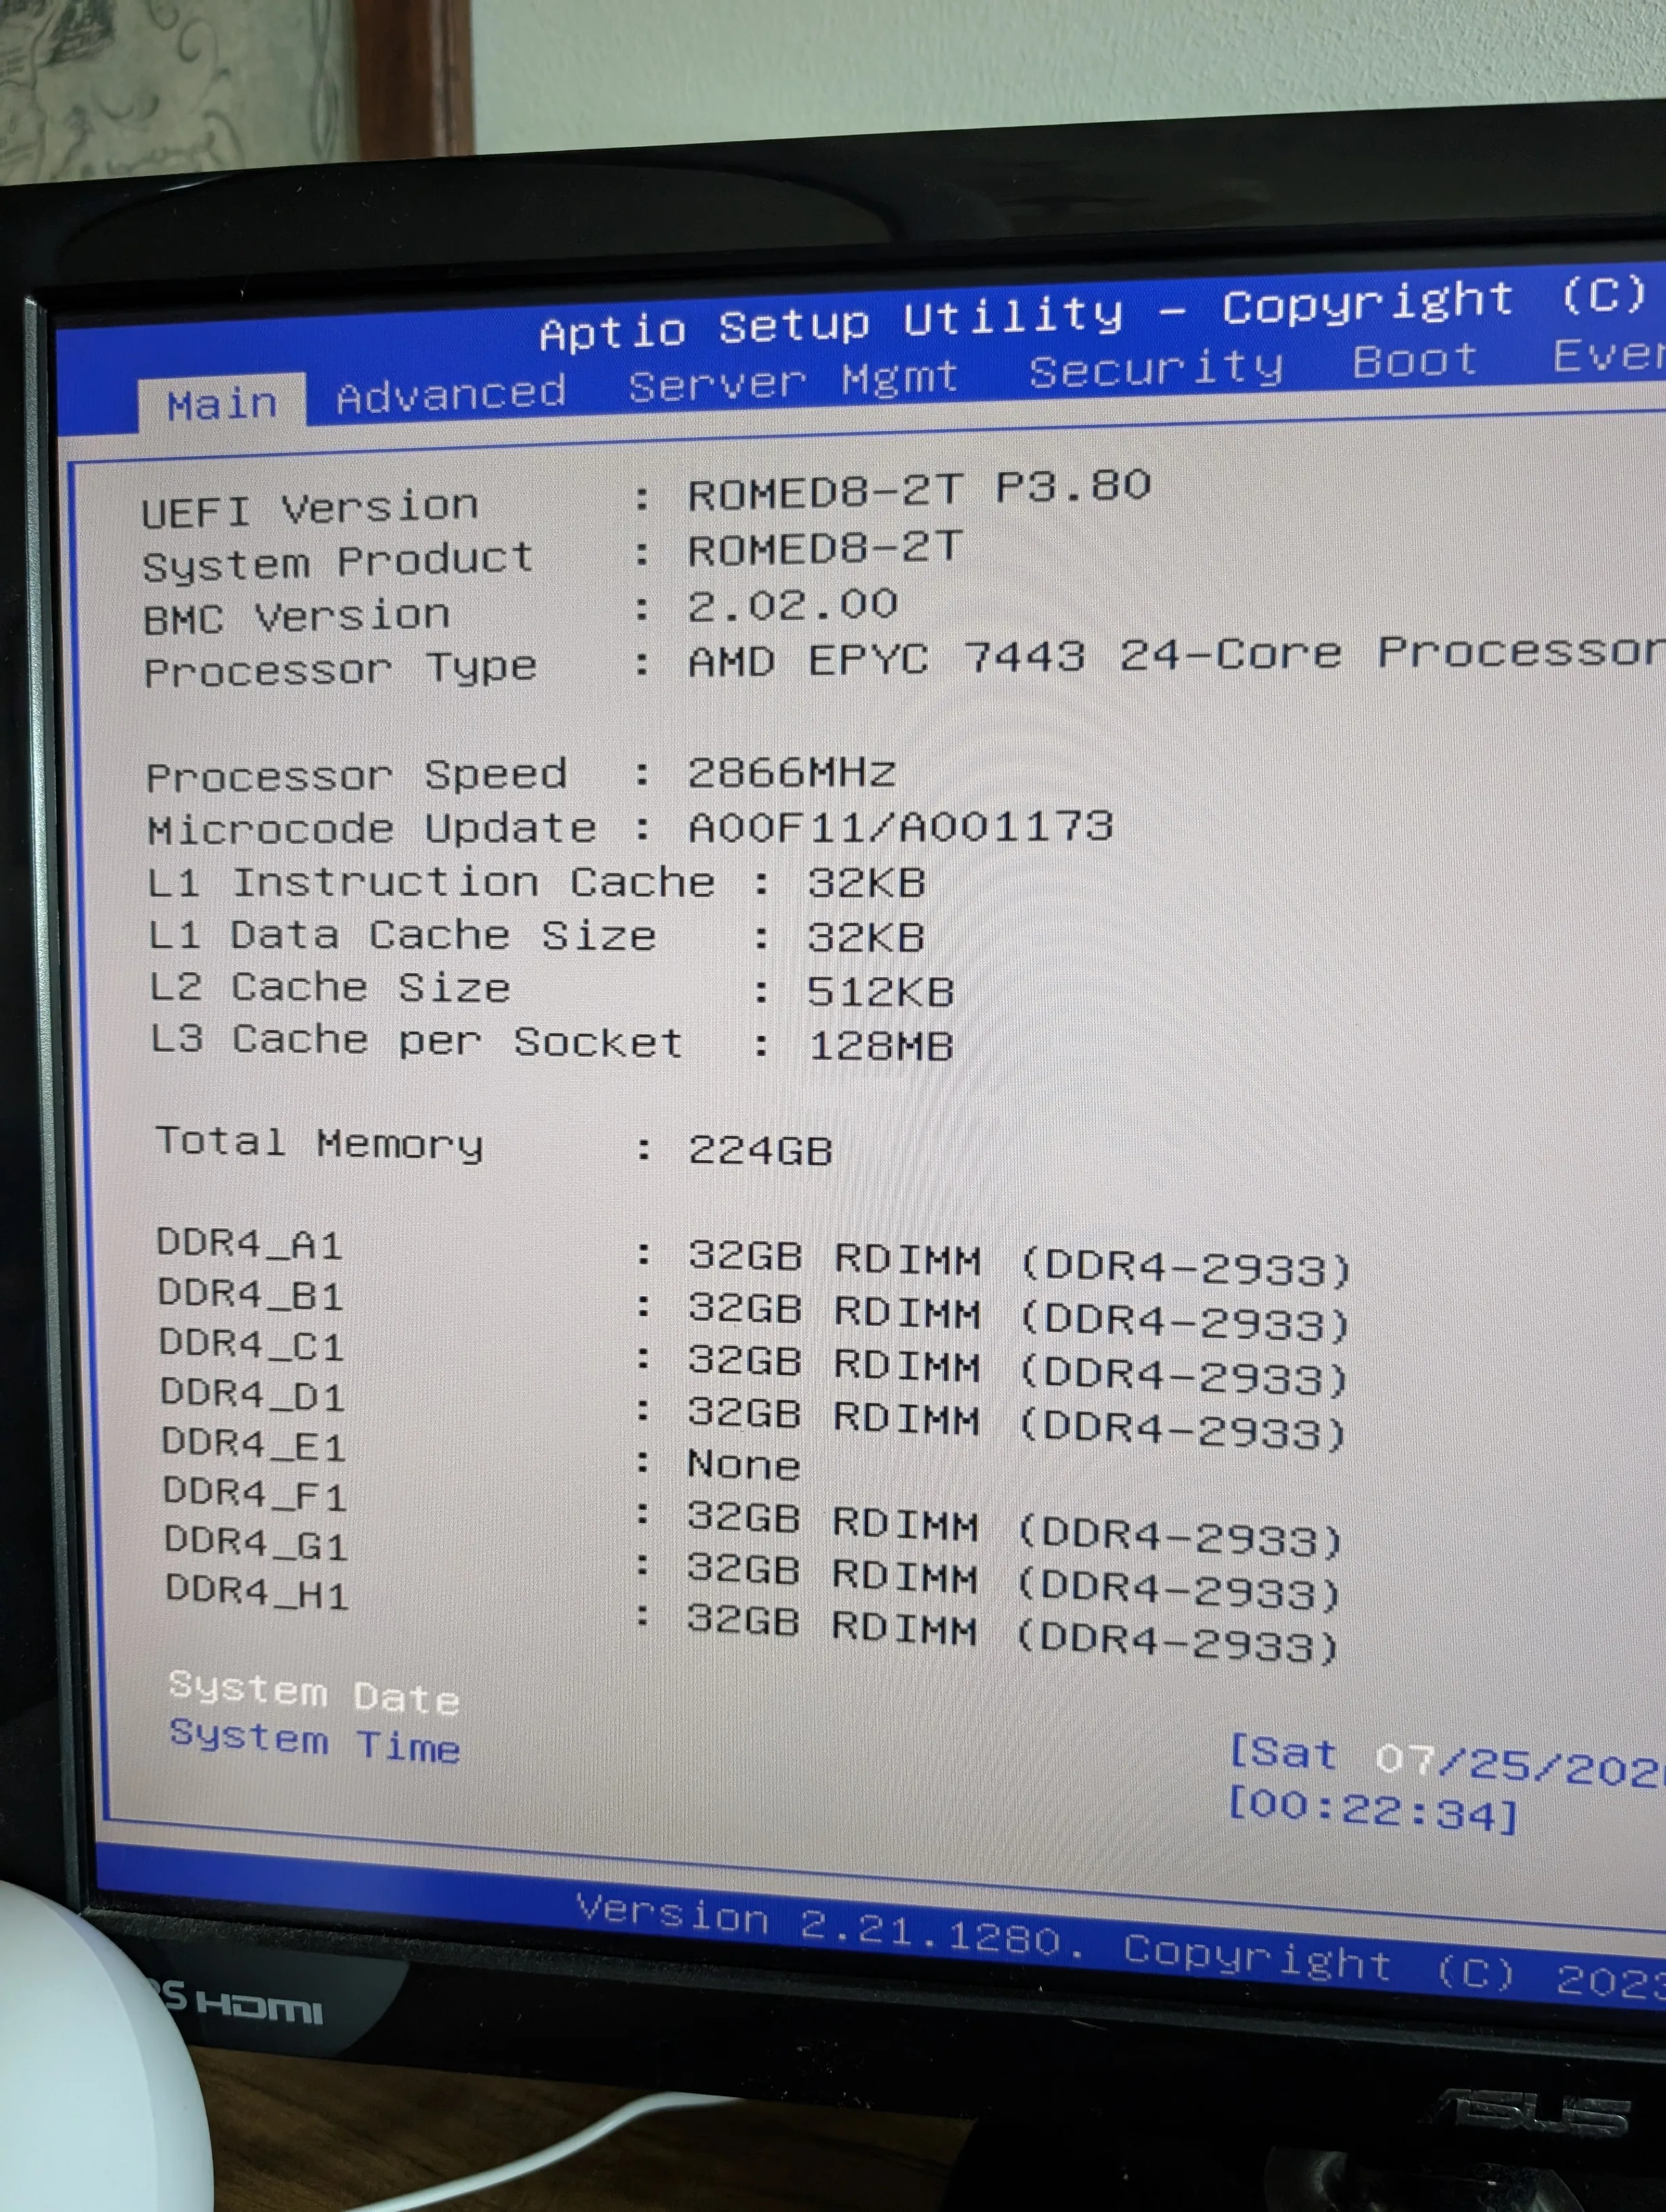
I first tried the reasonable thing: switch the position of the RAM modules, because it could be a faulty module. However I noticed that no matter the module that was installed, it was always the same RAM channel that was not being recognized.
After some online surfing, I got to the real problem: one of the pins in the CPU socket had bent due to the plastic cover! I looked closely at the 4096 pins in the SP3 socket with a magnifying glass and found the bent one.
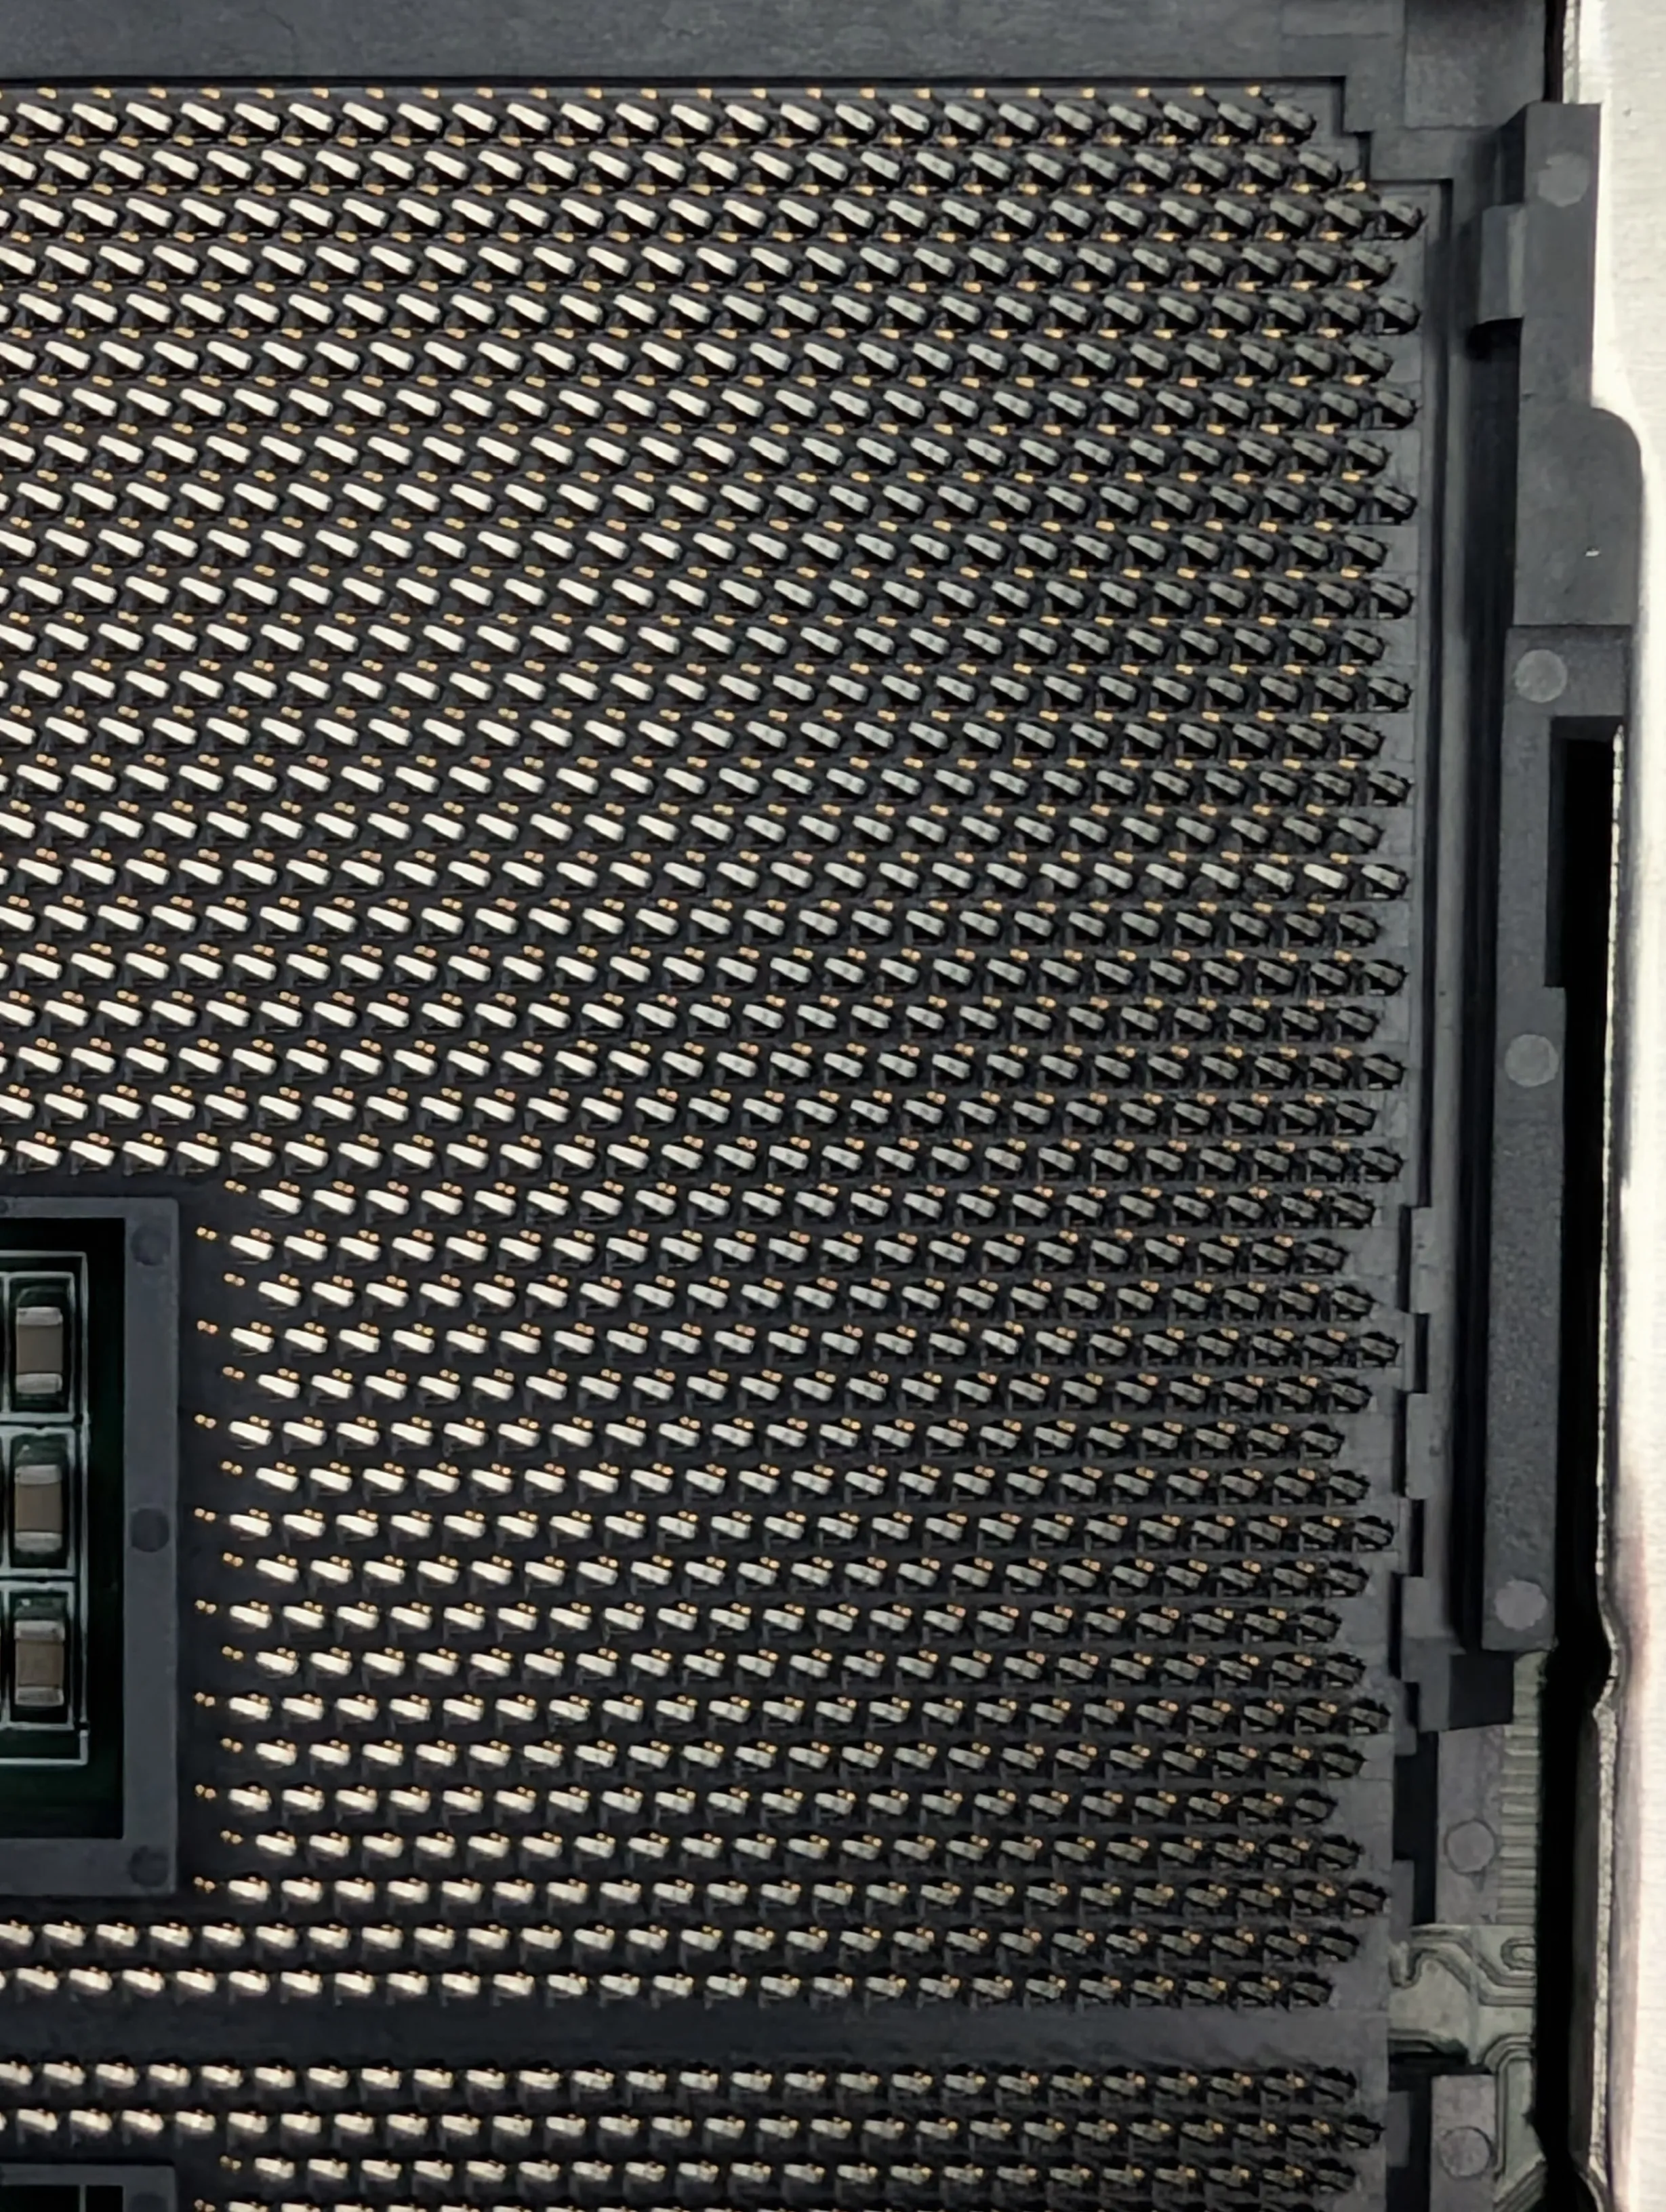
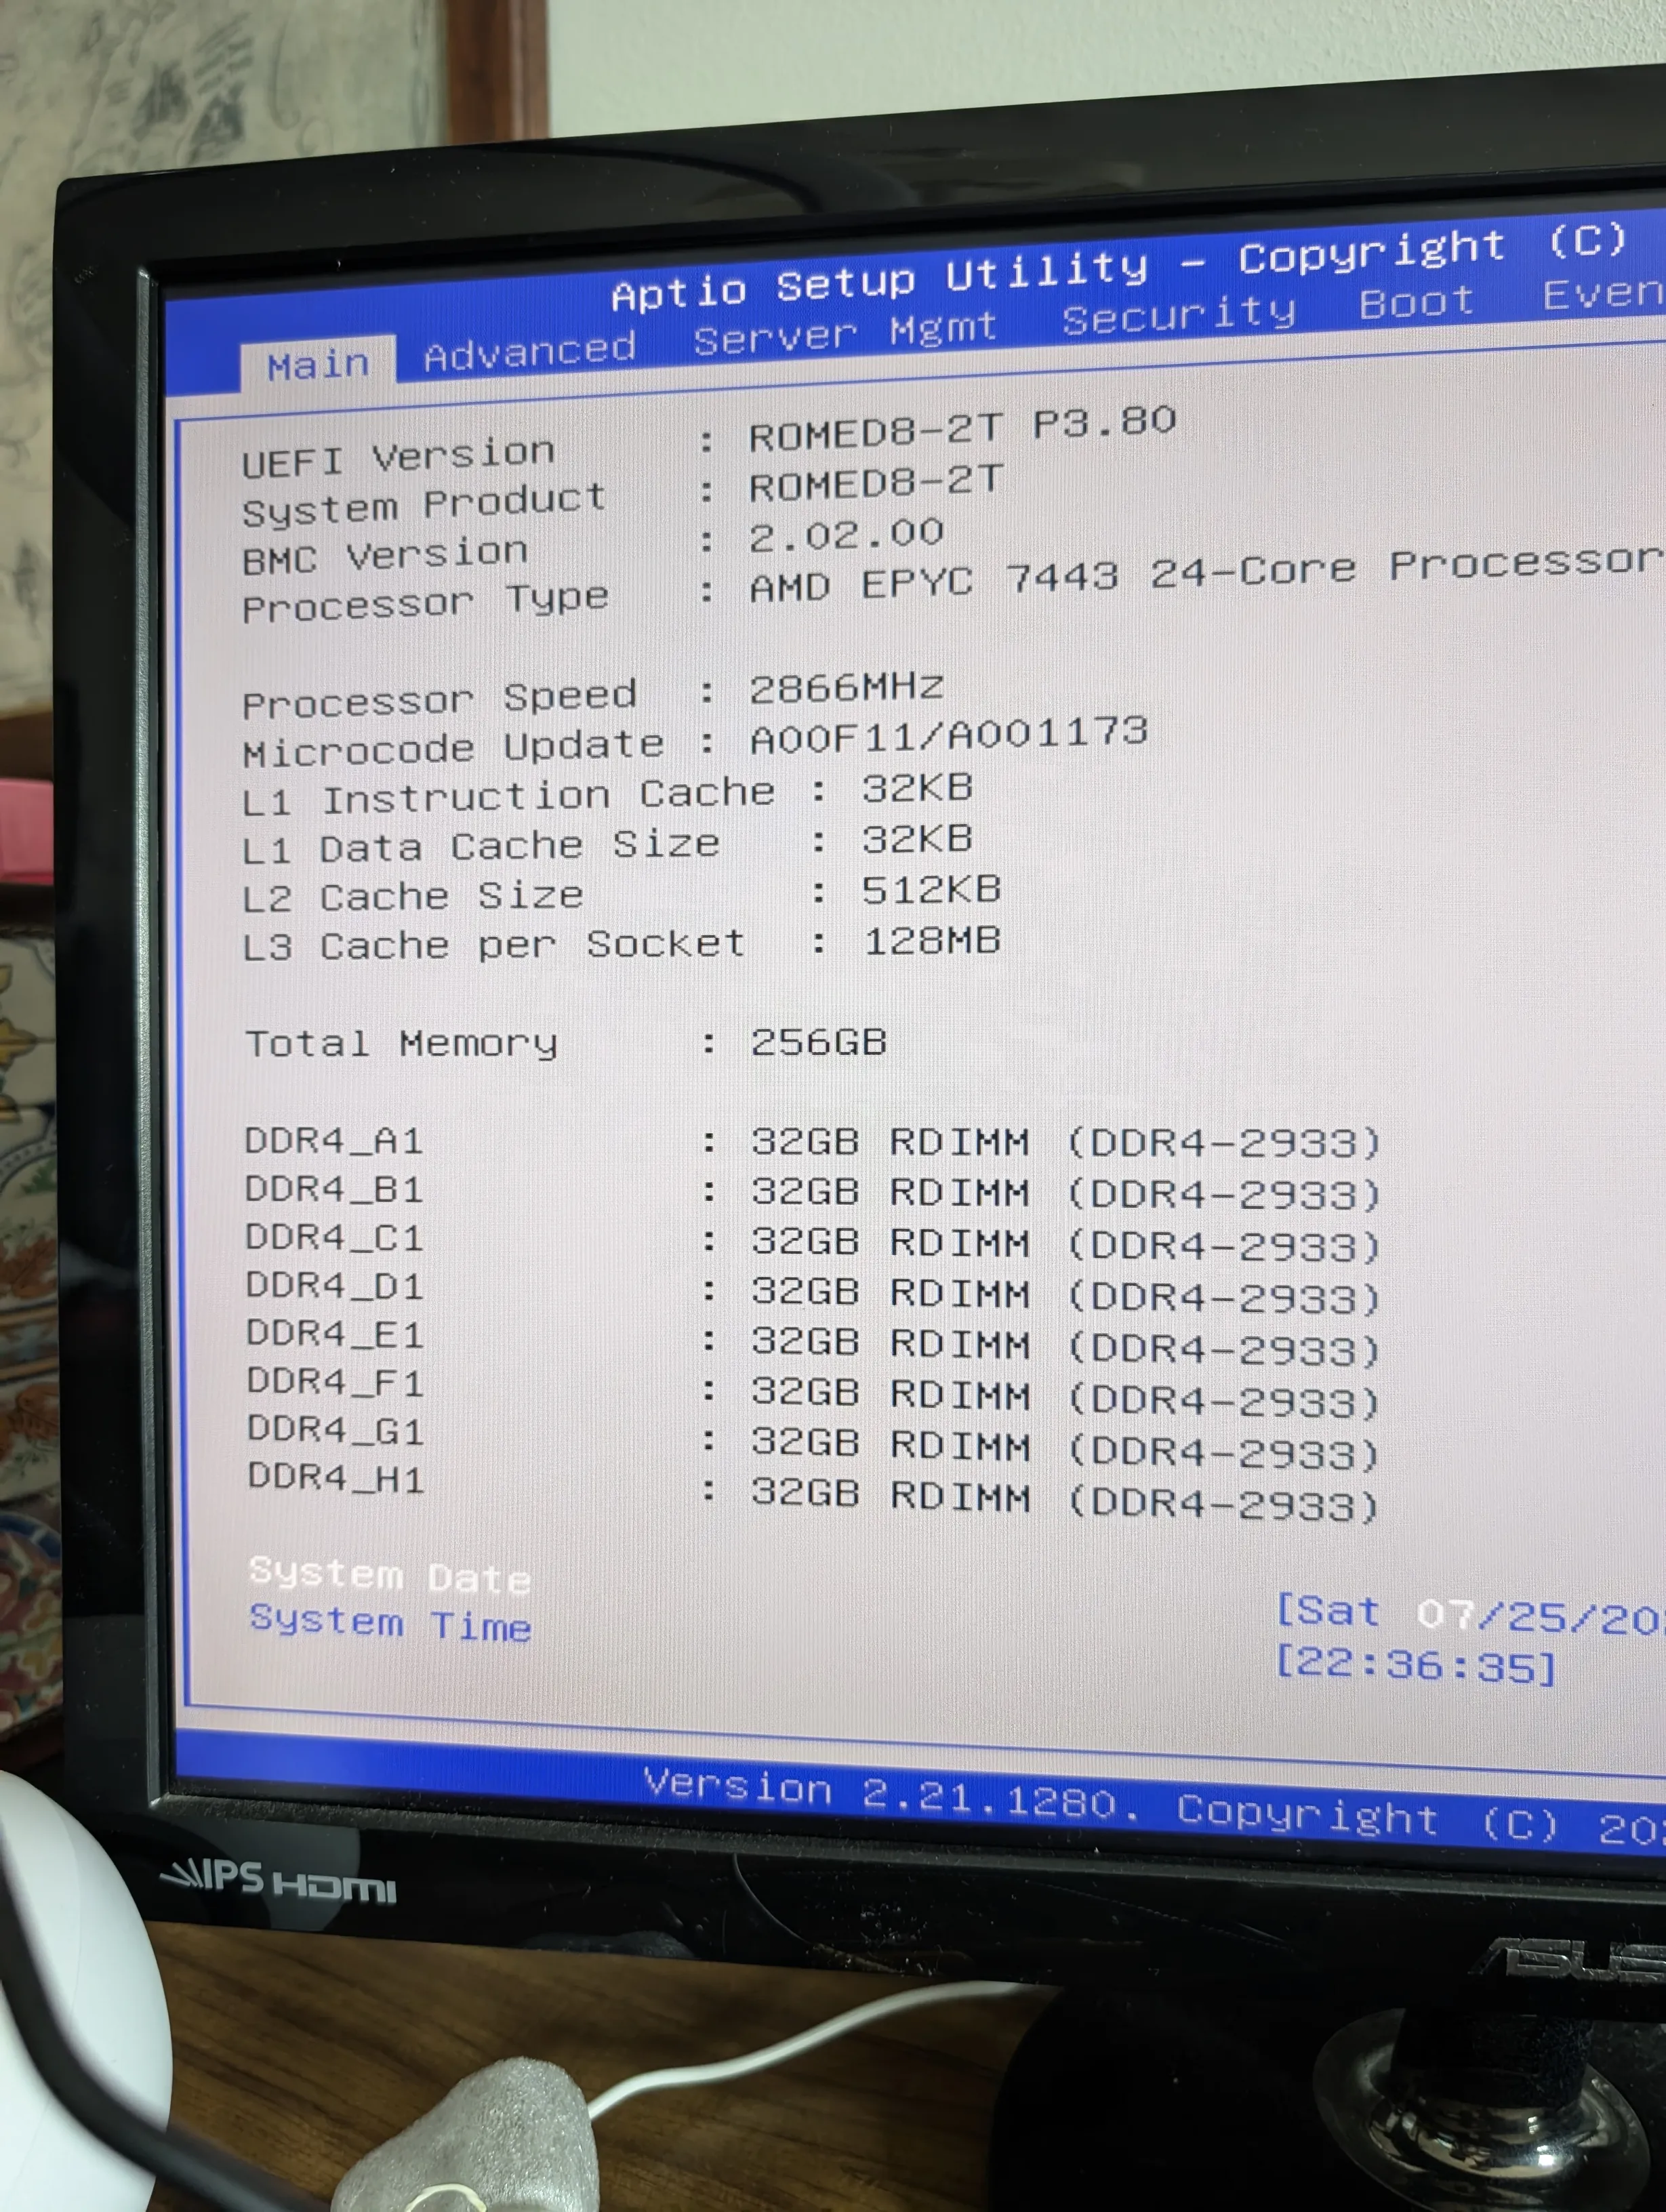
With a pair of fine tweezers and my best pulse I straightened it. Imagine my relief when it worked, it recognized the missing RAM module!
Mistake #2: CRPS PSUs wouldn't fit
The chassis came with a bracket installed where the PSUs should go, but they wouldn't fit. Turns out I needed to unscrew the bracket and add two other brackets that came with the CRPS PSU.
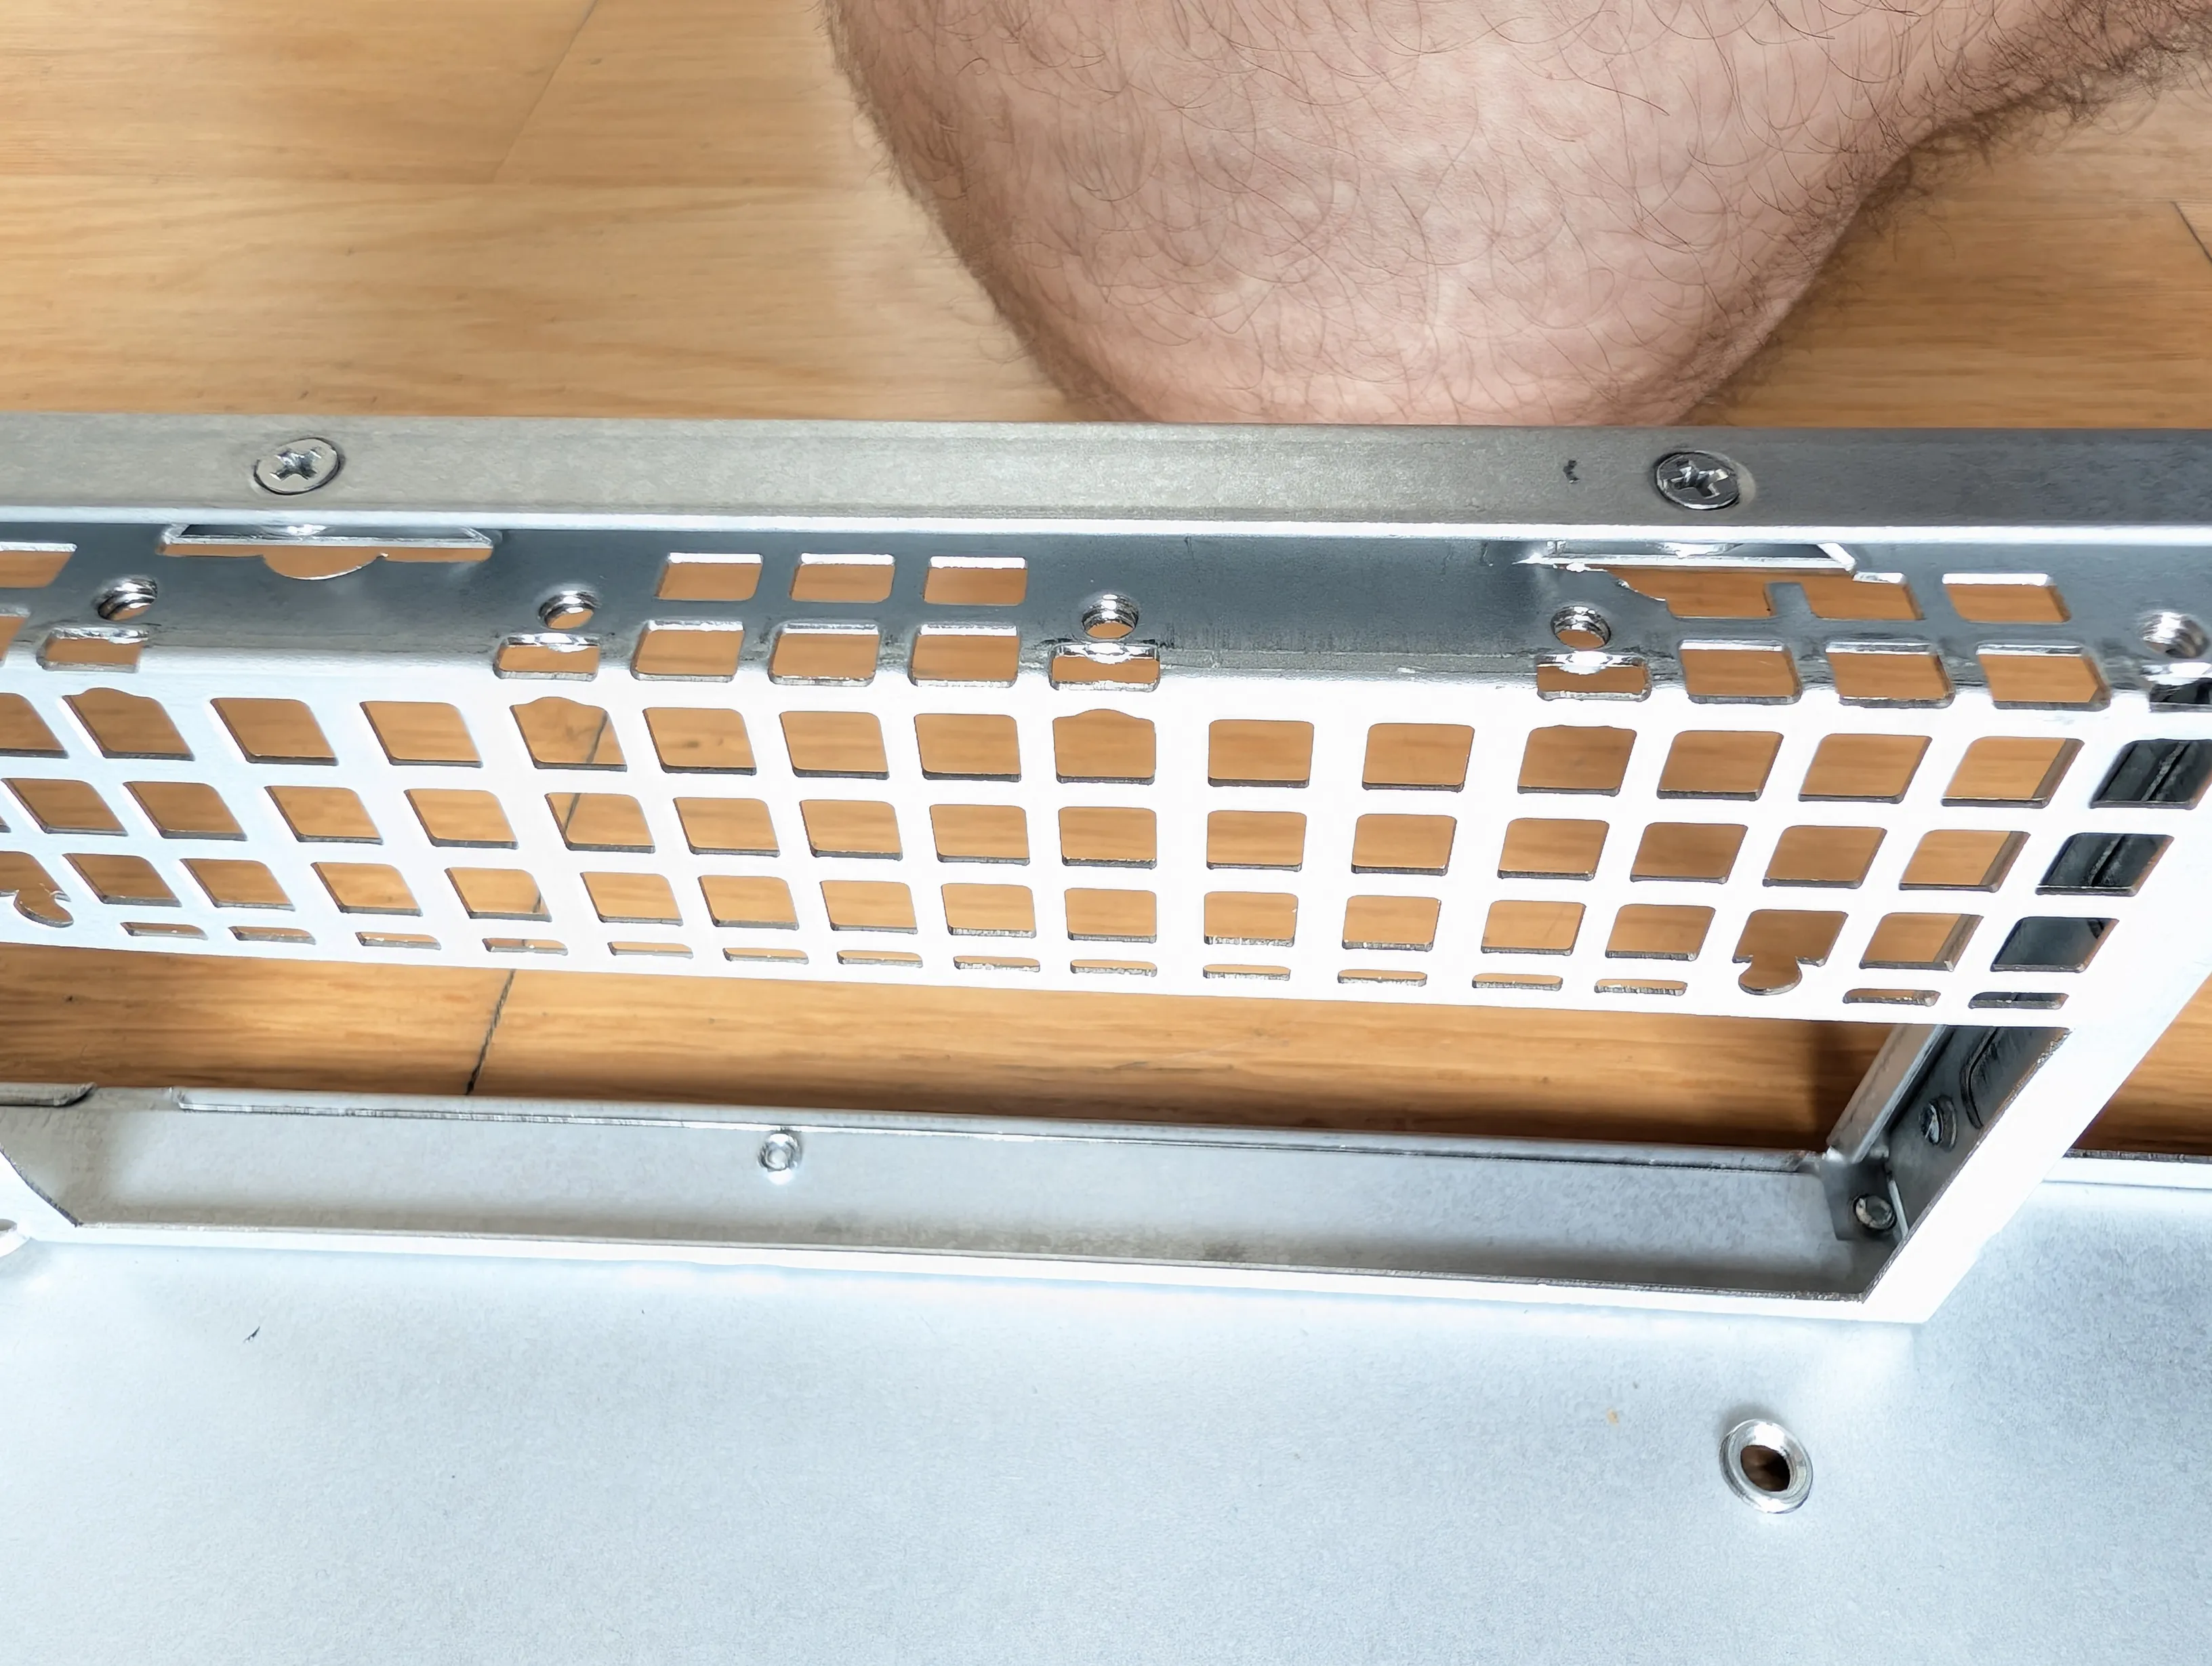
There were literally zero instructions about any of this. I know I'm very green at this rack-mounted hardware world, but come on, at least have a small instruction manual (even online!)
Mistake #3: Chassis needs special screws to support the motherboard
I thought the motherboard, but the screws wouldn't hold. Turns out the chassis included other set of screws that are meant to go between the chassis and the motherboard.
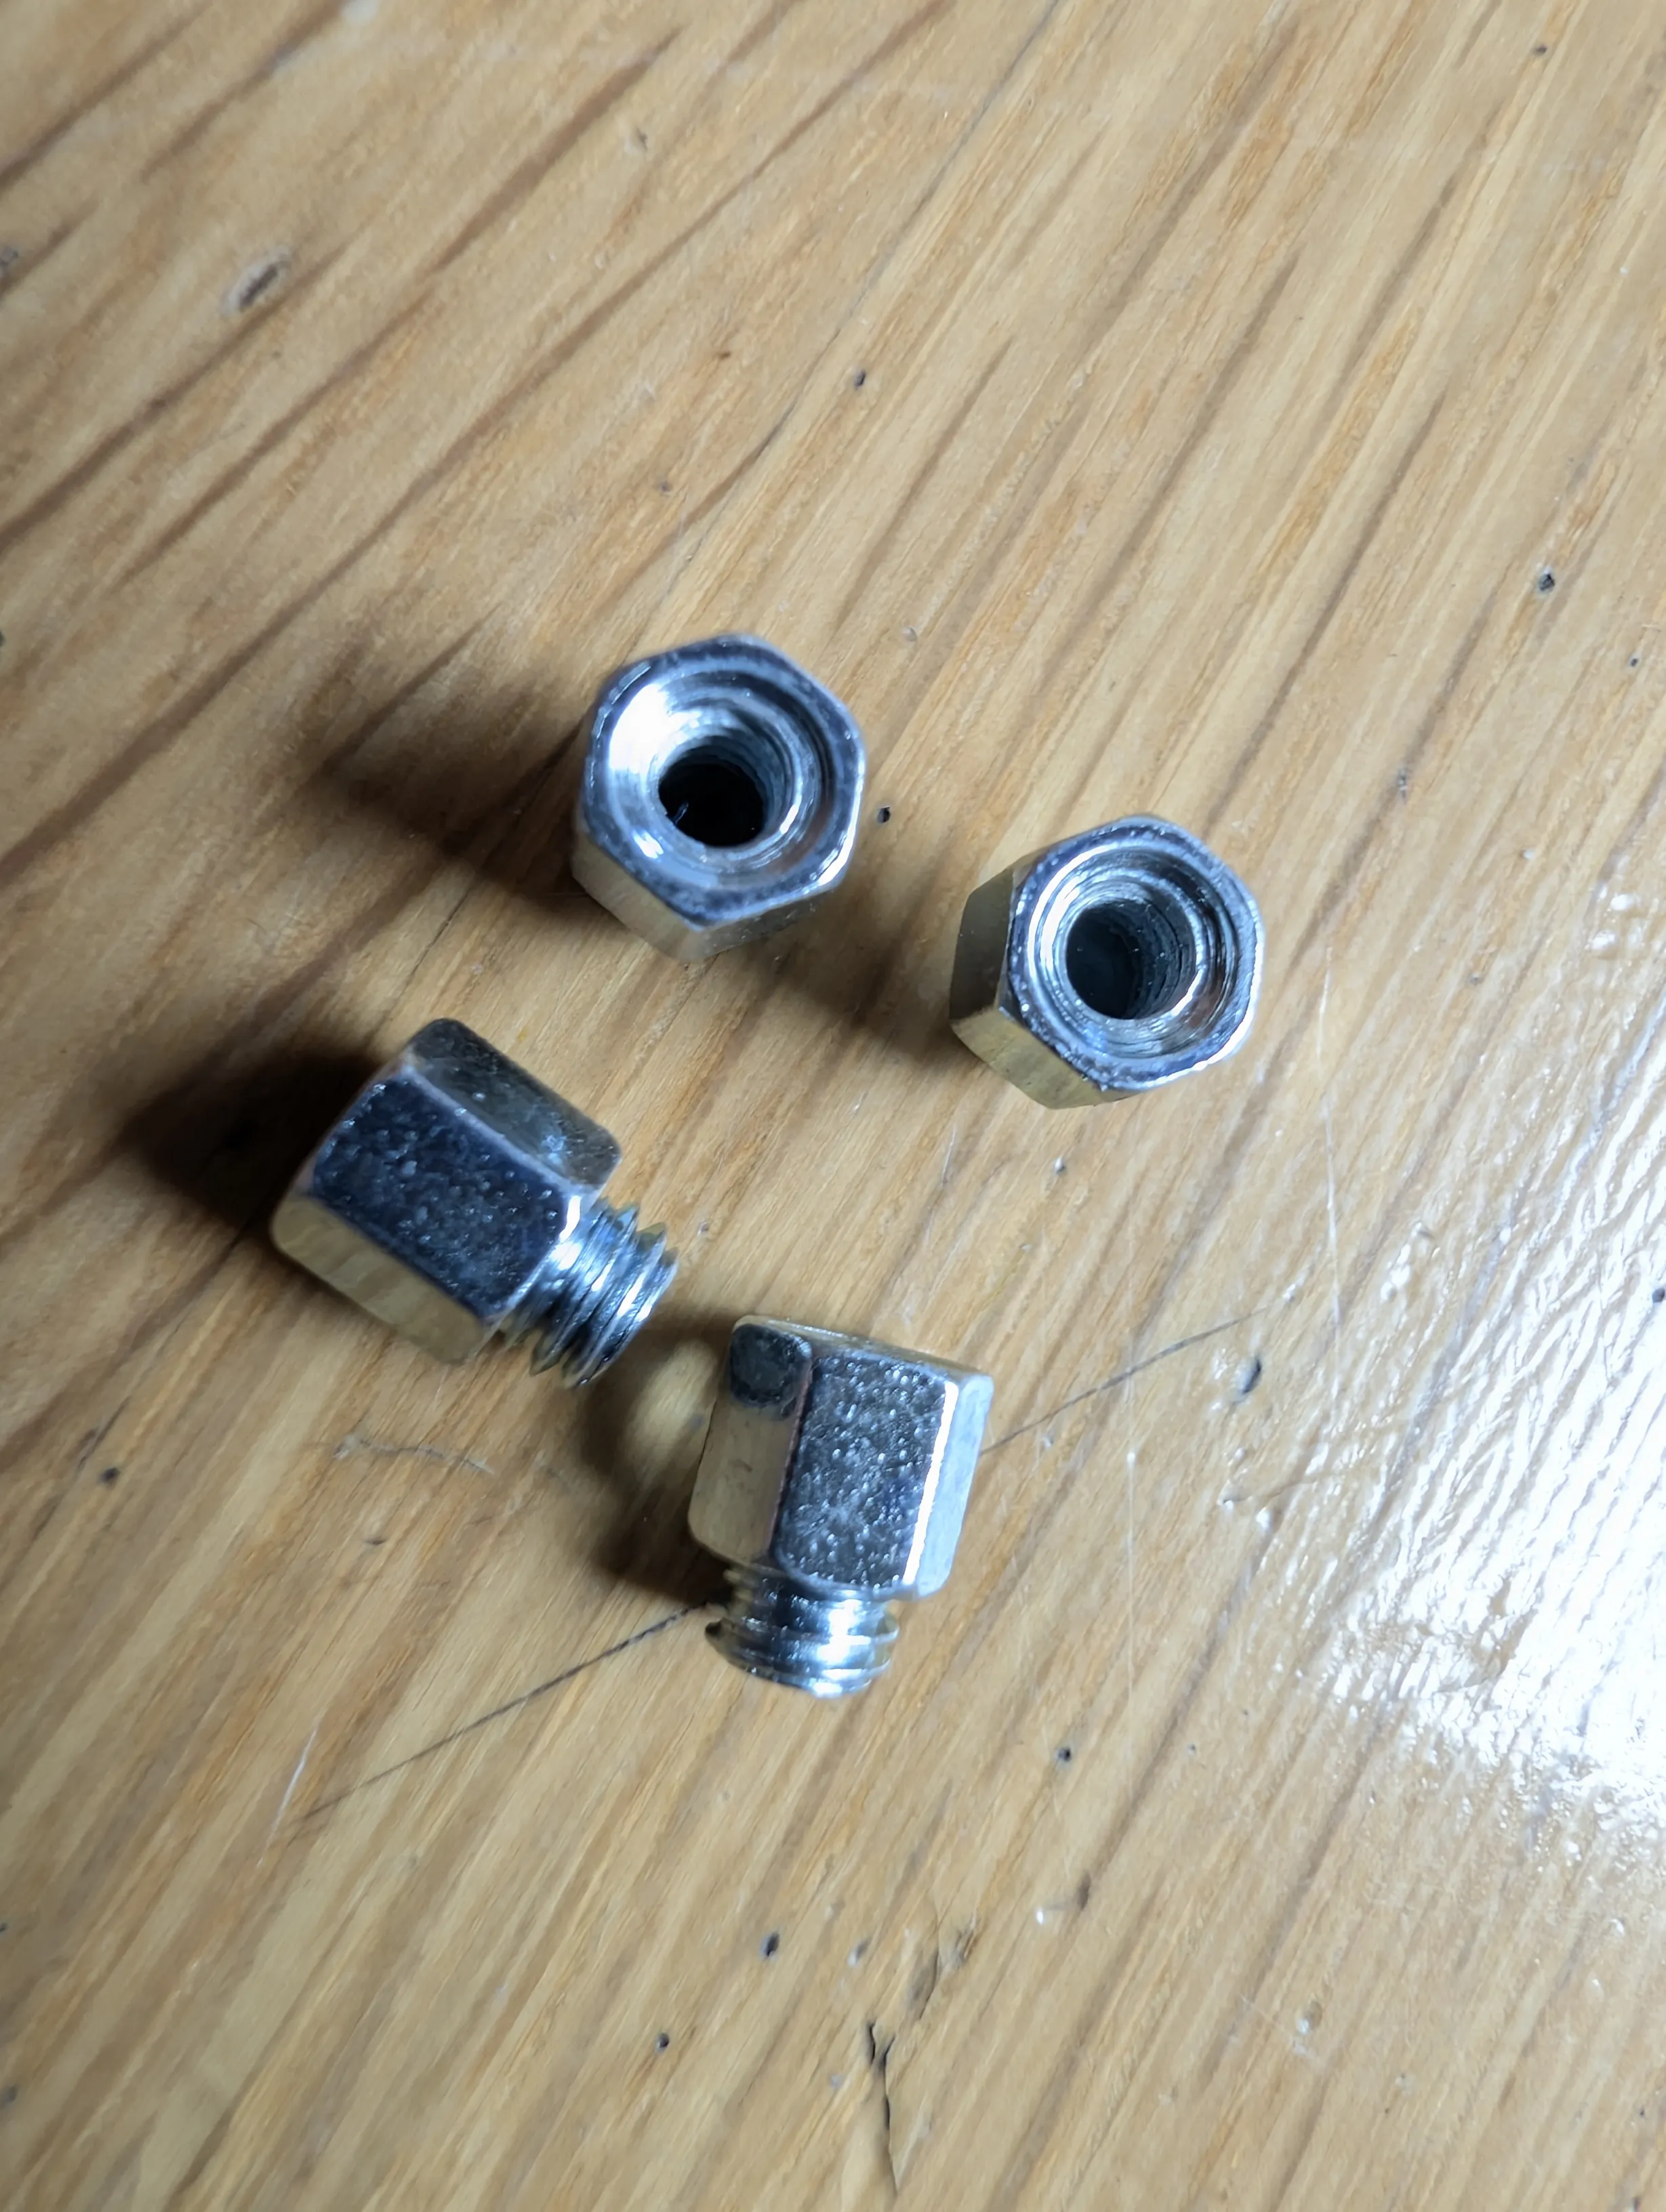
Again, I'm new at this stuff.
Mistake #4: ASRock ROMED8-2T header pins push against the side of the chassis
This one I don't blame myself, but bad design by ASRock.
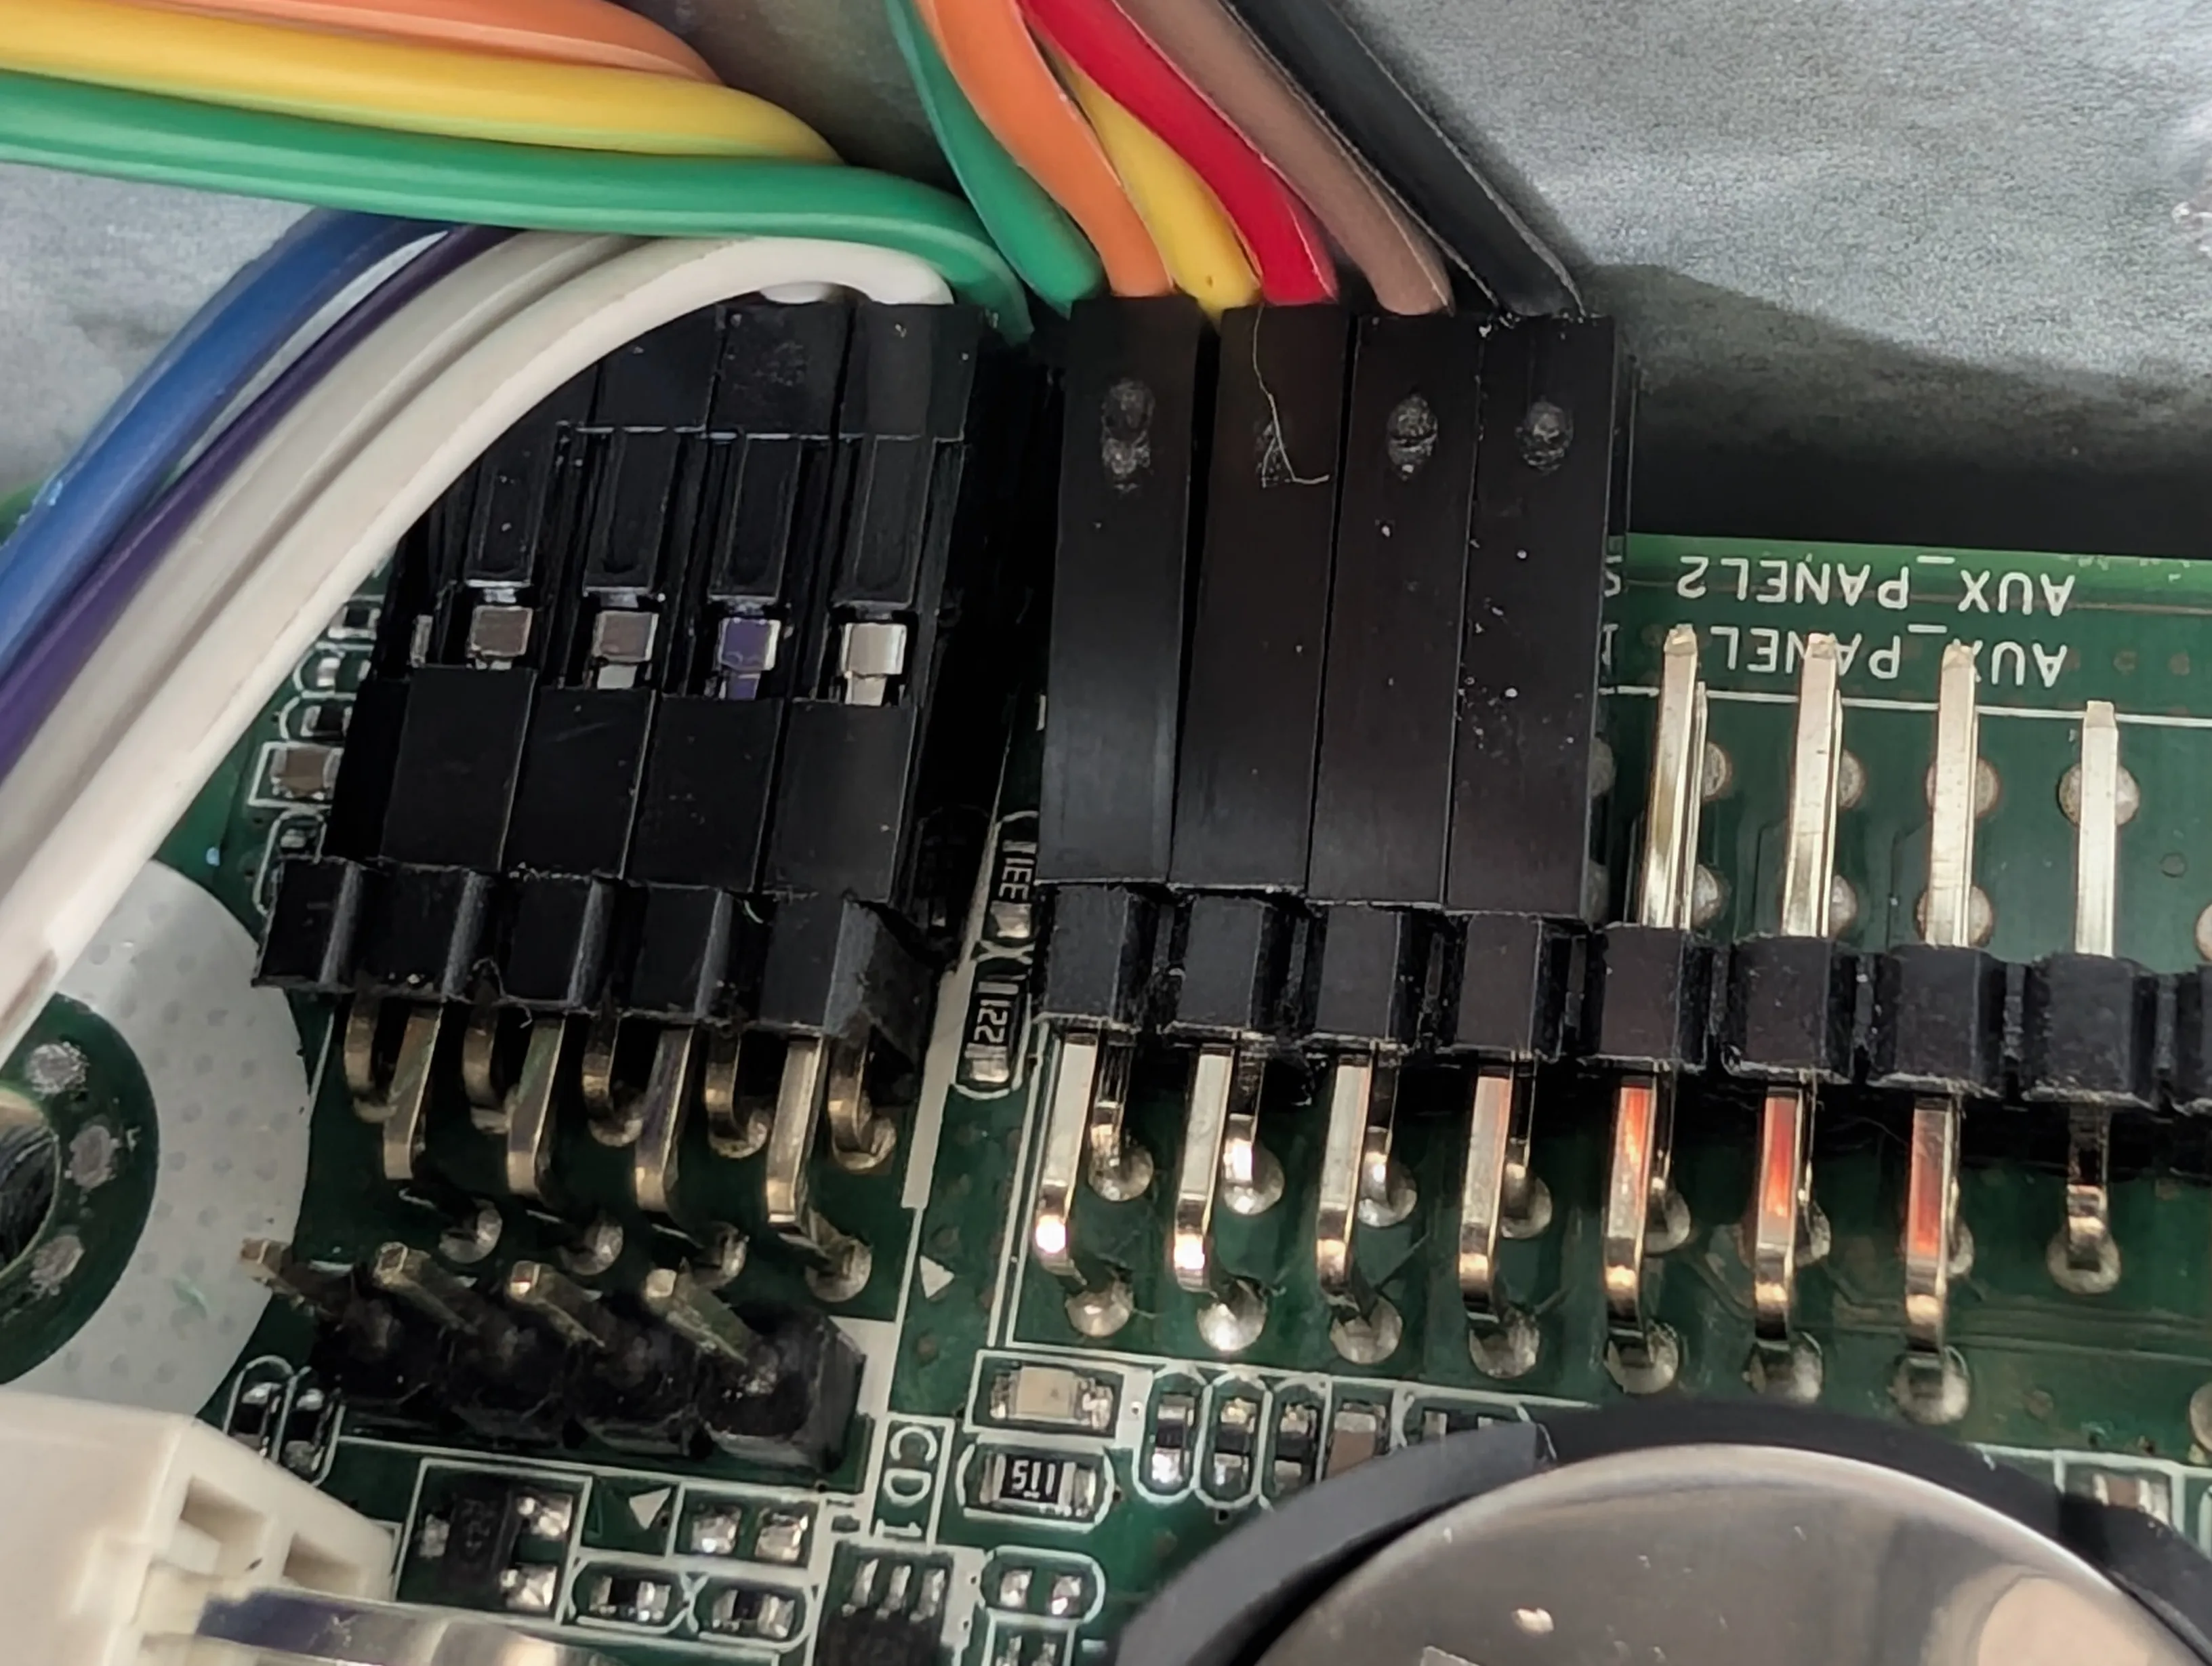
The motherboard header pins point to the side, not up, so there was no space to connect the chassis' front connectors, or rather after connecting them the motherboard wouldn't sit in place.
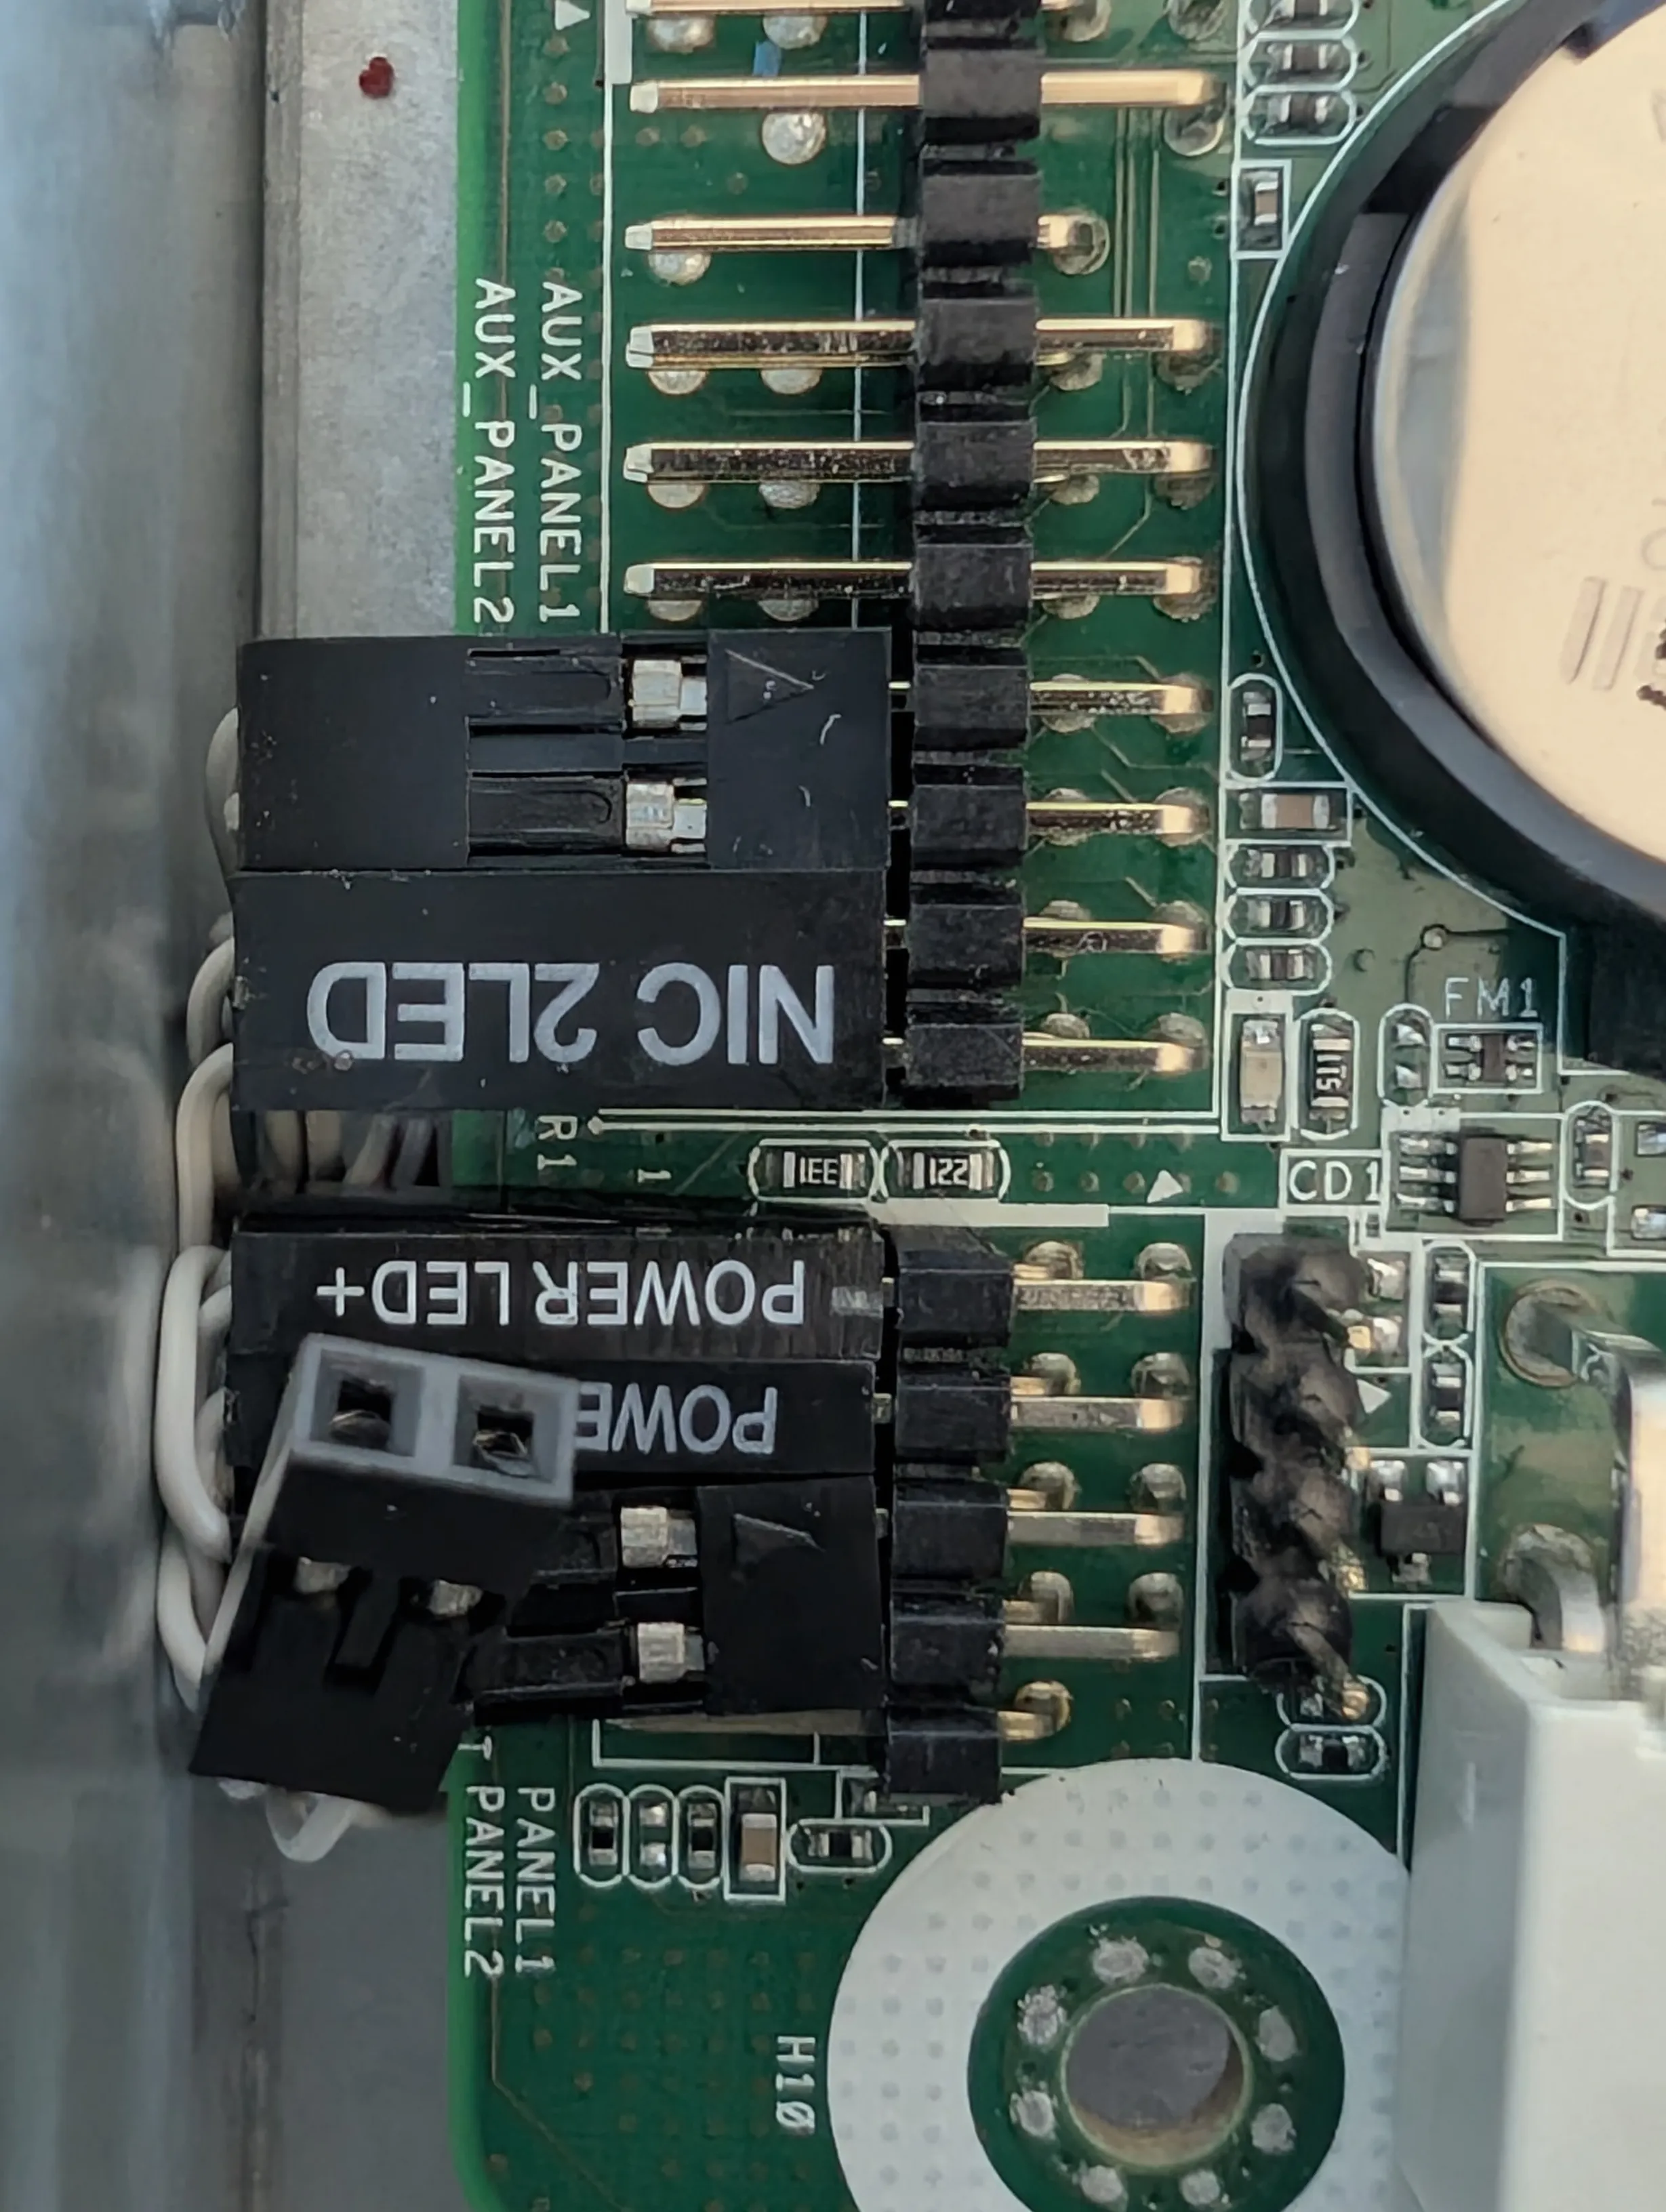
After hunting for ideas online I found that some people buy Dupont-style cables to individually connect the jumper pins. I got some cables and it was a very tight install, but I managed to put the motherboard in place.
Testing
Once everything was set up, I began testing the hardware.
Memory
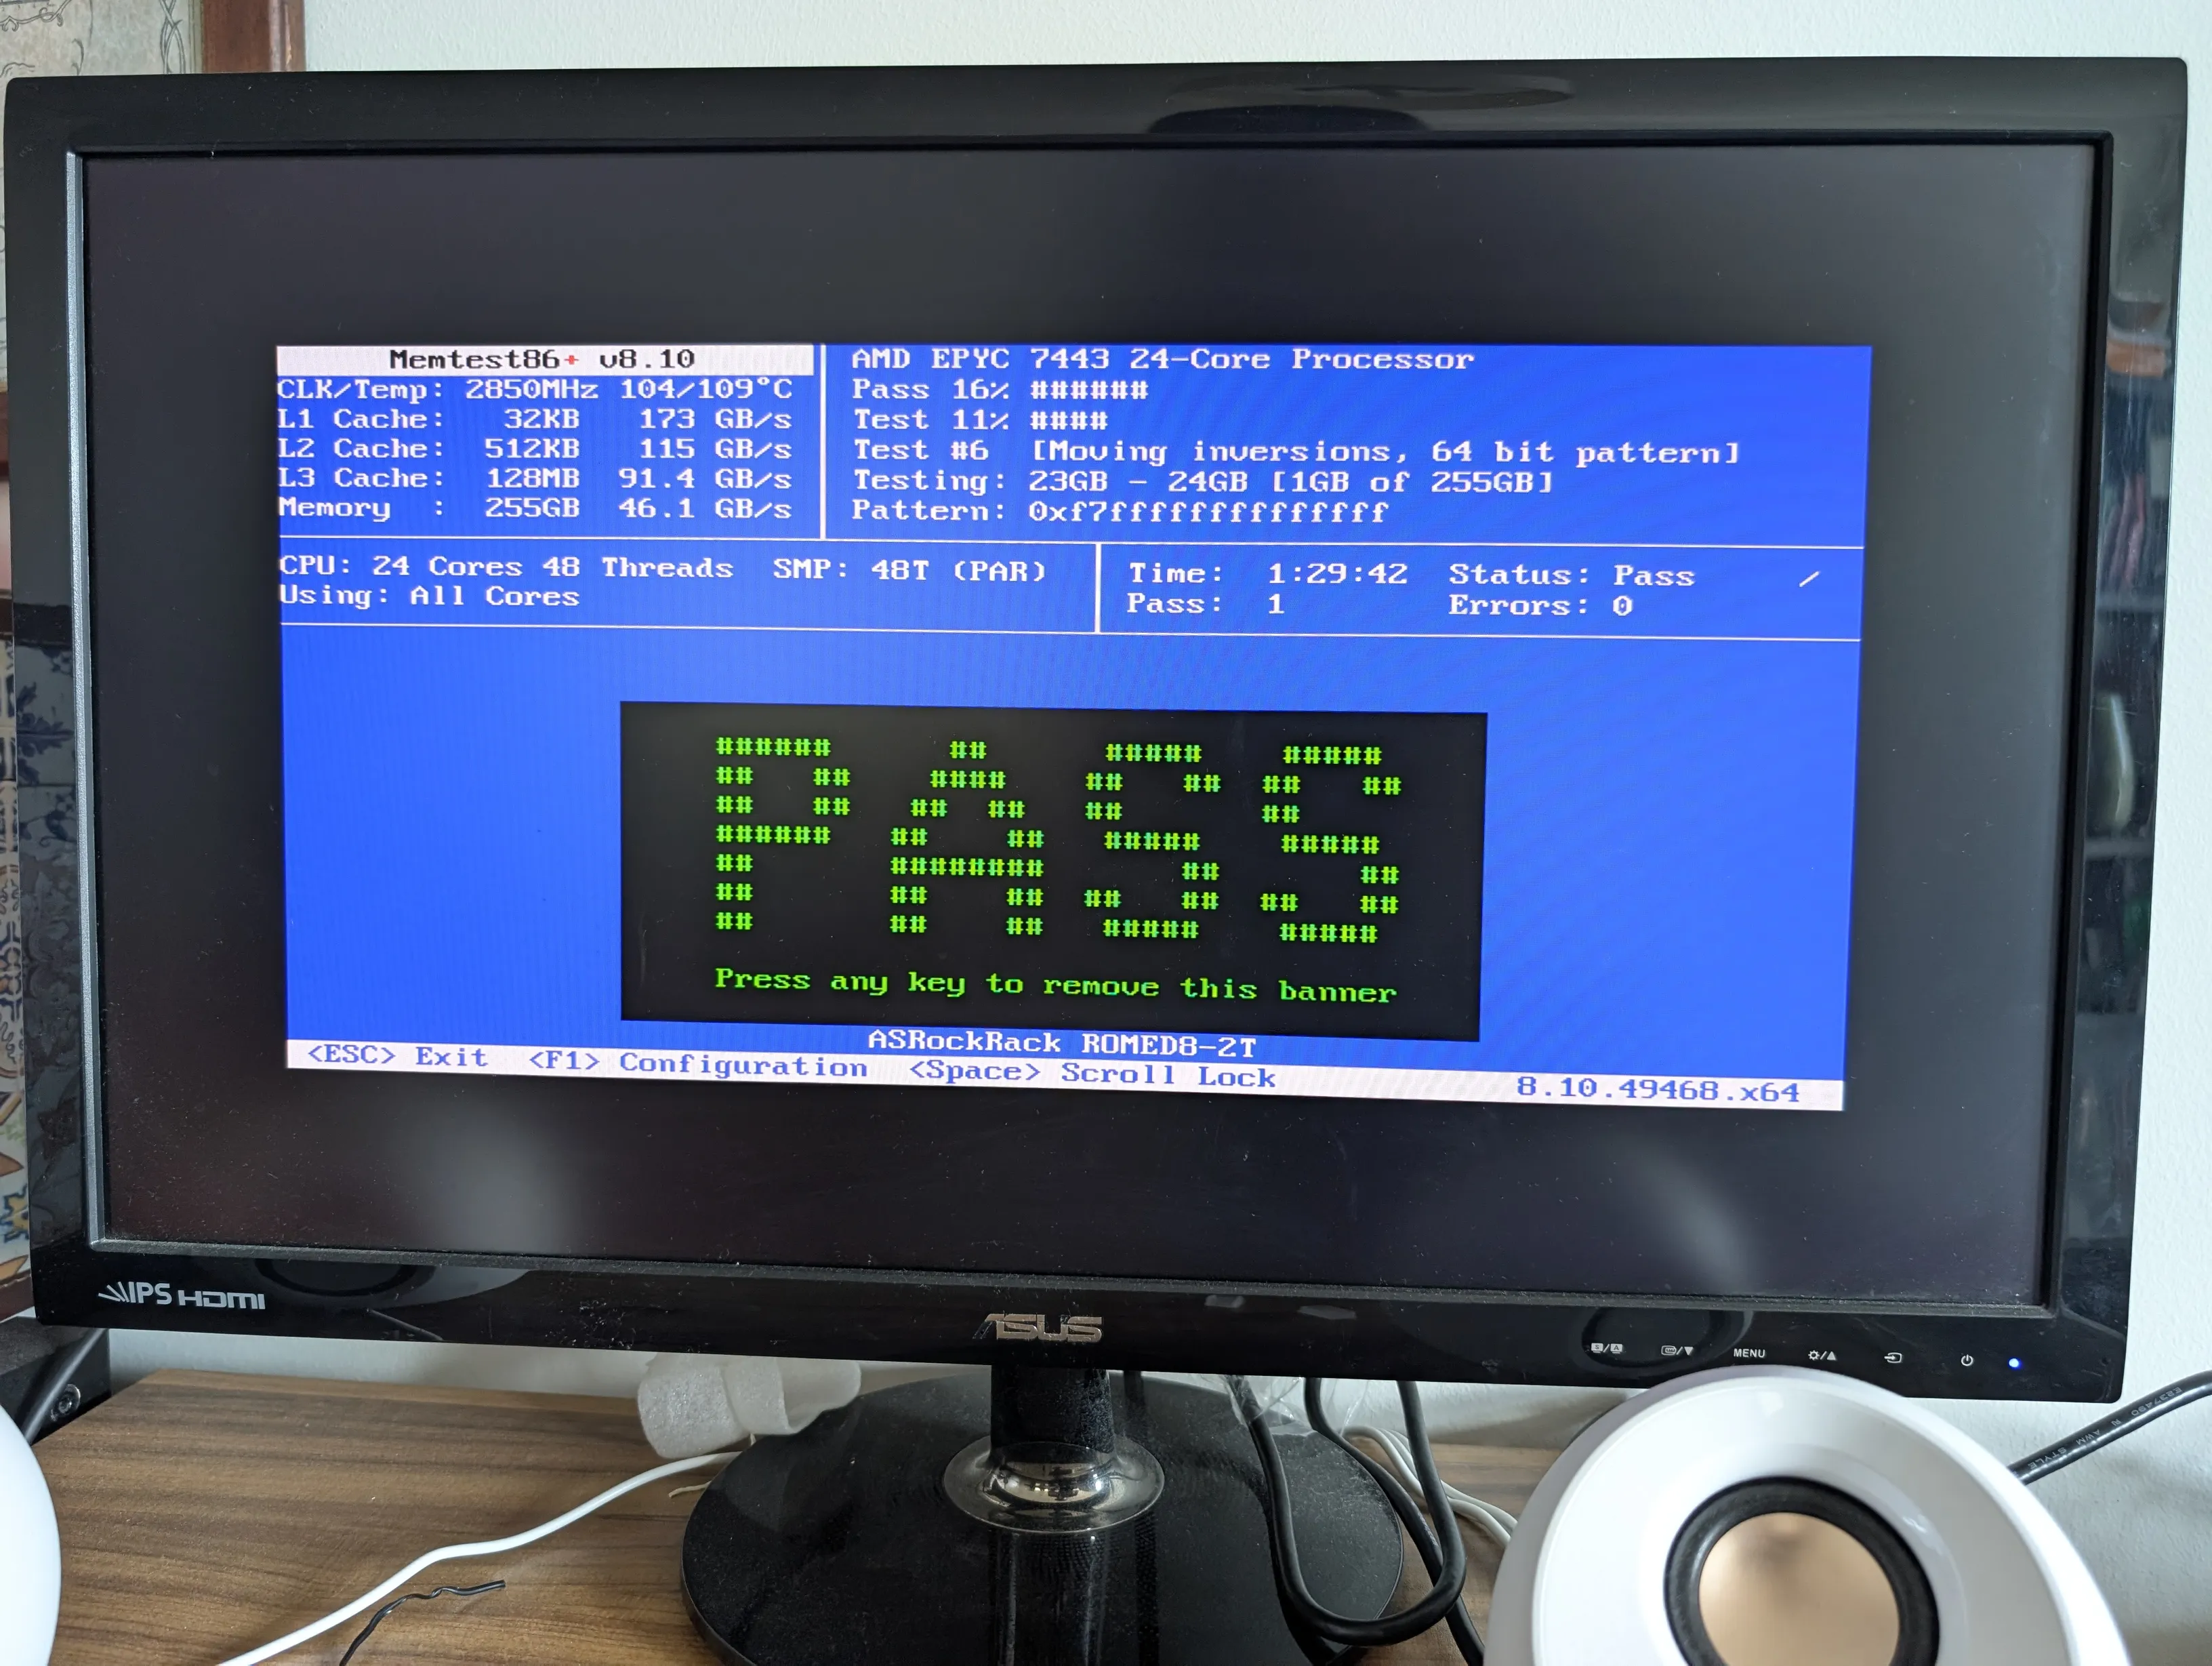
I used memtest86+, which is free and open-source software. It runs multiple passes over the RAM, writing various data patterns and then reading them back to verify proper operation.
Processor
I used stress-ng, specifically stress-ng --cpu 48 --timeout 1h. This pushed all CPU cores to 100% for 1 hour. The fan also performed as expected, keeping the CPU well below its danger thresholds.
Redundant NVMe Drives
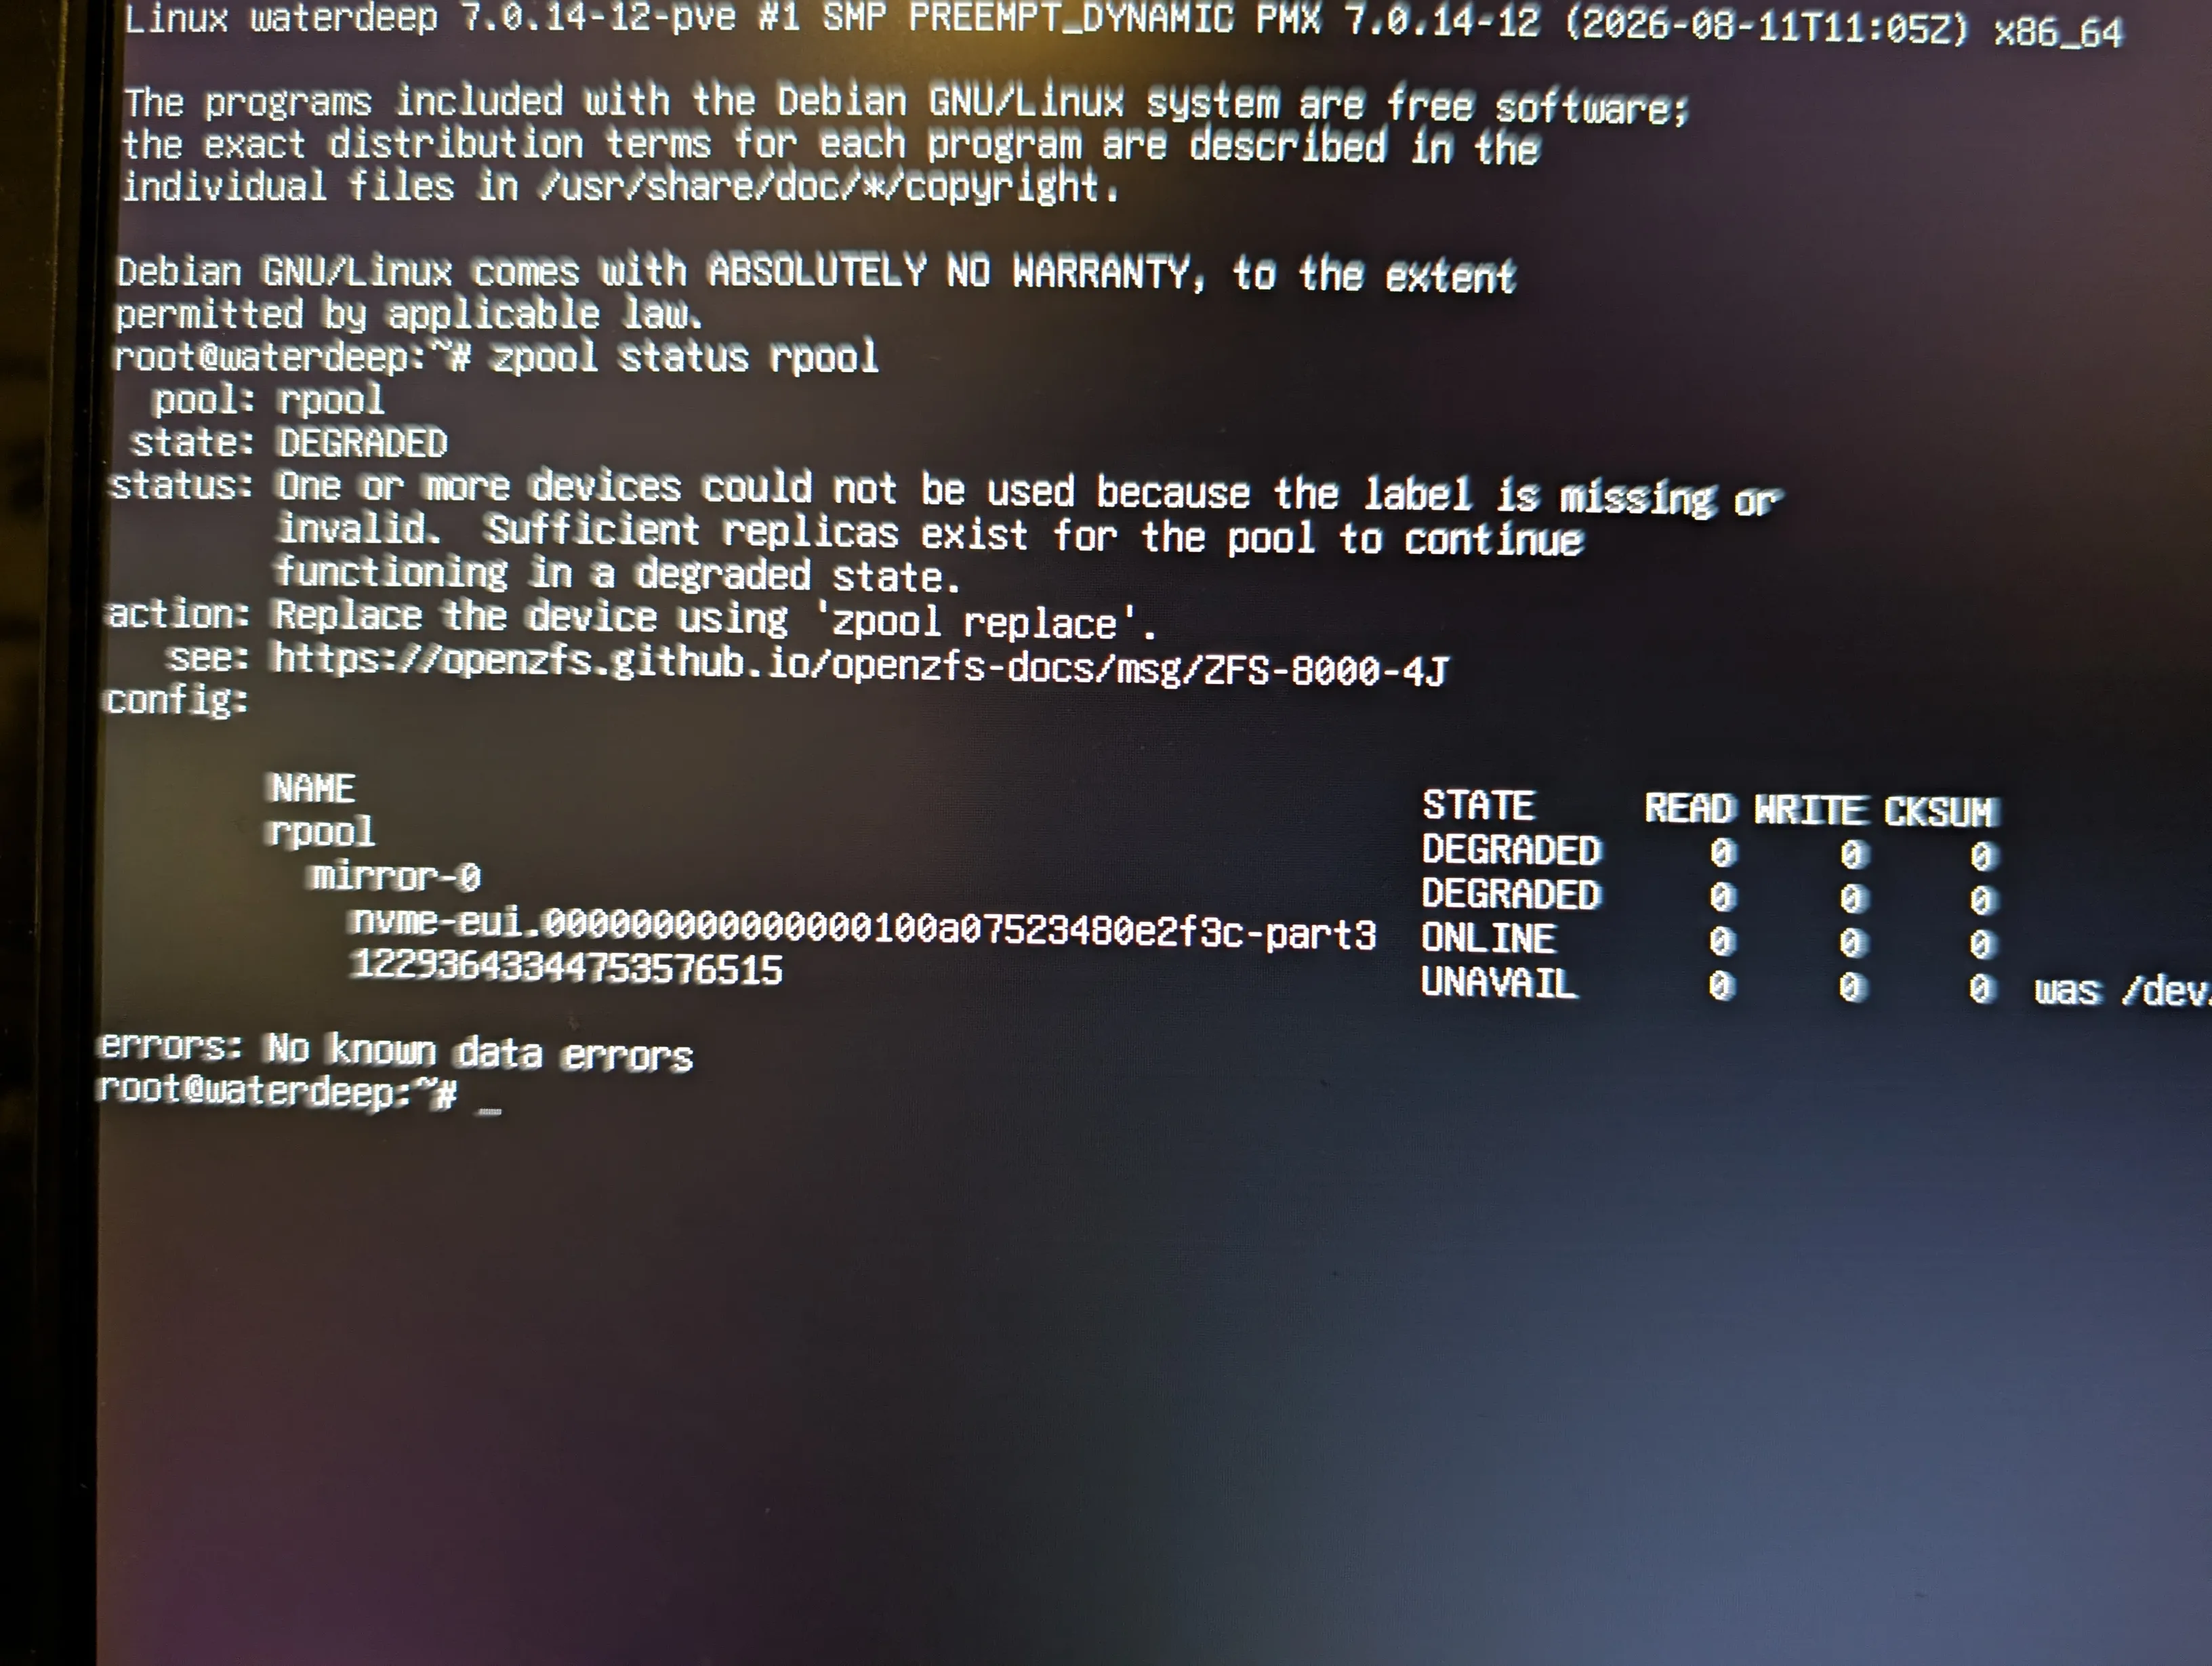
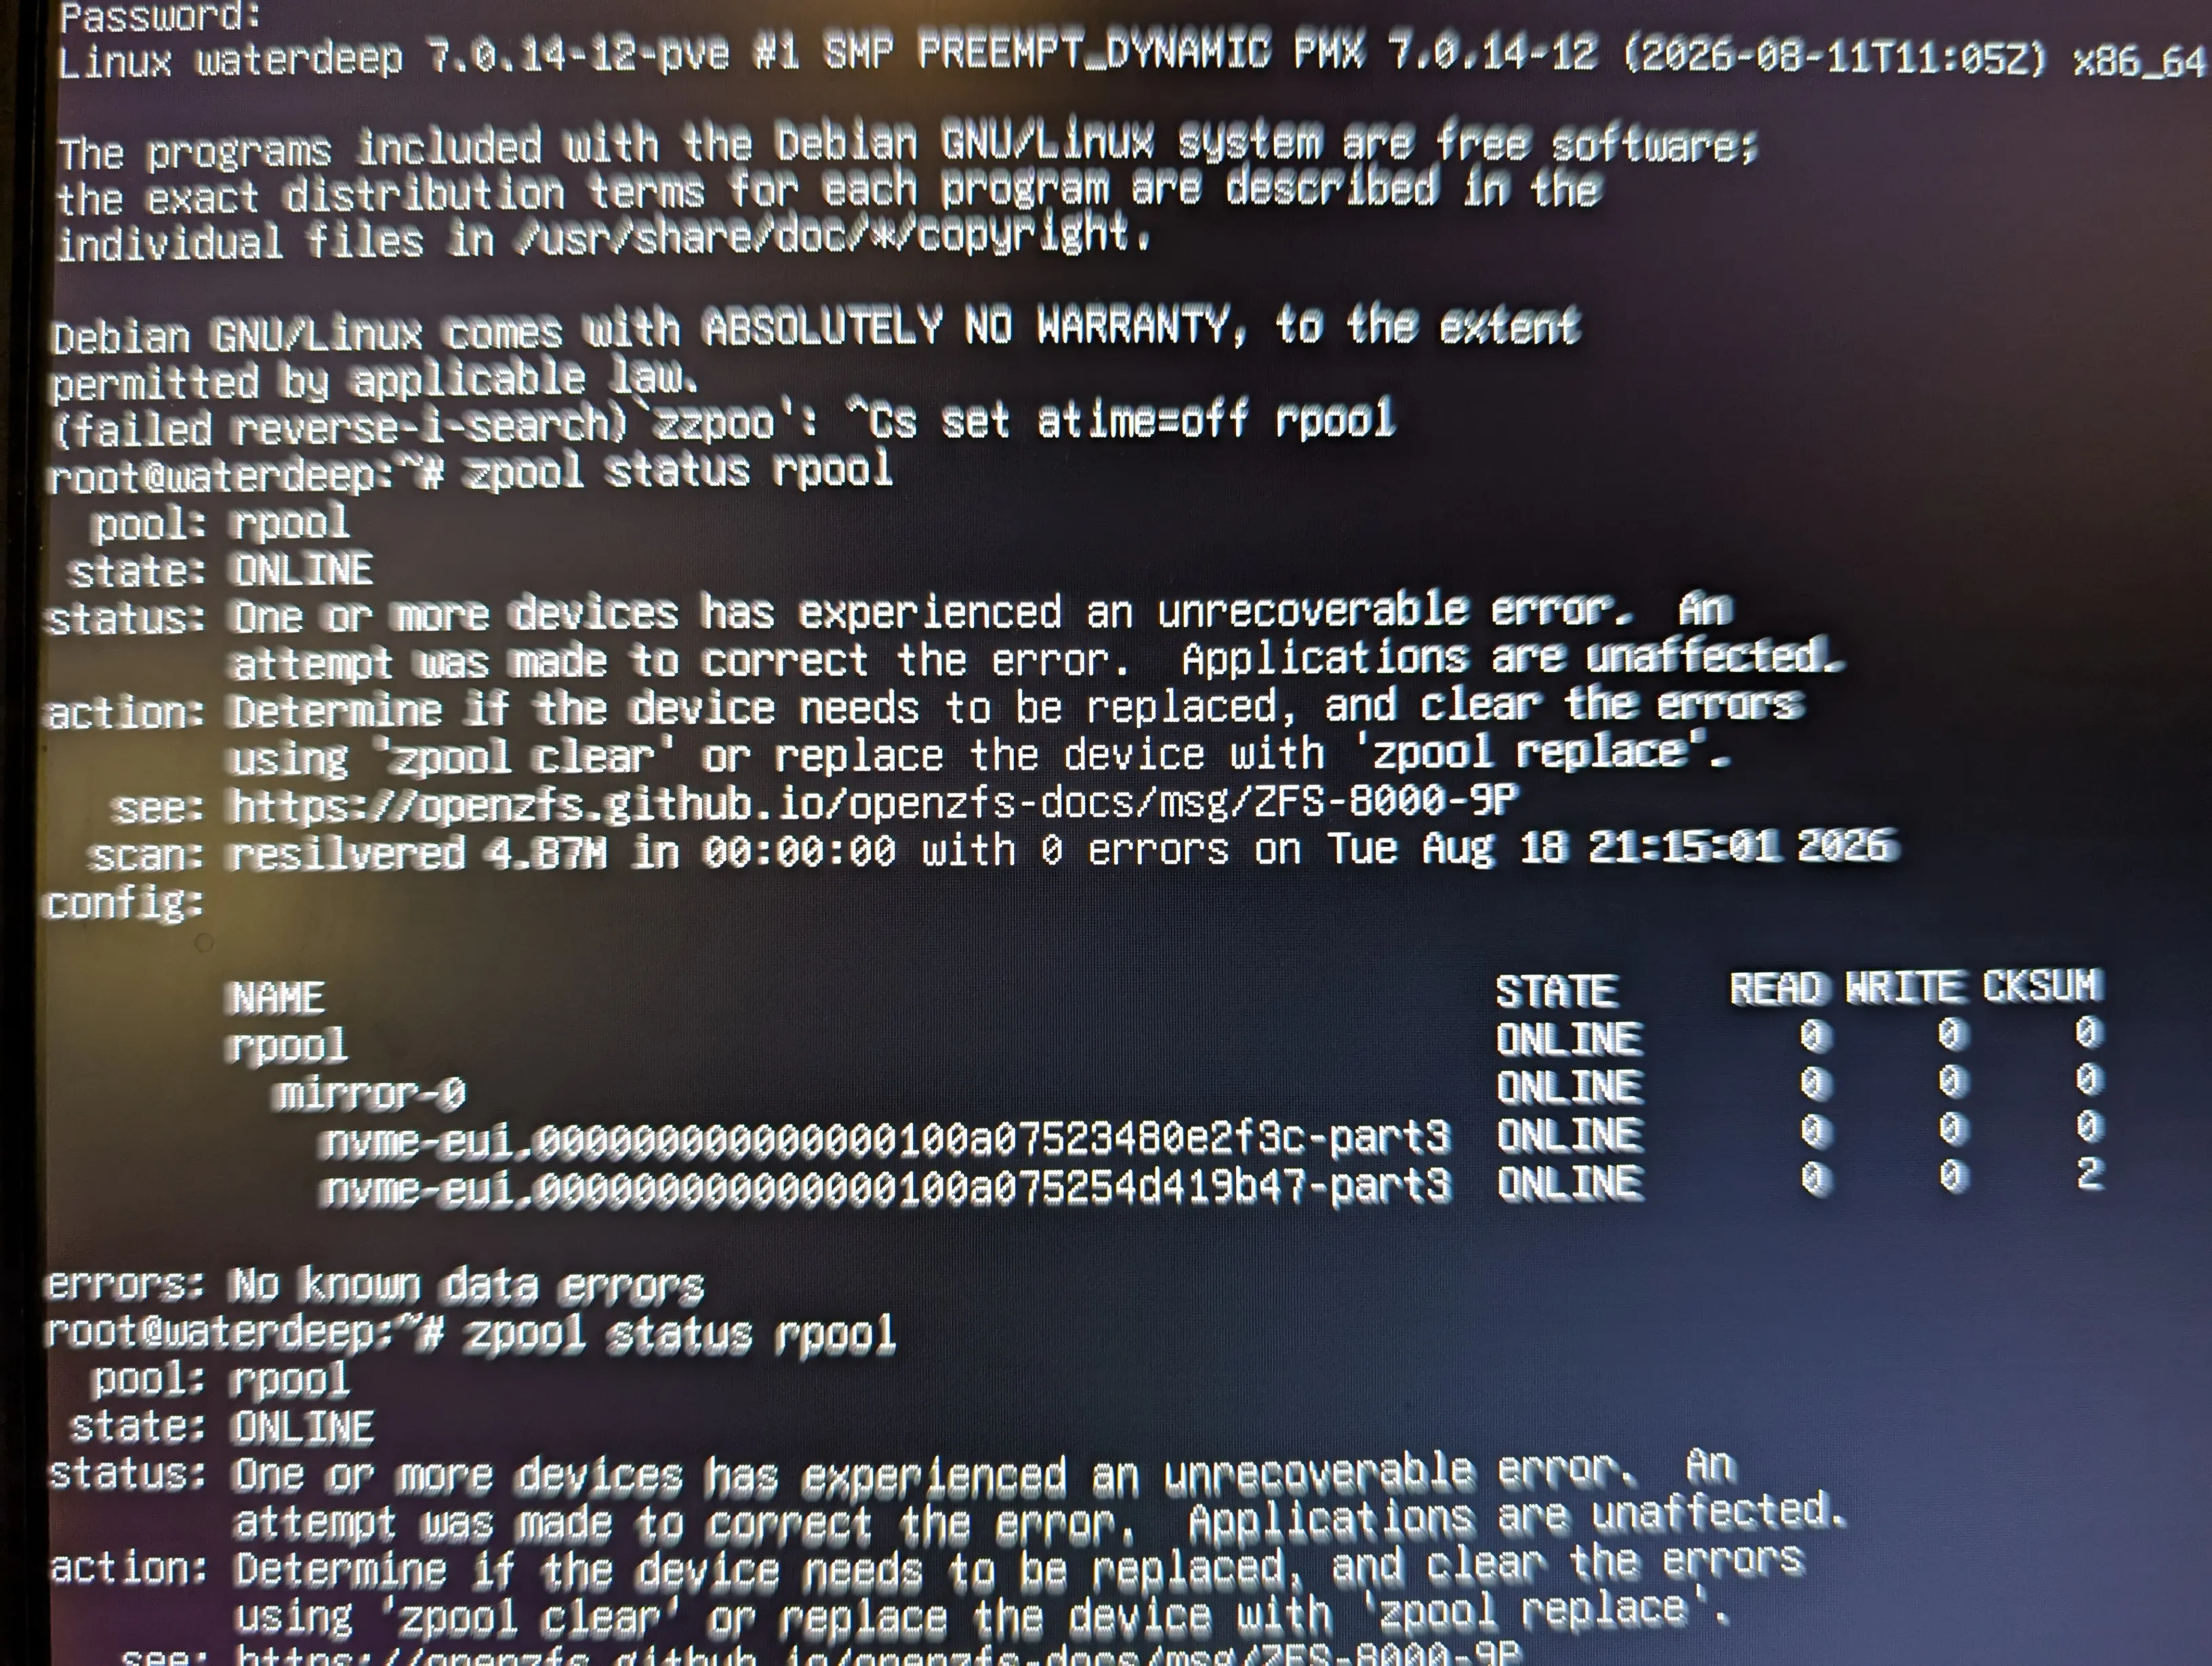
The motherboard doesn’t allow hot-swapping of M.2 drives, but I ran an experiment where I shut down the system and removed one of the drives, and it still booted up without any issues. ZFS marked the pool as degraded, which is to be expected:
Upon reinserting the other drive and rebooting, ZFS automatically repaired the pool (re-silver):
Hard Drives
The two essential tools for testing hard drives are smartctl and badblocks.
The first thing I did was run a short S.M.A.R.T. test on all the drives, followed by a long one. The short test takes one minute, but the long one lasts nearly 24 hours.

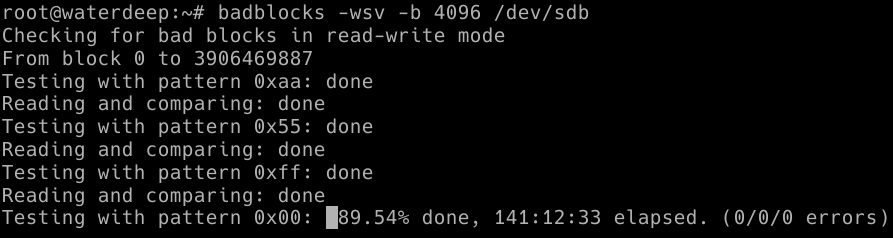
Next, I ran a thorough write test using badblocks. This is a destructive operation: badblocks overwrites the entire disk several times with various patterns and then reads it to ensure that all sectors were written correctly. The whole process took a week, which was also a good test of the HDDs working 100%, temperatures also stayed reasonable (45ºC).
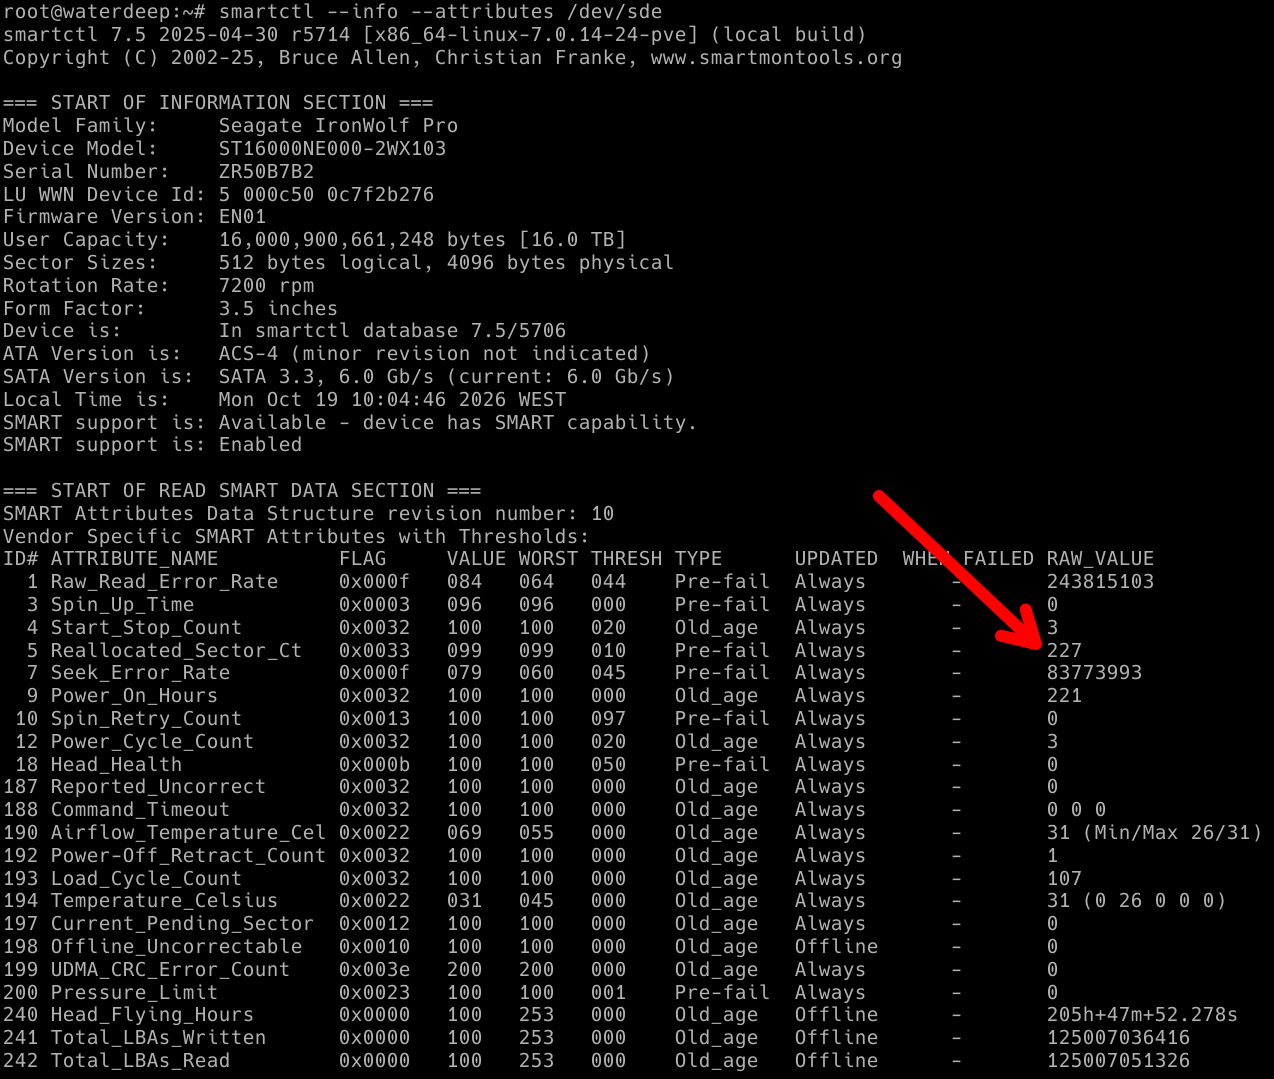
These tests have been essential. badblocks found problems with one of the disks. The number of relocated sectors grew from 0 to 227 as the write tests were run. This didn’t cause any errors in itself, because the drive internally marks the sectors as defective and uses others, but it’s generally considered a sign that a hard drive is about to fail, and it’s certainly not acceptable in a newly installed hard drive.
The seller had no issue honoring the warranty and sent me a replacement.
Power Supplies
This test is pretty straightforward: when you unplug one of the power supplies, the other one continues to work without any issues. There’s a fairly loud beep when this happens, an alarm signal, it stops when the faulty (disconnected in the test) power supply is removed.
Next Steps
With the server finally up and running, I was able to install Proxmox and start configuring services.
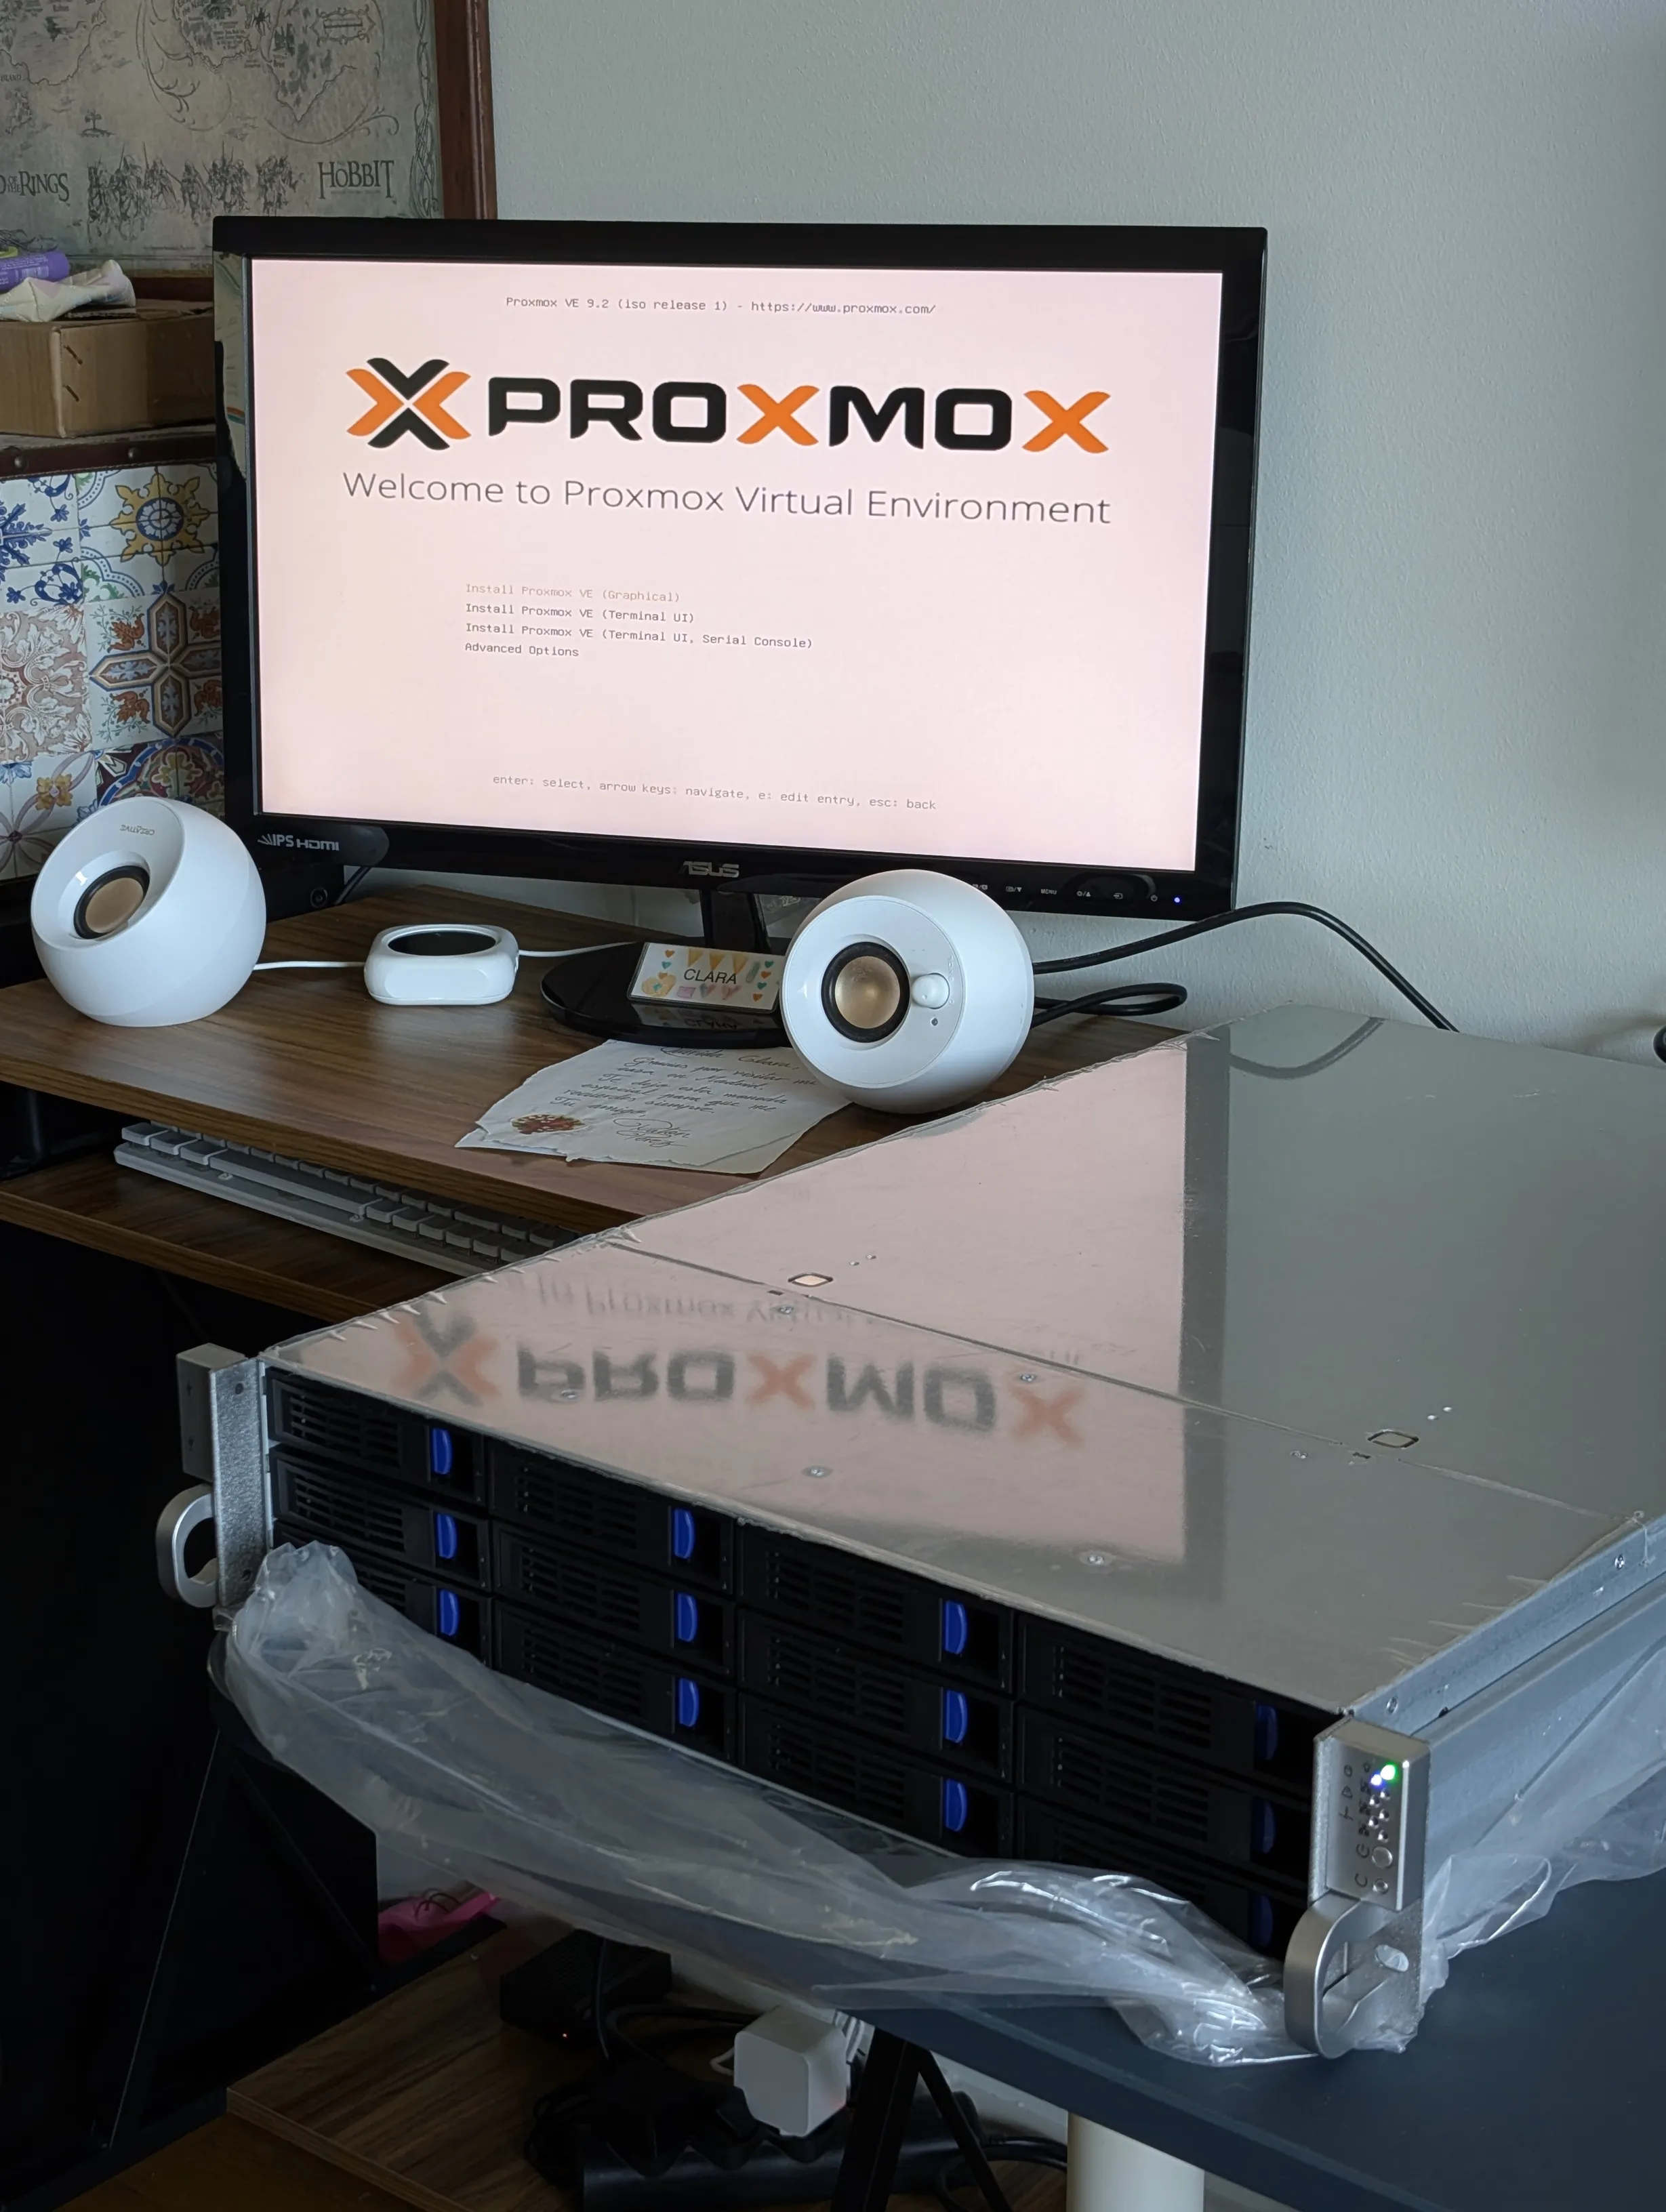
This has been a really fun process, because I’ve always preferred software to hardware. The downside is that since the server isn’t in its final location yet, I can’t leave it running 24 hours a day, so I can’t migrate the services and use them continuously just yet.
In the next article, I’ll talk about how I’ve configured the server, including a lot of AI to help me with each step, but in a collaborative way where I can monitor it and track what it’s doing.
